CaseWriter Quick Start
This workflow starts with a completed Analyzer document version and ends with approved cases ready to be saved in the CaseWriter repository.
Before you start
Confirm that:
- the correct RabbitQA project is active;
- the source document and intended version are available;
- a usable AI model is configured centrally in Integrations;
- you know the intended platform and testing profile; and
- you have permission to generate, review, and save cases.
1. Load the exact source version
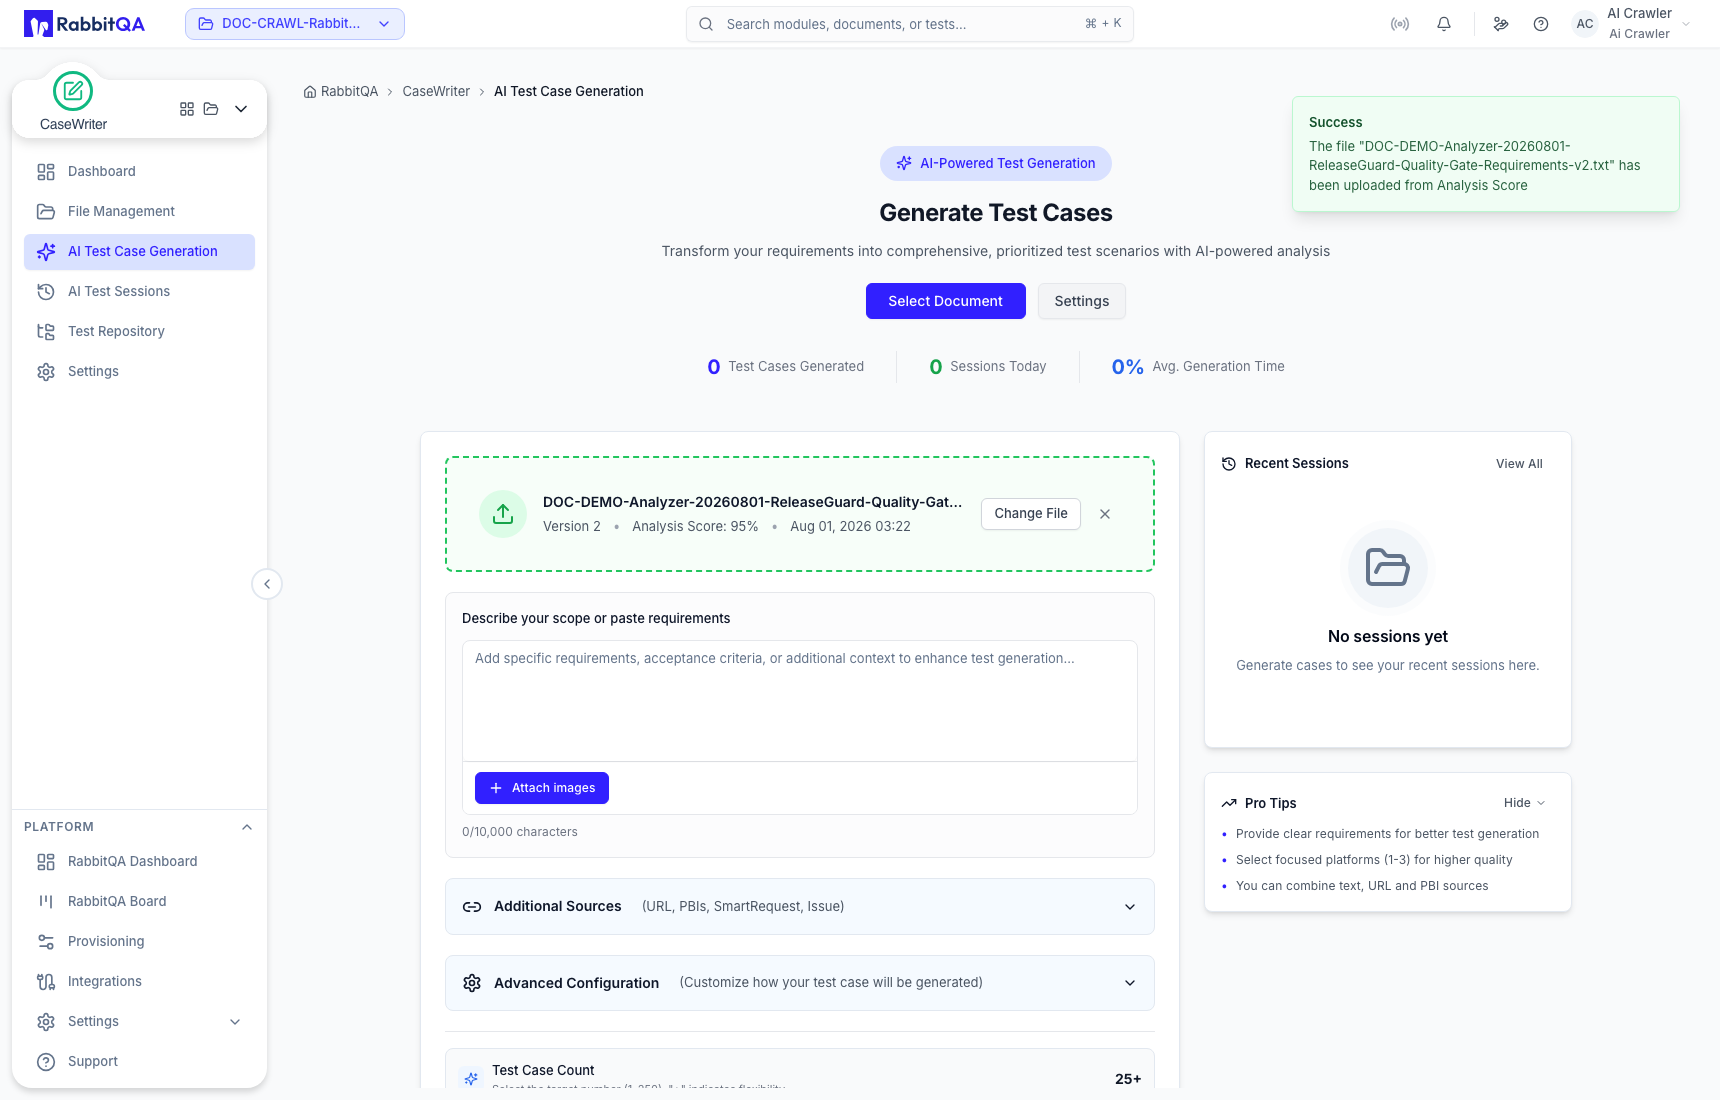
Open CaseWriter → File Management, locate the document, and open Versions if more than one version exists. Select Test Case Generation for the intended version.
The generator should show the selected document and version before you configure the run.
2. Configure generation
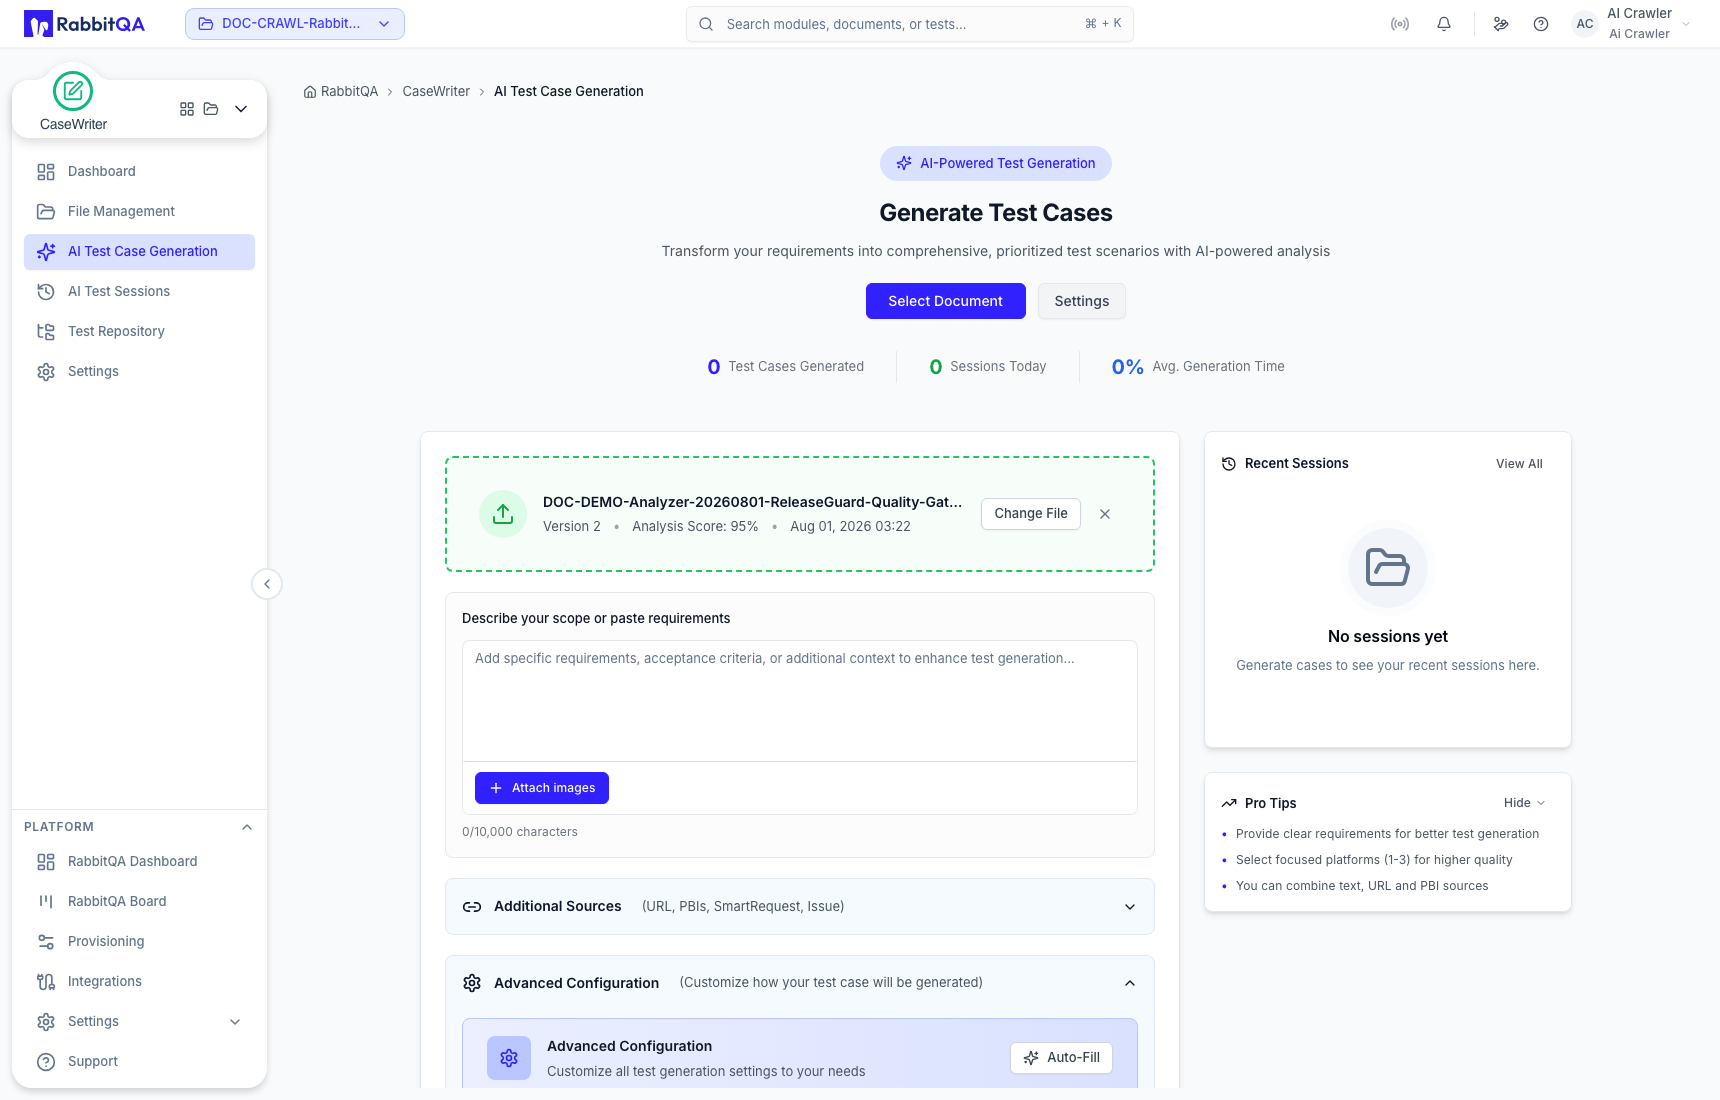
Review all settings rather than relying blindly on defaults:
- Choose the output language.
- Select one to three target platforms.
- Choose execution type, testing focus, and test level.
- Select up to three test types for a focused run.
- Balance priority and complexity distributions so each group totals 100%.
- Set a target from 1 to 250 cases.
3. Review the test design
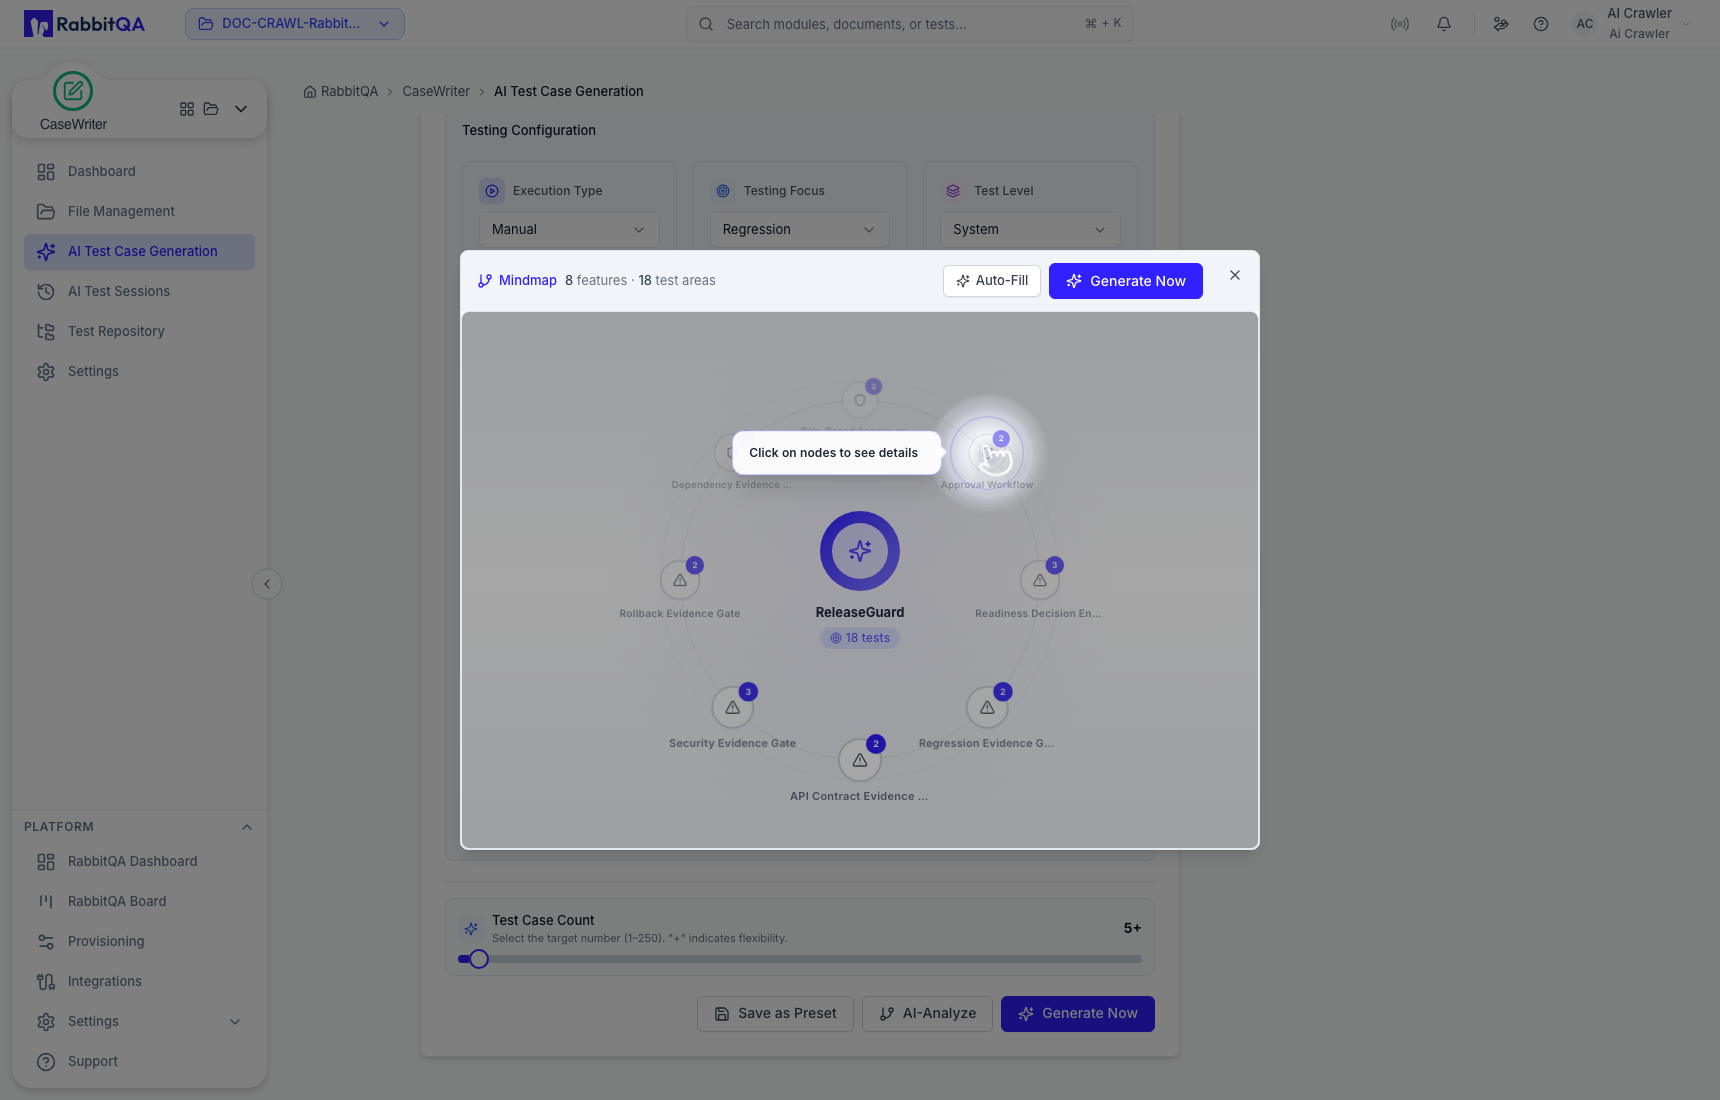
Select AI-Analyze when you want to inspect the proposed coverage before generation. Review the mind map's features and test areas. Return to the source or configuration if important behavior is missing.
4. Generate the cases
Select Generate Now. Keep the page open until the run starts, then use AI Test Sessions to track it. A completed run shows the generated cases, but they are not yet repository cases.
5. Review every case
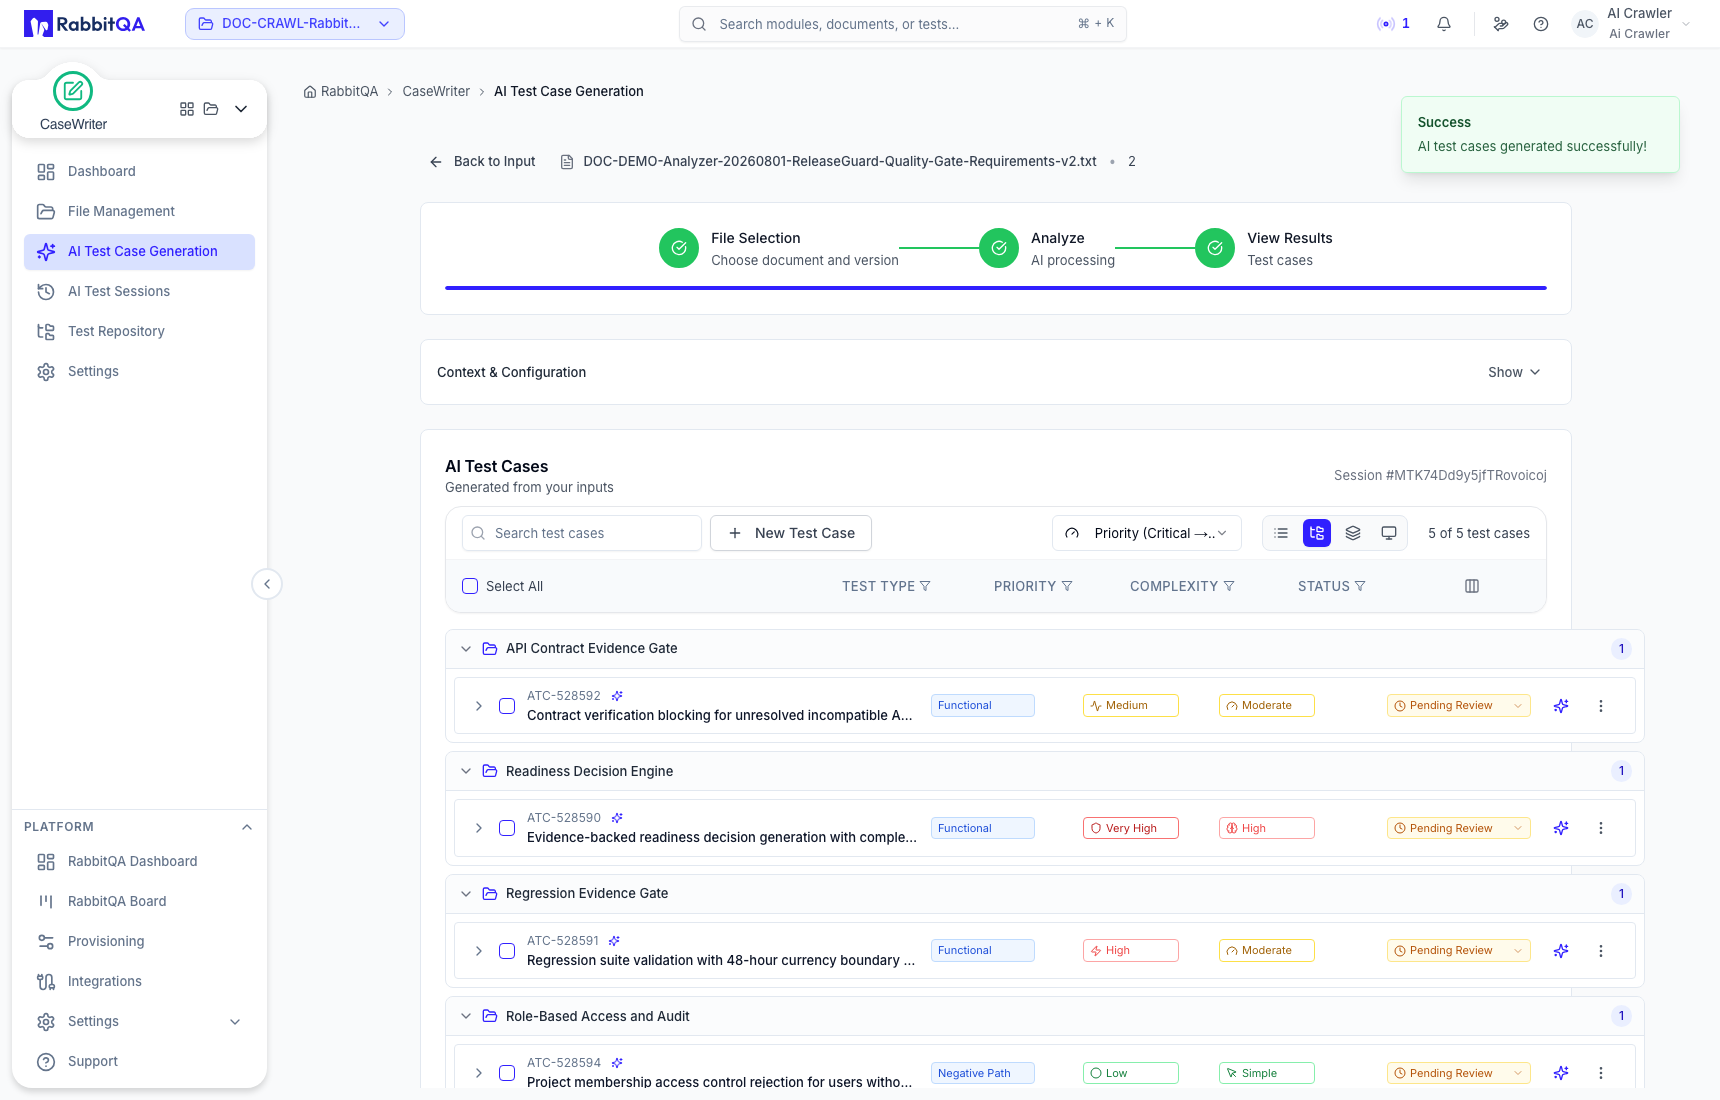
Open the completed session and inspect the context and testing configuration. Search, filter, sort, or group cases by list, module, feature, or screen as needed.
For each case:
- verify title, description, preconditions, steps, expected results, labels, priority, and complexity;
- edit factual or coverage problems;
- use targeted regeneration when the scenario needs a substantive rewrite; and
- approve only when the case is ready for reuse.
New, edited, duplicated, and regenerated cases remain or return to Pending Review.
6. Save approved cases
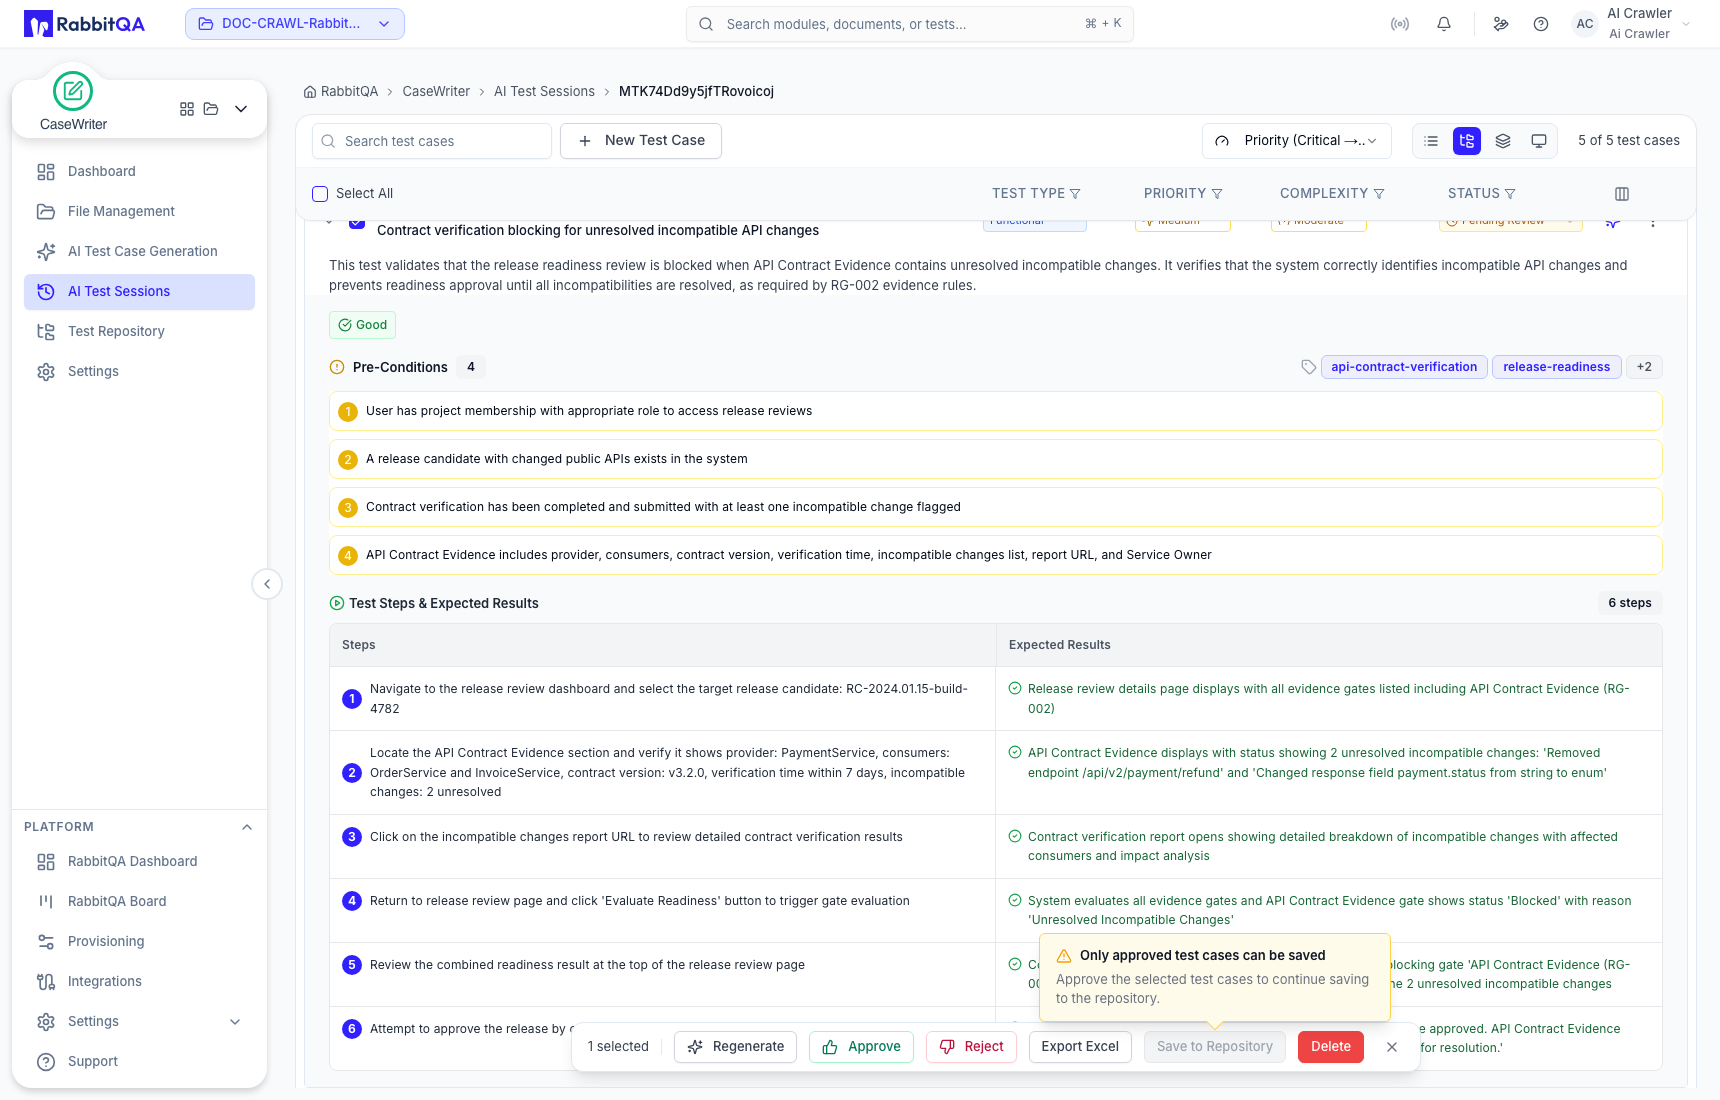
Select one or more Approved cases and choose Save to Repository. Select the intended test set when prompted. Pending or rejected cases cannot pass this gate.
Verify the result
Open Test Repository, find the destination test set, and confirm the saved cases. The Dashboard's repository metrics may update separately from AI-generation metrics.
Common blockers
| Problem | What to check |
|---|---|
| AI-Analyze and Generate Now are disabled | Add at least one valid source and confirm required configuration. Requirements text must contain enough usable context. |
| The wrong requirements appear | Confirm the document version, input-source list, and any loaded preset. |
| Save to Repository is disabled | Select at least one Approved case; editing alone does not approve. |
| A source selector is empty | Confirm project scope, source-module data, permissions, and required integration. |
| A session is missing | Confirm the active project and check all status tabs in AI Test Sessions. |
Next, read AI Test Case Generation for source and configuration details, or Generated Case Review for the full review lifecycle.
