CaseWriter Quick Start
This walkthrough takes you from an empty session to approved test cases in the repository.
What You Will Do
- Read the dashboard
- Generate test cases with AI
- Review the generated cases
- Save the approved cases to the test repository
- Organize and export them
Step 1: Open the Dashboard
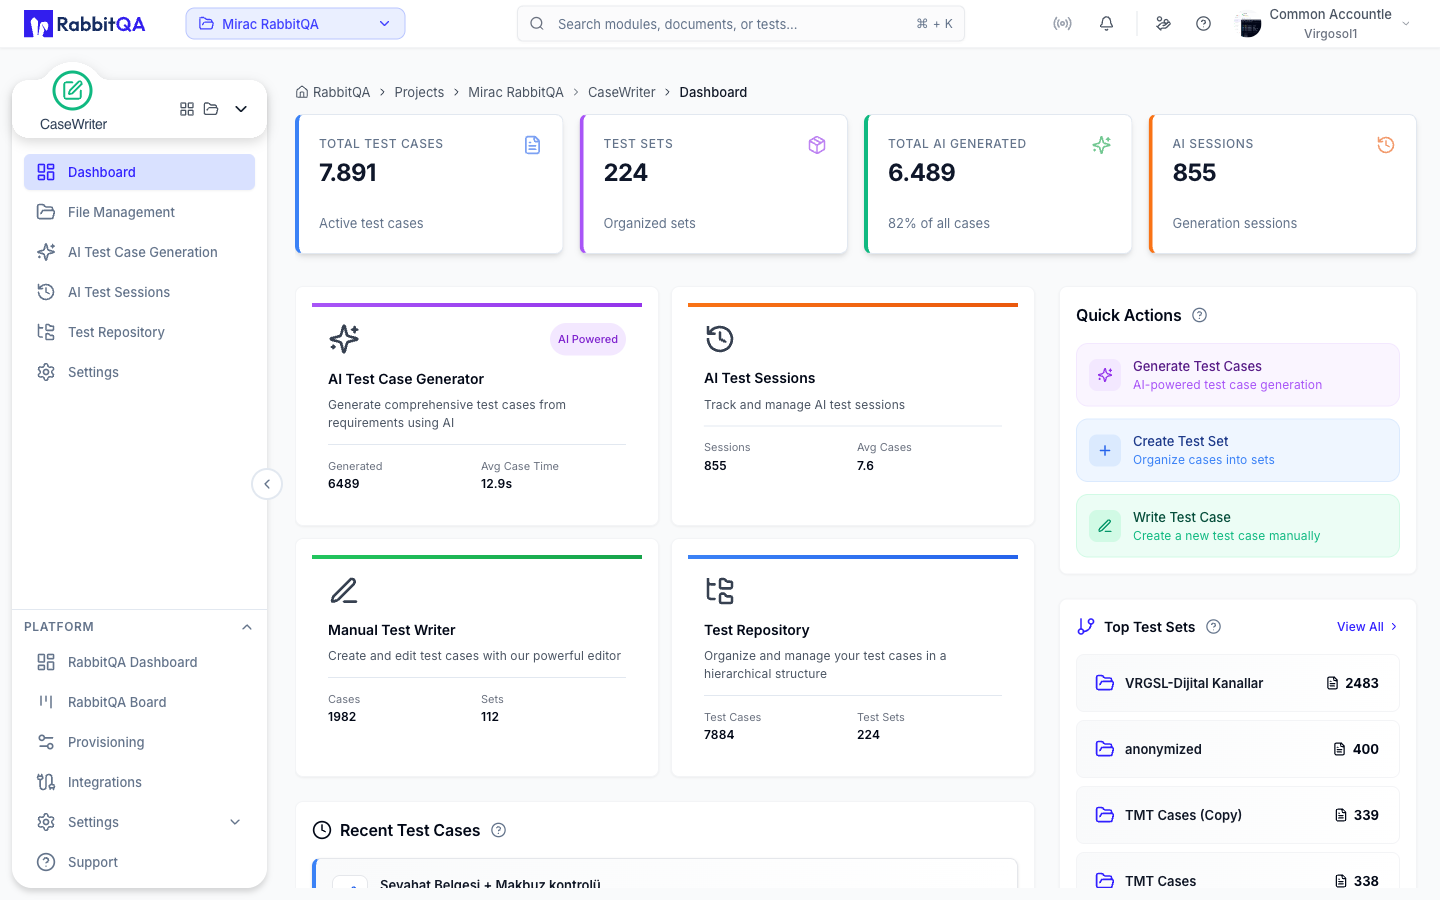
Select CaseWriter in the module switcher and land on the dashboard.
Four metric cards sit at the top: Total Test Cases, Test Sets, Total AI Generated, and AI Sessions.
The Quick Actions panel on the right has three shortcuts: Generate Test Cases, Create Test Set, and Write Test Case. The panel only appears if you hold the AI generation permission.
See Dashboard for the full layout.
Step 2: Generate Test Cases
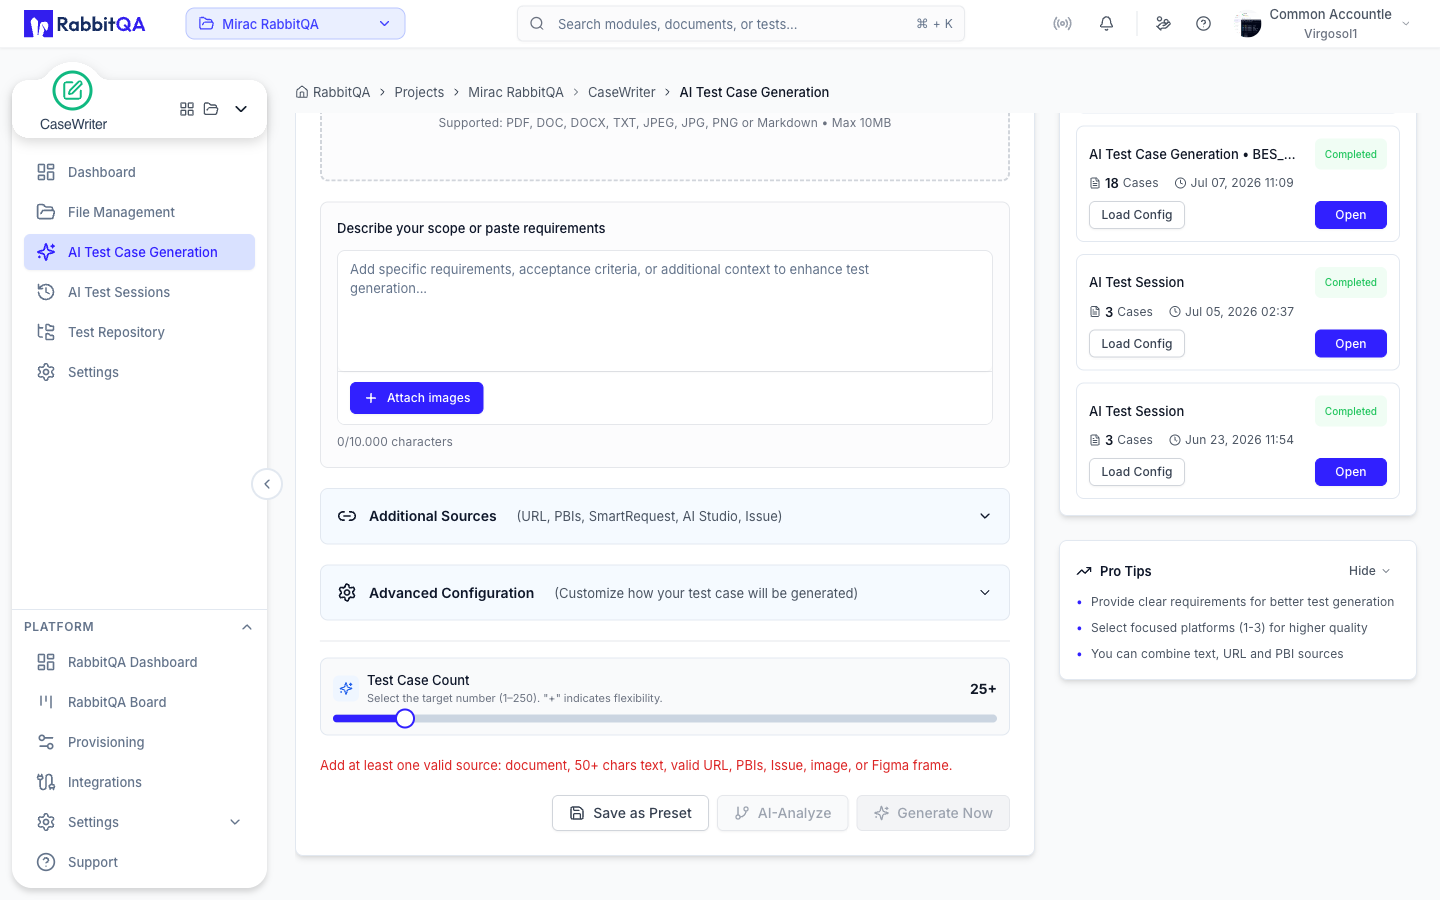
Open AI Test Case Generation from the sidebar or the dashboard.
- Add at least one source. Upload New Document takes a PDF, DOC, DOCX, TXT, JPEG, JPG, PNG, or Markdown file up to 10 MB, and Select from Confluence pulls a page straight from a connected space. You can instead describe the scope in your own words under Describe your scope or paste requirements (50 characters minimum, 10,000 maximum) and attach images to it, or open Additional Sources for a URL, PBIs, a SmartRequest, AI Studio screens, or a tracker issue.
- Open Advanced Configuration to set the output language, platforms, execution type, testing focus, test level, and test types for this run. The AI model itself is no longer chosen here — it is managed centrally under Integrations, and the defaults for everything else come from Settings.
- Set Test Case Count with the slider — the target is between 1 and 250, and the trailing
+means the count is treated as flexible rather than exact. - Select Generate Now. AI-Analyze first checks your inputs without generating, and Save as Preset stores the current configuration for reuse.
The page moves to the analysis view and streams progress: analyzing inputs, indexing documents, creating test cases, filling in details, ordering, and analyzing coverage.
See AI Test Case Generation for every source, setting, and limit.
Step 3: Review the Generated Cases
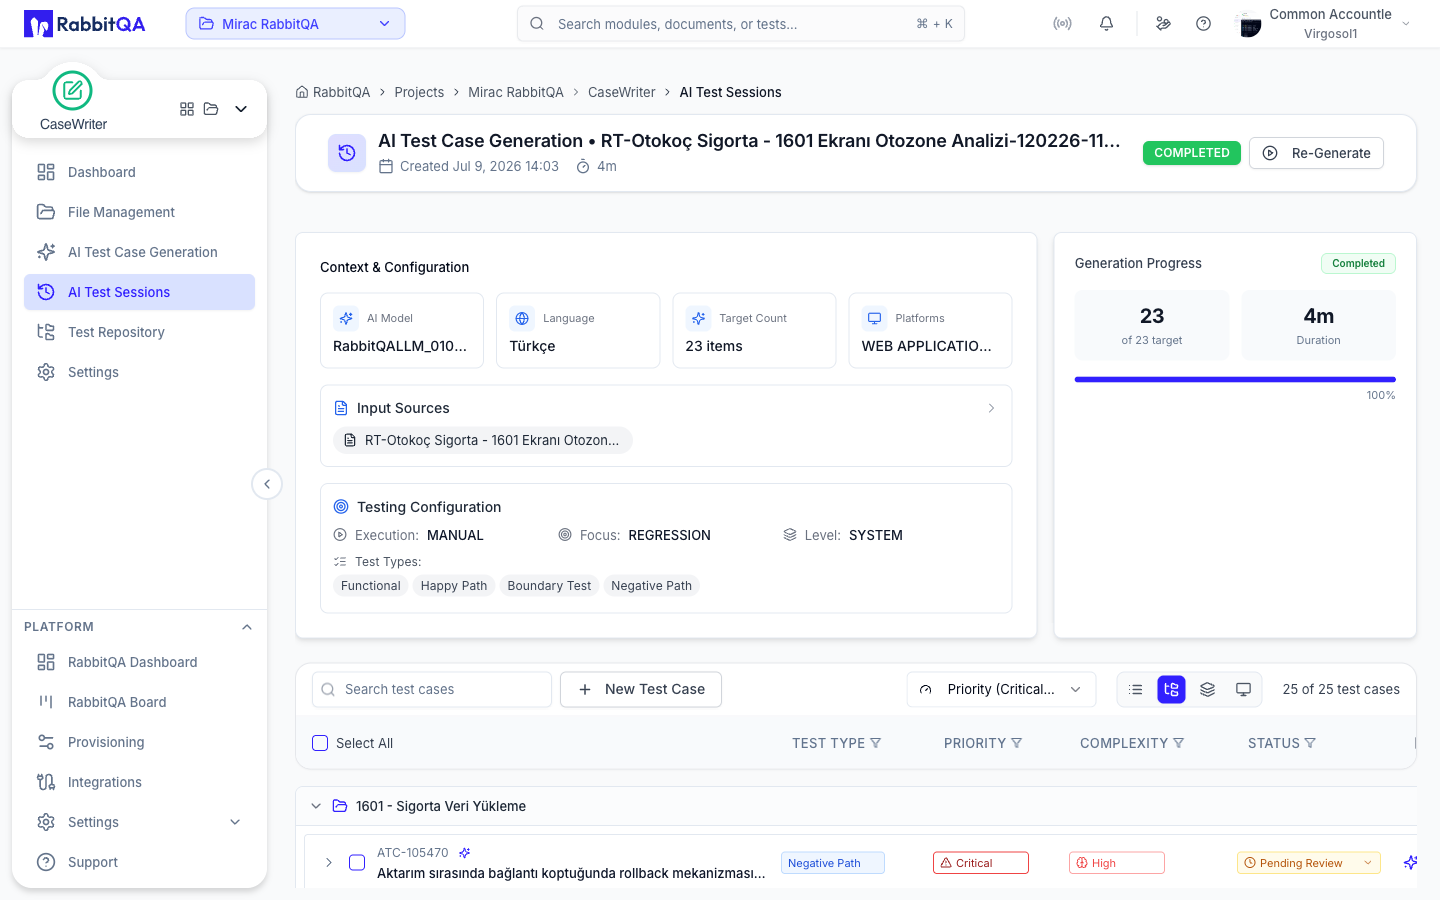
Generated cases arrive with the review status Pending Review.
- Expand a case to read its description, preconditions, and steps.
- Fix anything that needs fixing with Edit, or select Regenerate with extra instructions.
- Select the cases you want and choose Approve or Reject in the selection bar at the bottom.
Approve runs immediately. Reject and Re-review open a dialog where you can add an optional comment that is stored in the review history.
Only approved cases can be saved to the test repository. This is the module's central rule — see Review Workflow.
Step 4: Save to the Repository
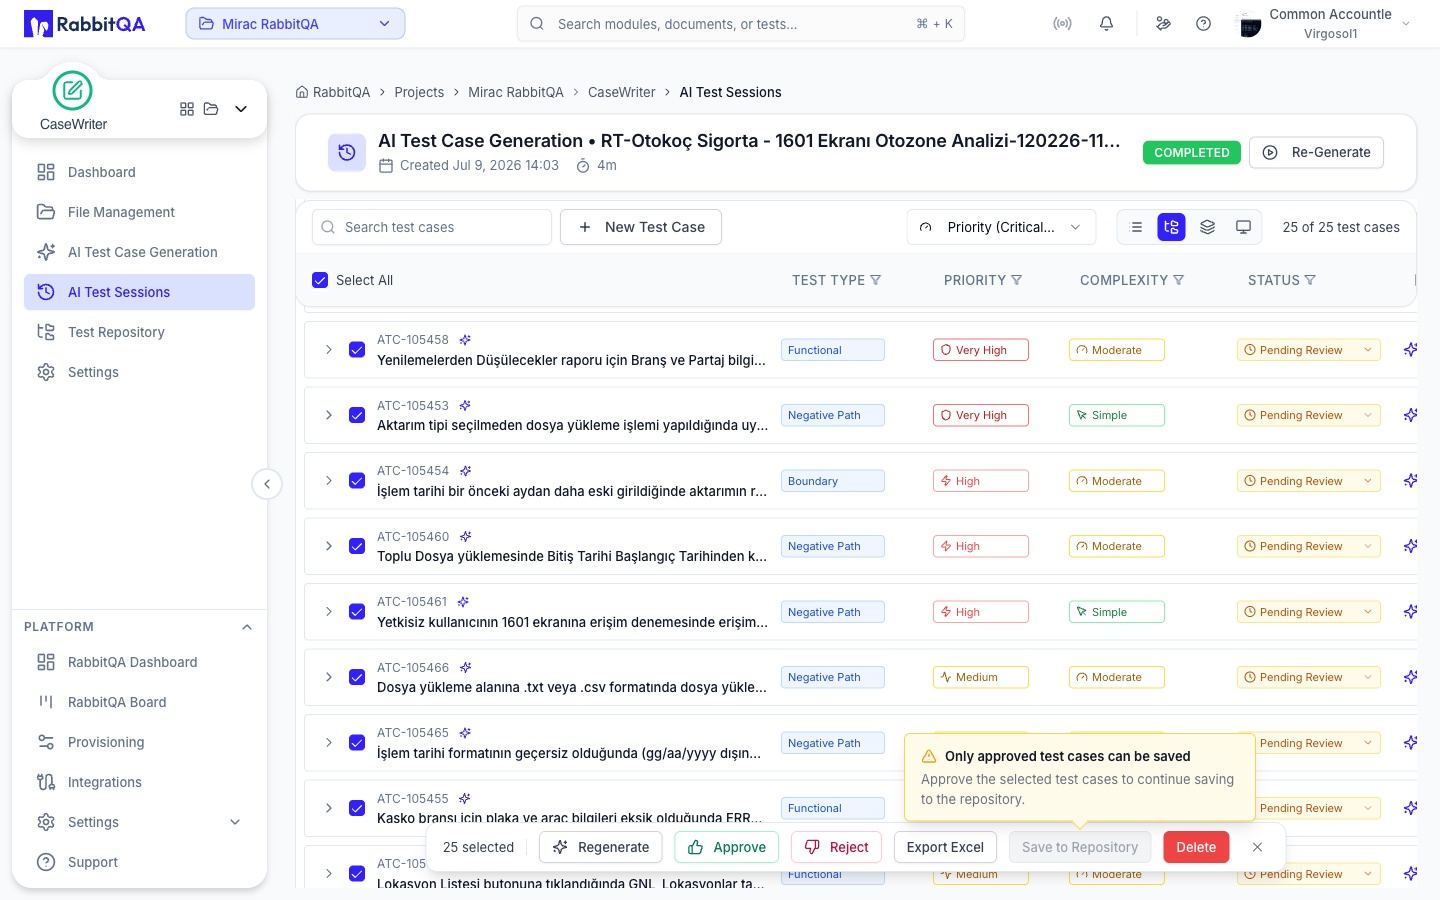
With cases still selected, choose Save to Repository.
- If nothing in your selection is approved, the button is disabled and explains why.
- If part of your selection is approved, a dialog offers to save just the approved subset.
- If everything is approved, the export dialog opens straight away.
Pick an existing test set or create a new one, then confirm.
Step 5: Organize in the Test Repository
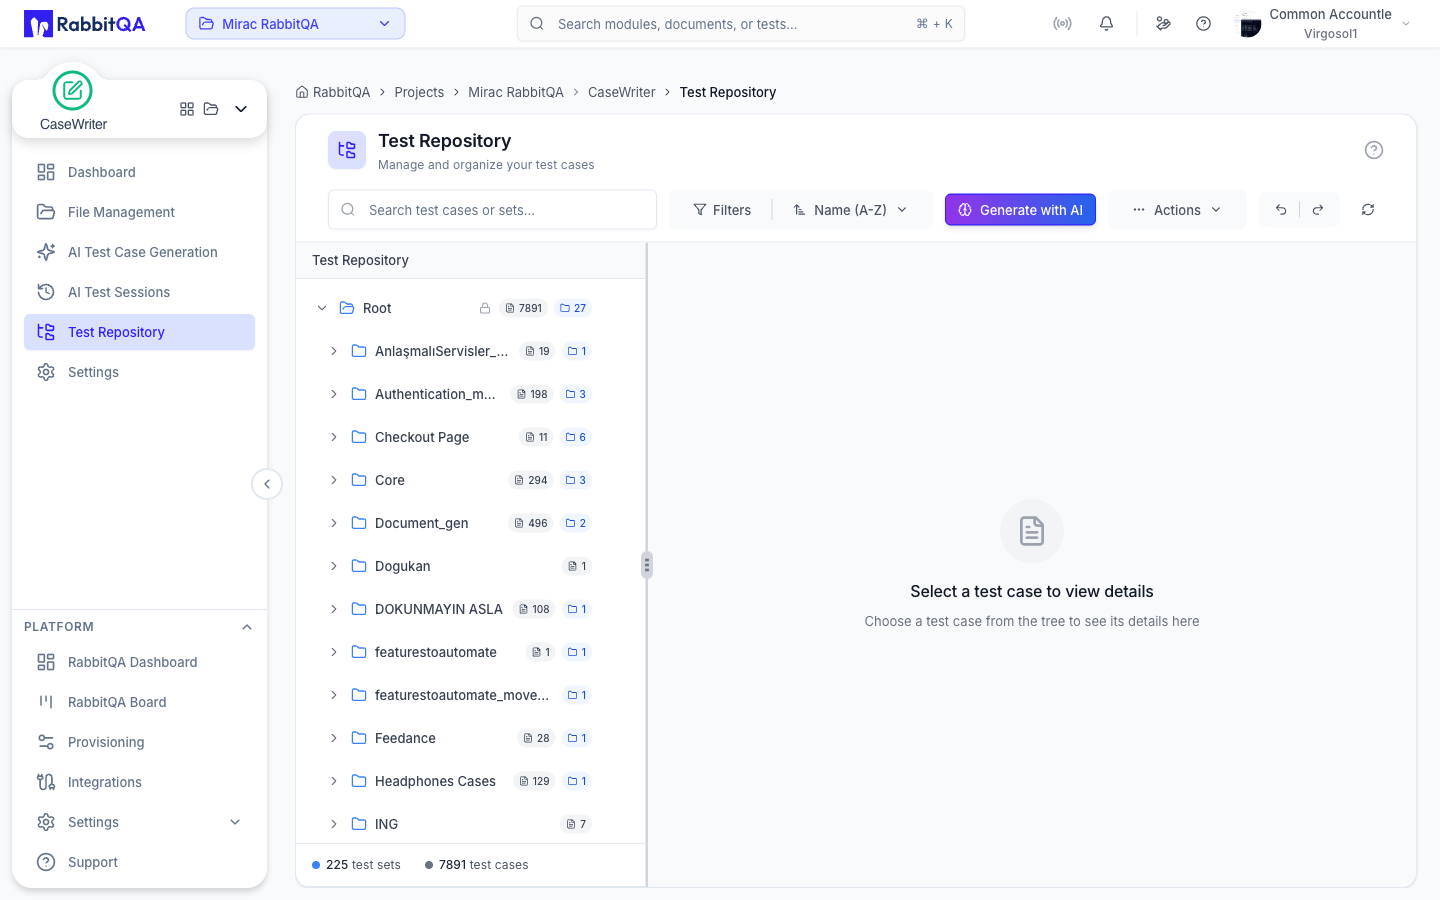
Open Test Repository.
- Browse the tree of test sets and test cases. Each folder shows how many cases and sub-folders it holds, and the footer totals the whole repository.
- Search by name, description, or labels — the search box accepts up to 100 characters.
- Narrow the tree with Filters (priority, complexity, labels) and reorder it with the sort control next to it.
- Select a case to open its detail pane, where you can edit it, view its history, or run a review action.
- Generate with AI starts a new generation run against the set you are looking at, and the undo, redo, and refresh actions sit at the end of the toolbar.
See Test Repository.
Step 6: Export or Hand Off
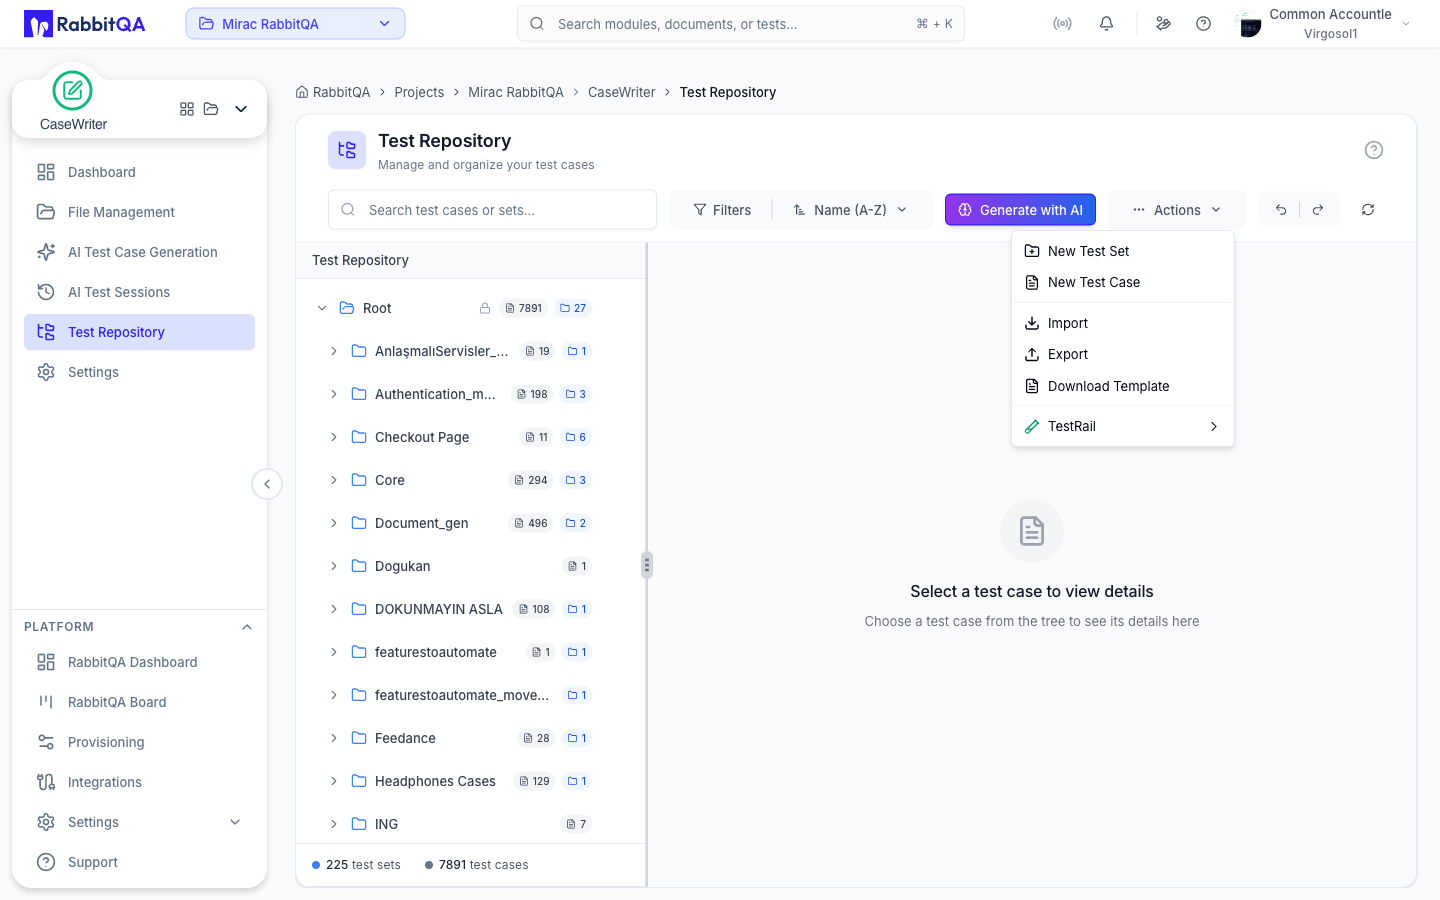
From the repository toolbar, the Actions menu offers New Test Set, New Test Case, Import, Export, Download Template, and a TestRail submenu.
- Export produces an Excel file for all cases, the current test set, or your selection.
- Download Template gives you the spreadsheet layout that Import expects.
- You can also export straight from a generation session: select the cases and choose Export Excel in the selection bar.
- Test cases in the repository are available to TestPilot when you build a test run.
See Import and Export for the Excel and TestRail flows.
If Something Goes Wrong
Generate Now is disabled
The validation line under the configuration explains the first unmet condition, for example
Add at least one valid source: document, 50+ chars text, valid URL, PBIs, Issue, image, or Figma frame.
The usual cause is that no source has been added yet, or that the requirement text is still shorter than
50 characters.
The run produced fewer cases than the target
The session says so on the detail page. Duplicates are dropped to keep the set distinct, so a short document cannot fill a large target. Extend or change the inputs and generate again.
Save to Repository is disabled
Nothing in the selection is approved yet. Approve the cases first.
A test case is missing from the tree
Clear the active filters, check the search box, and confirm you are looking at the right test set.
Next Steps
- AI Test Case Generation — every source and setting
- Review Workflow — approvals, rejections, and the export gate
- AI Test Sessions — find and manage past runs
- Best Practices — writing standards
