Smart PBI Generation
Smart PBI Generation combines requirement context with a generation configuration and persists the result as a PBI Session. The current interface is a single working form followed by a results view; it is not the former multi-tab generation wizard.
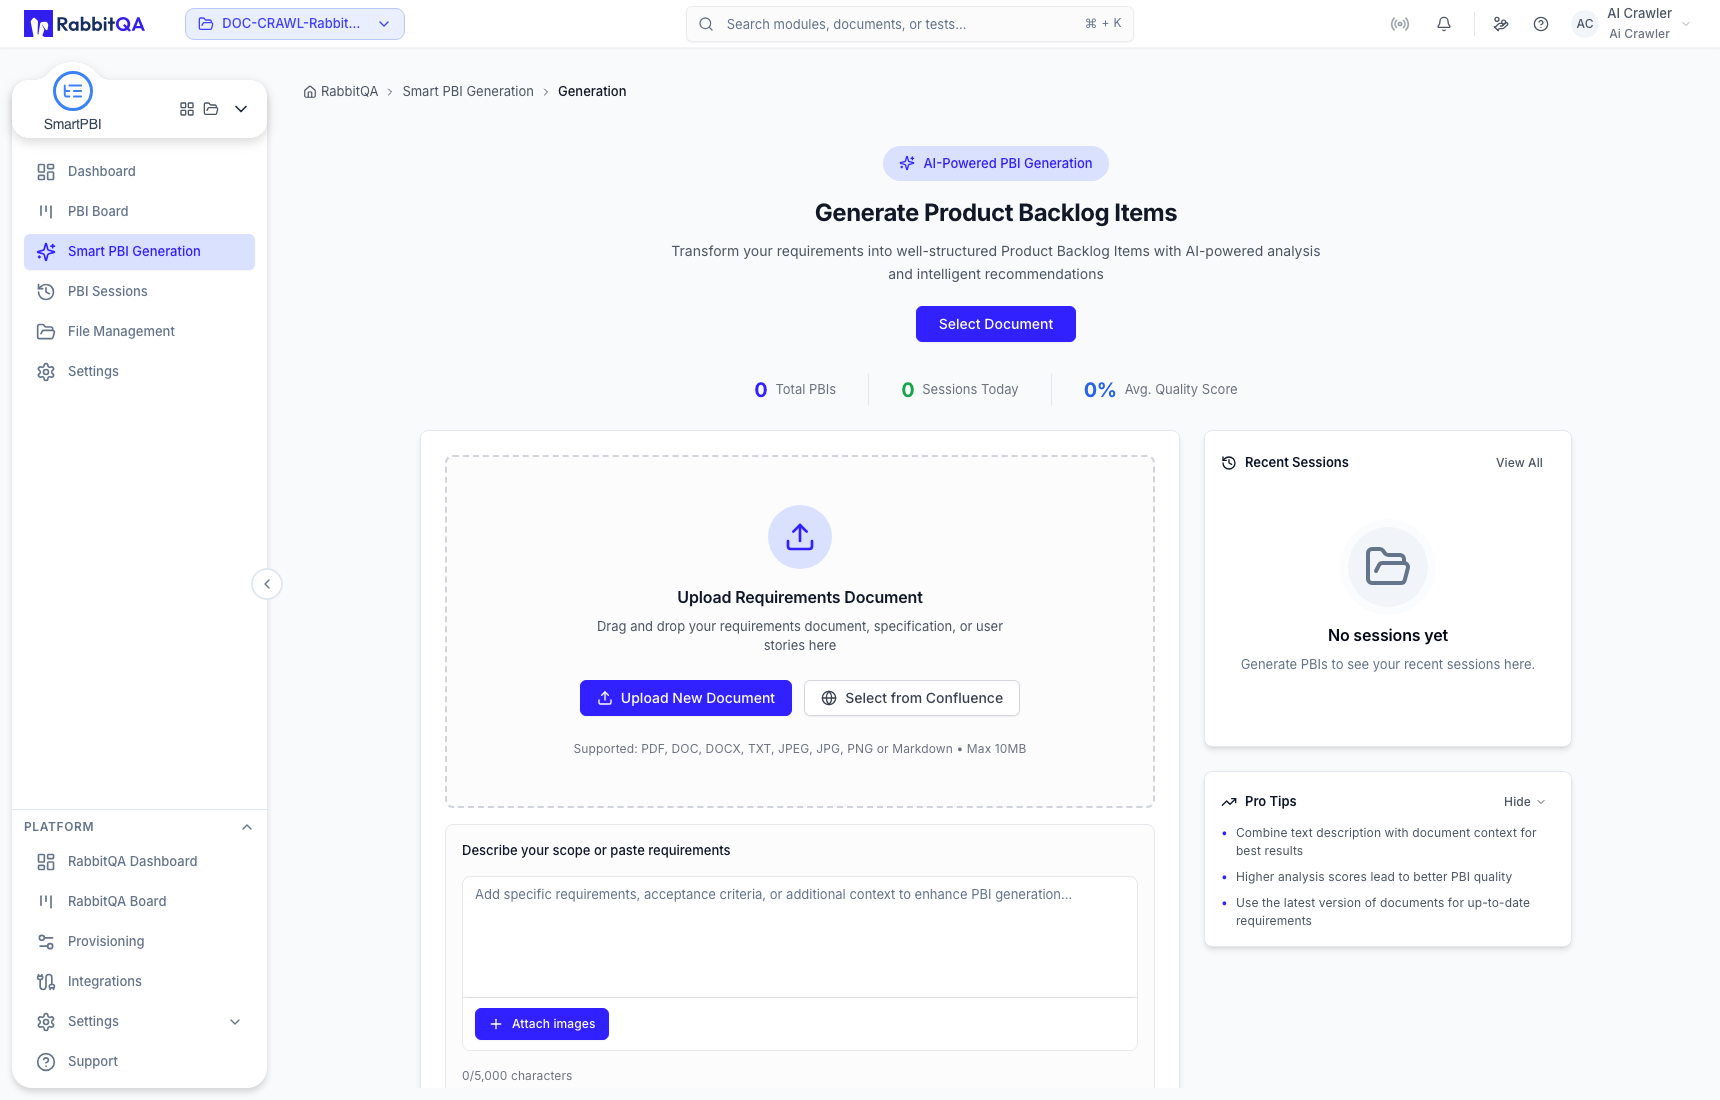
1. Choose source context
A session can use one source or combine several. Select only material that belongs to the same planning scope.
Analyzed document version
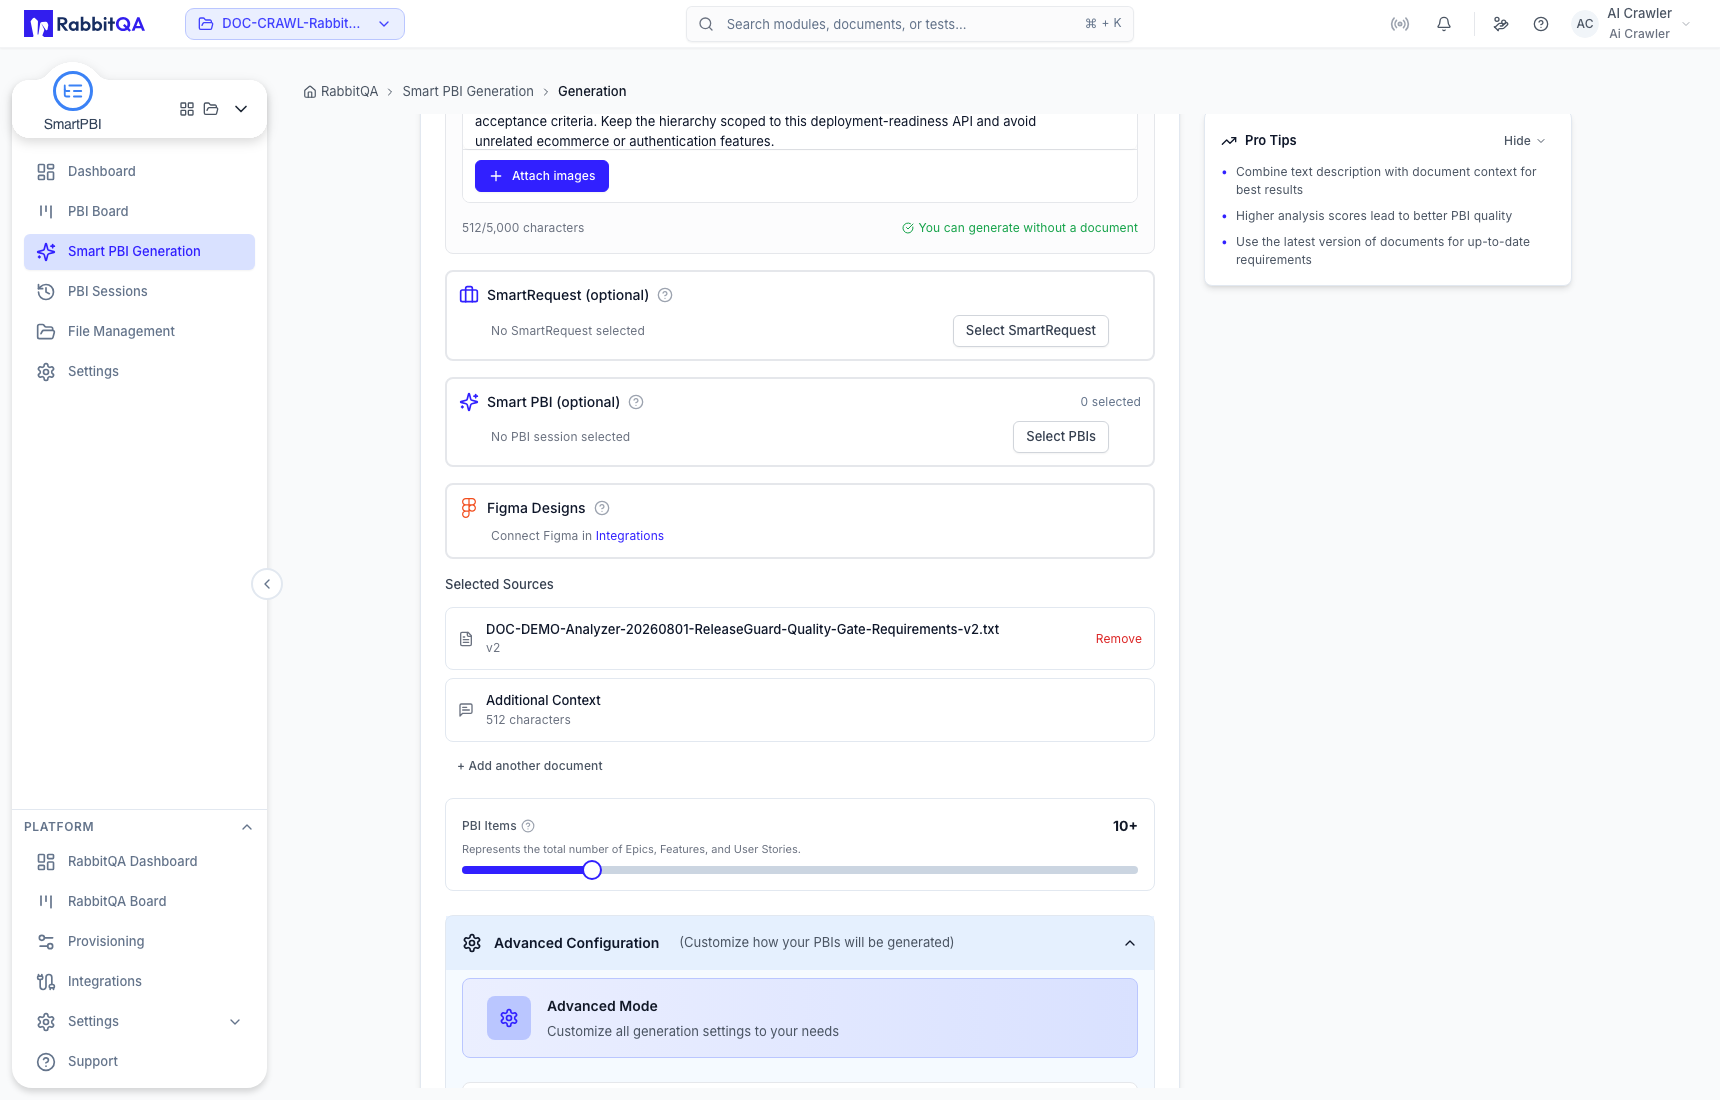
Choose Select Document to open the analyzed-file library. Search or filter the library, open version history, and select the intended version rather than assuming that the latest filename is the correct source.
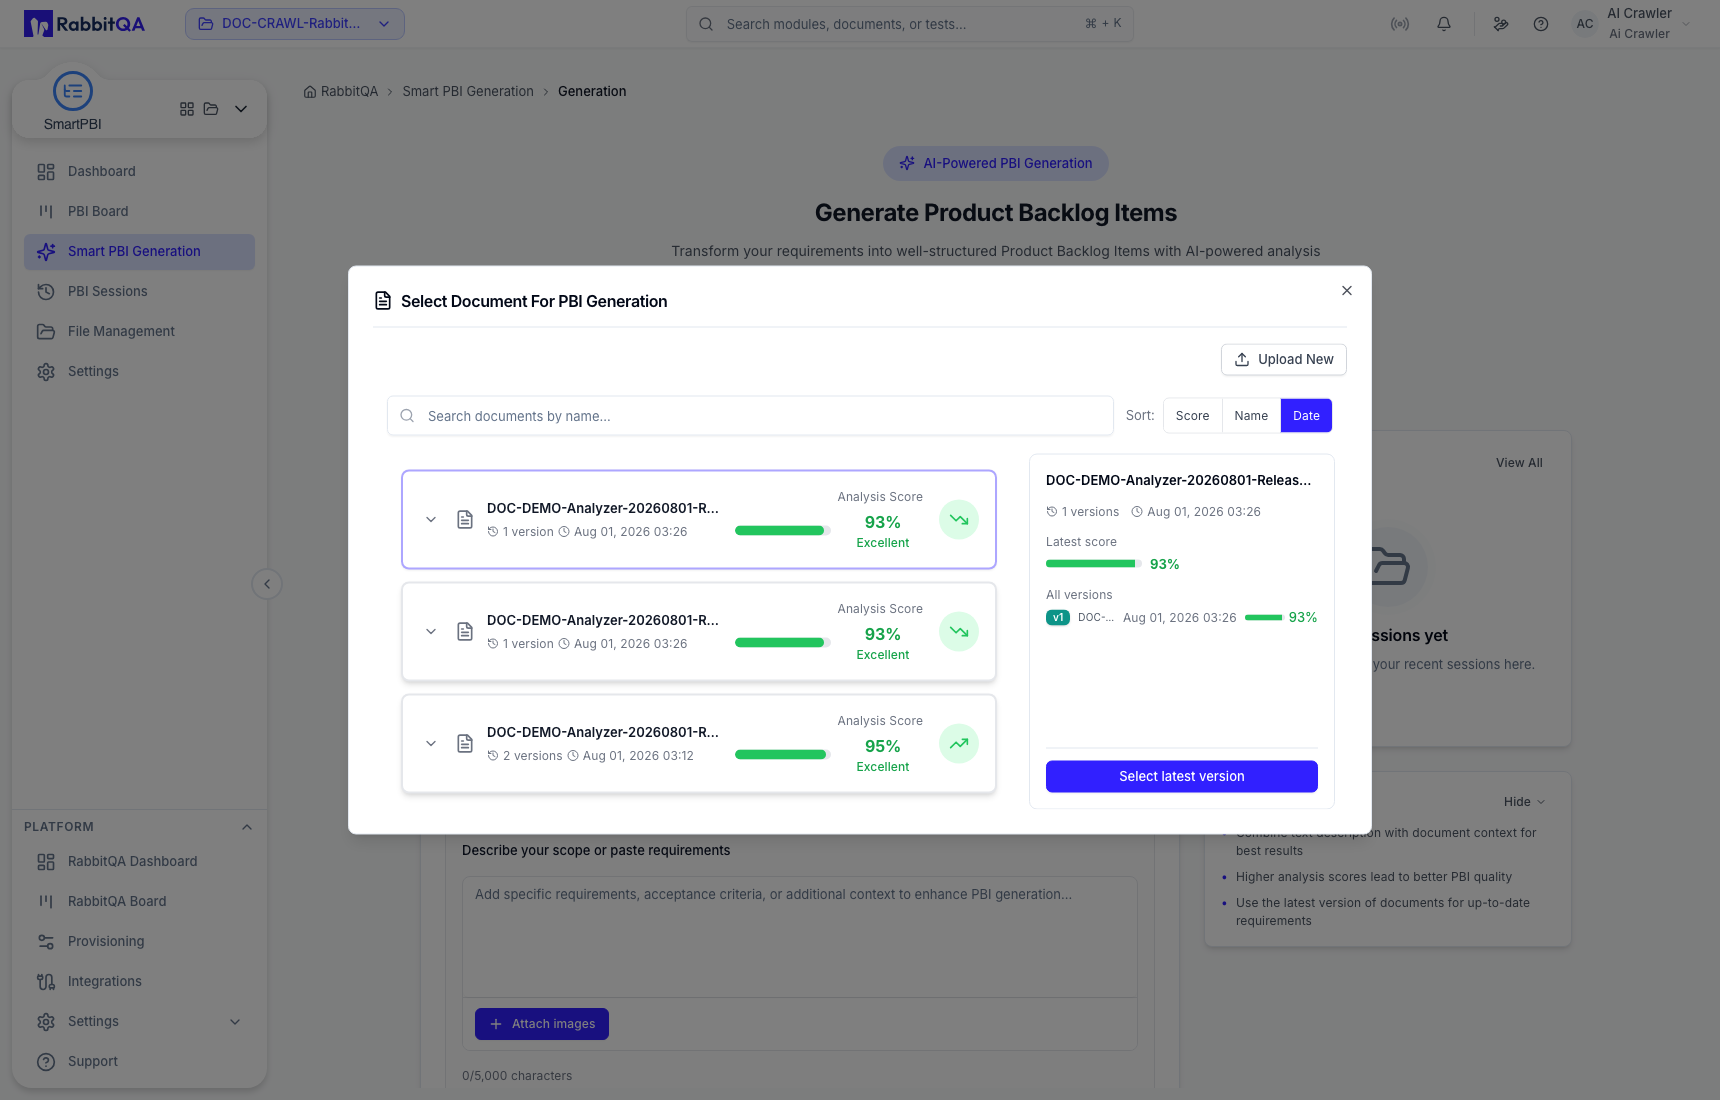
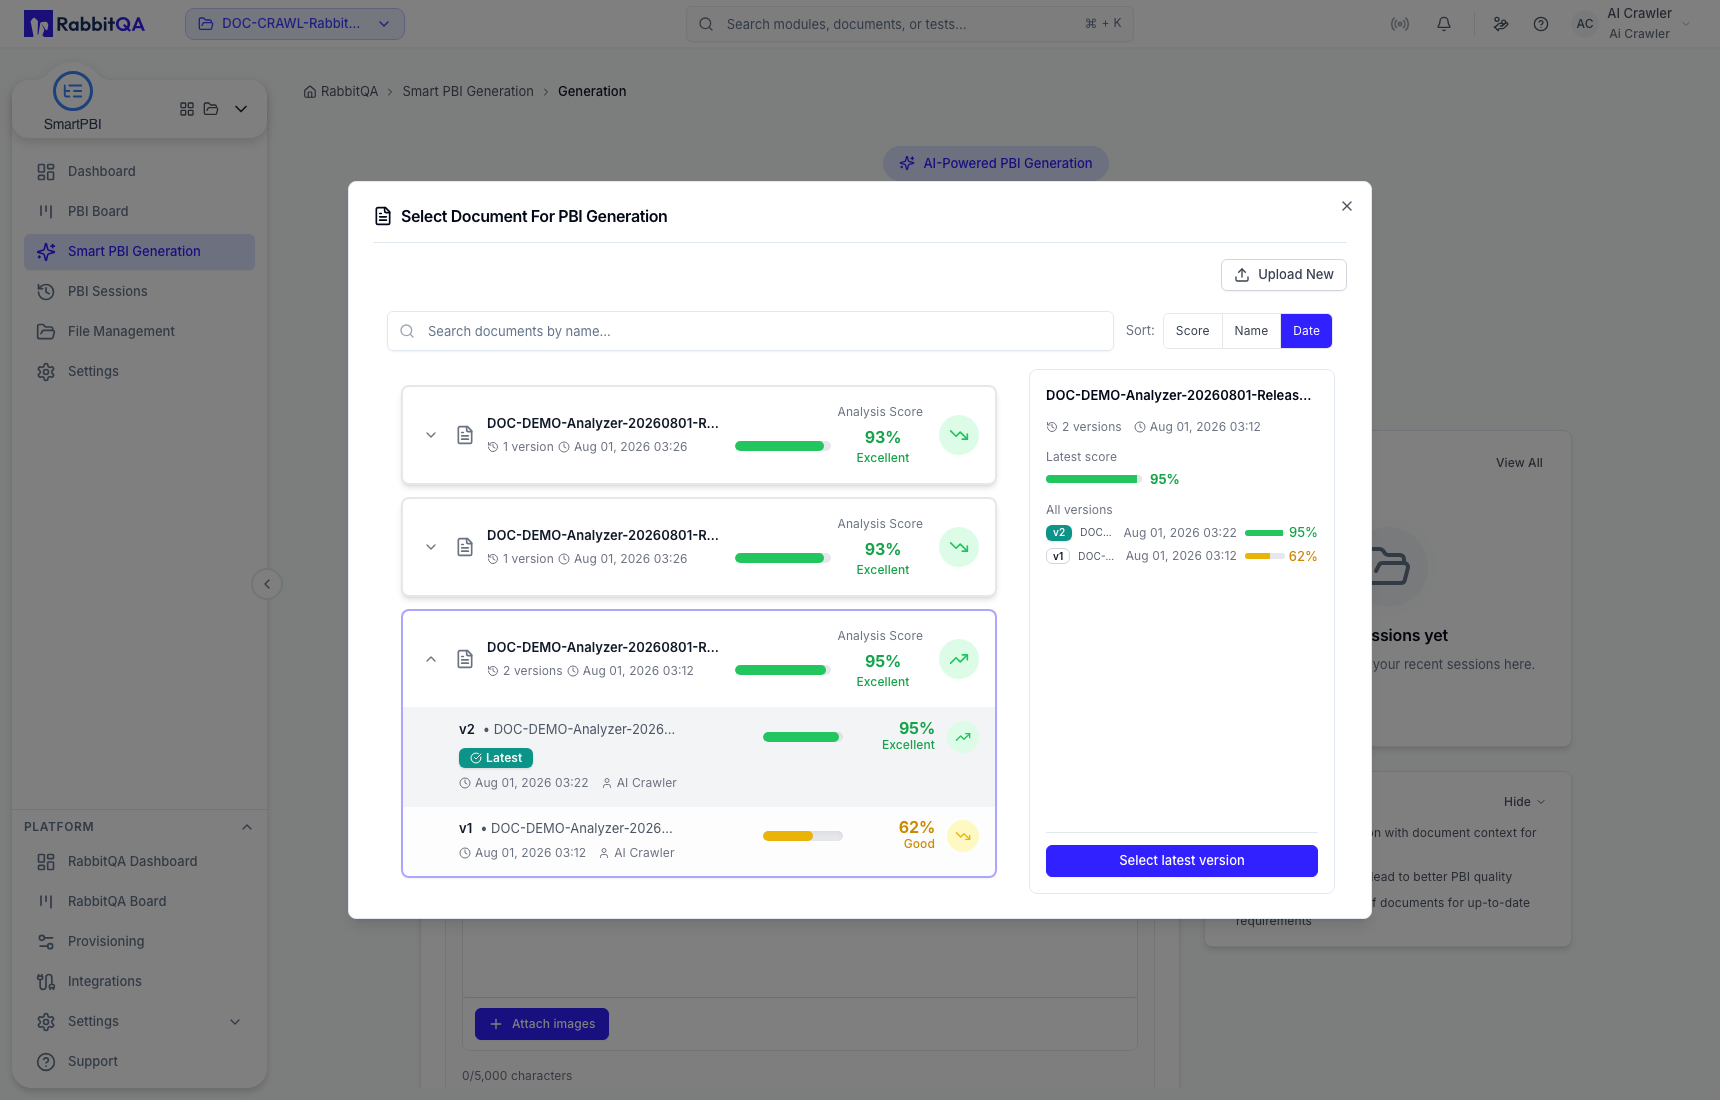
The selected file displays its version and analysis score in the generation form. You can add another analyzed document or change the selection before generation.
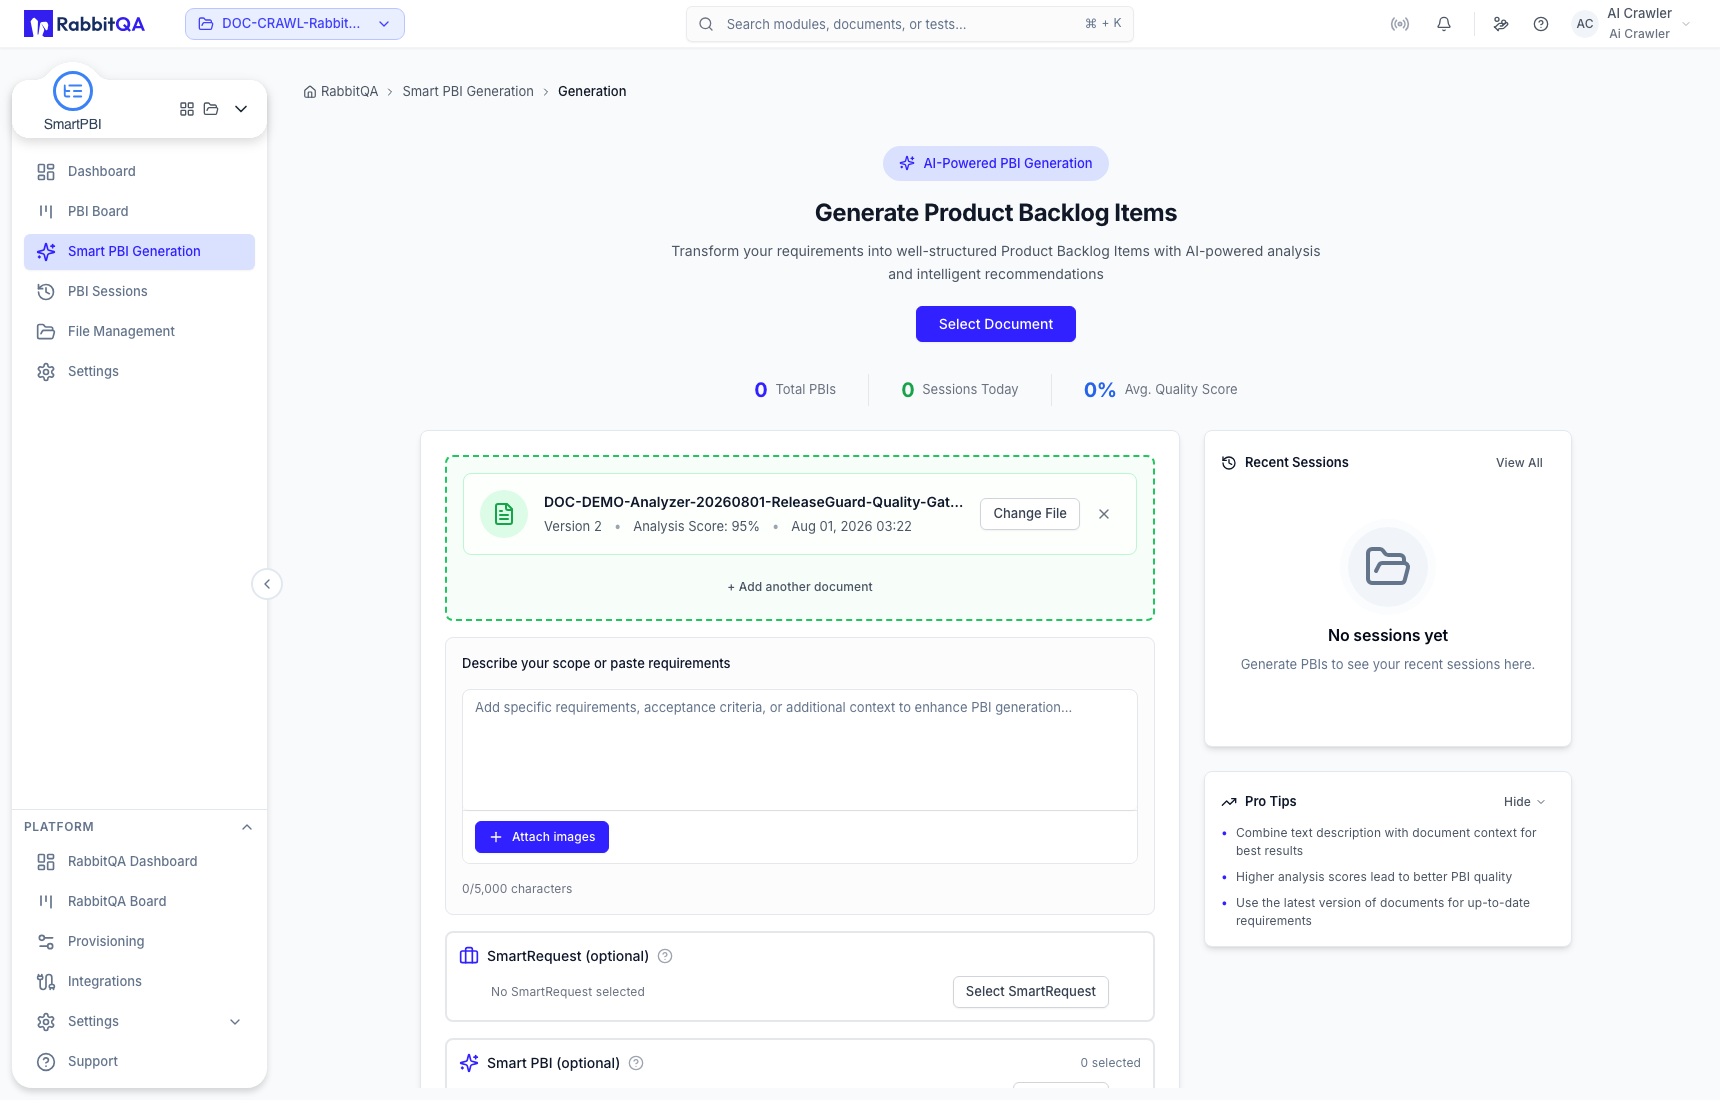
Direct upload, written scope, and images
- Upload New Document accepts PDF, DOC, DOCX, TXT, JPEG, JPG, PNG, or Markdown up to 10 MB.
- Describe your scope or paste requirements accepts up to 5,000 characters of focused context.
- Attach images adds visual context such as a mockup or flow.
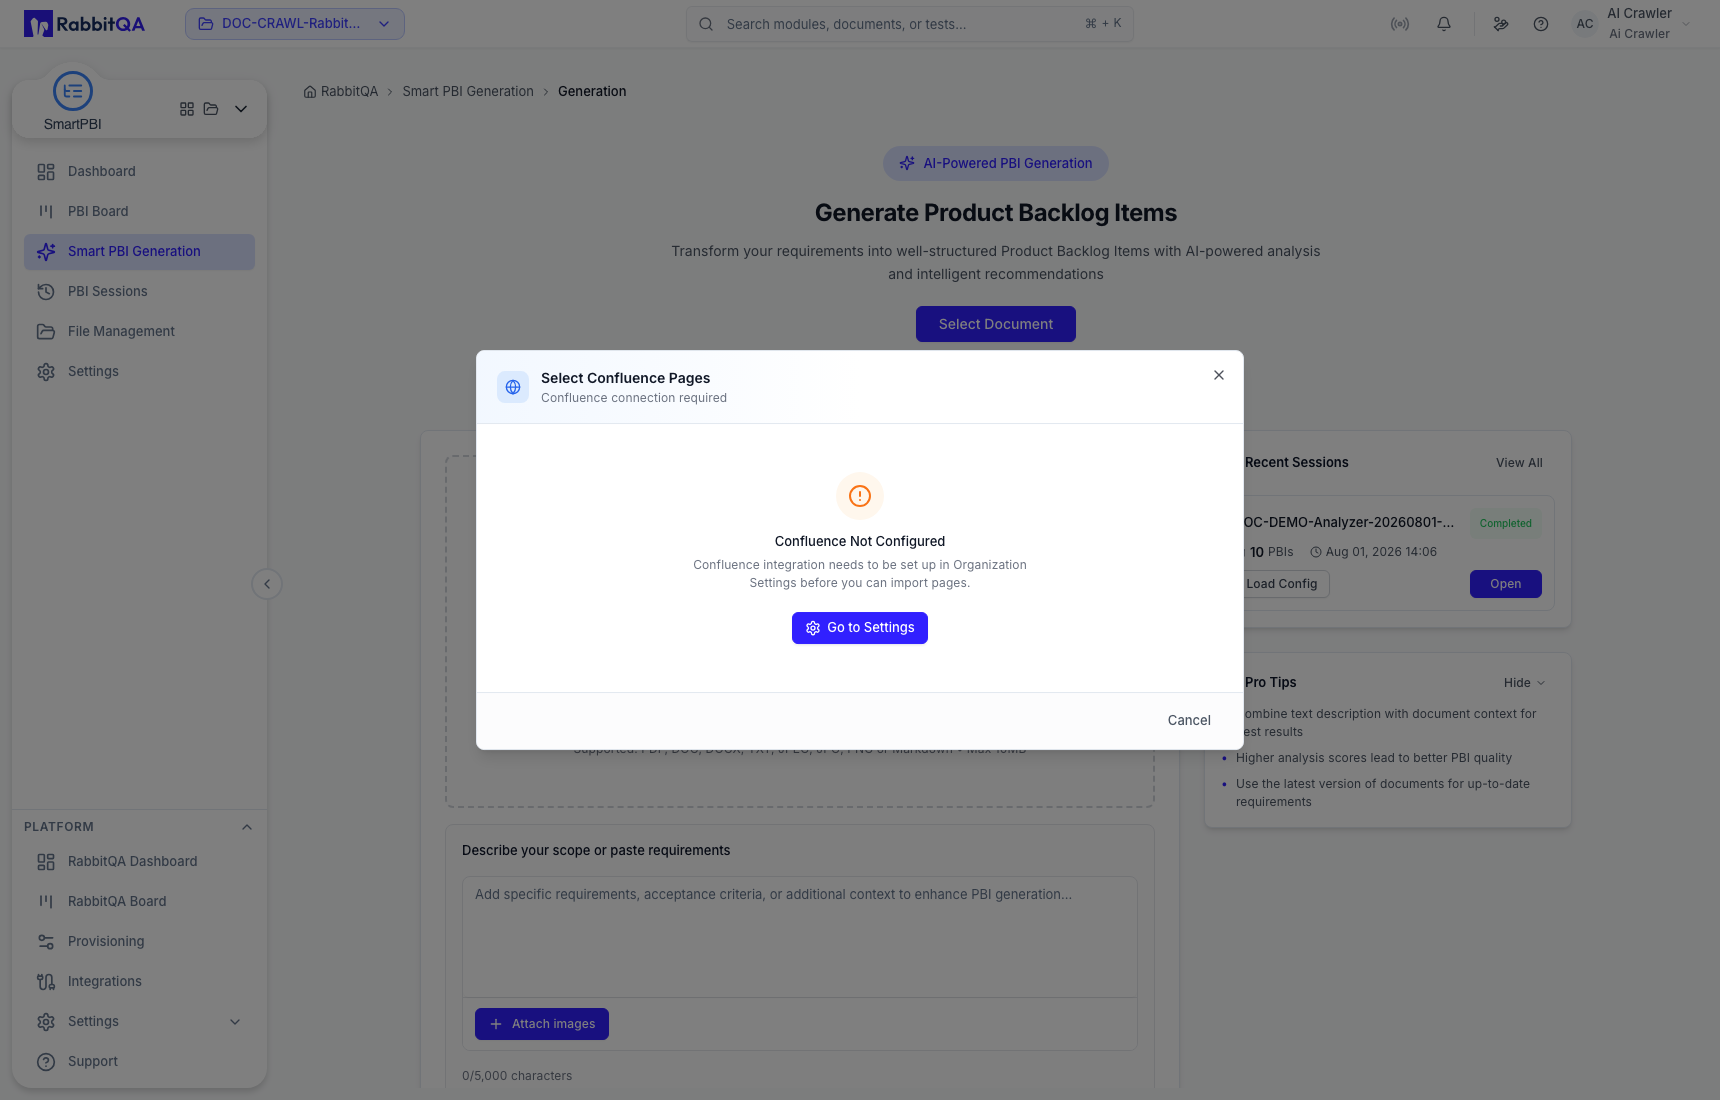
- Select from Confluence requires a configured Confluence integration.
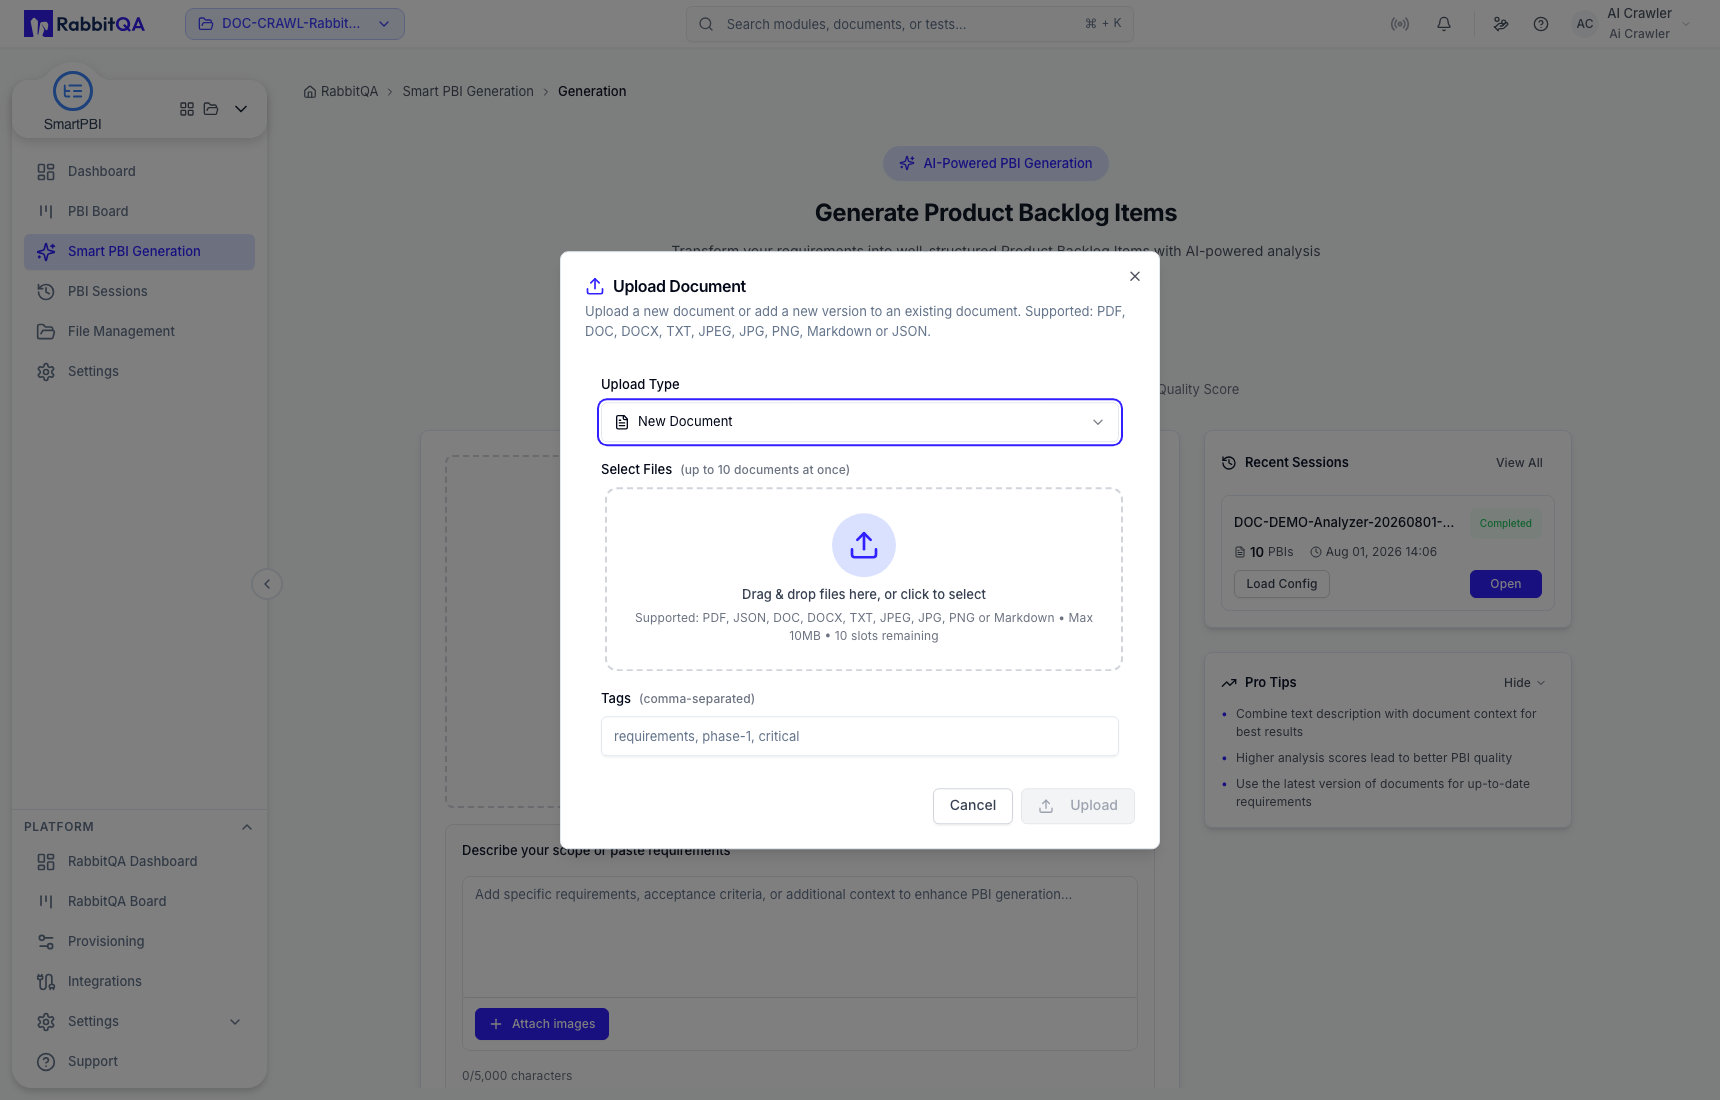
Use an analyzed file when its version and analysis score matter to the audit trail. Use direct upload for ad hoc generation when the file does not need to be selected from Analyzer history.
If Confluence is not connected, the dialog directs you to Integrations instead of returning pages. Connecting or changing an integration is an administrative action, not part of generation itself.
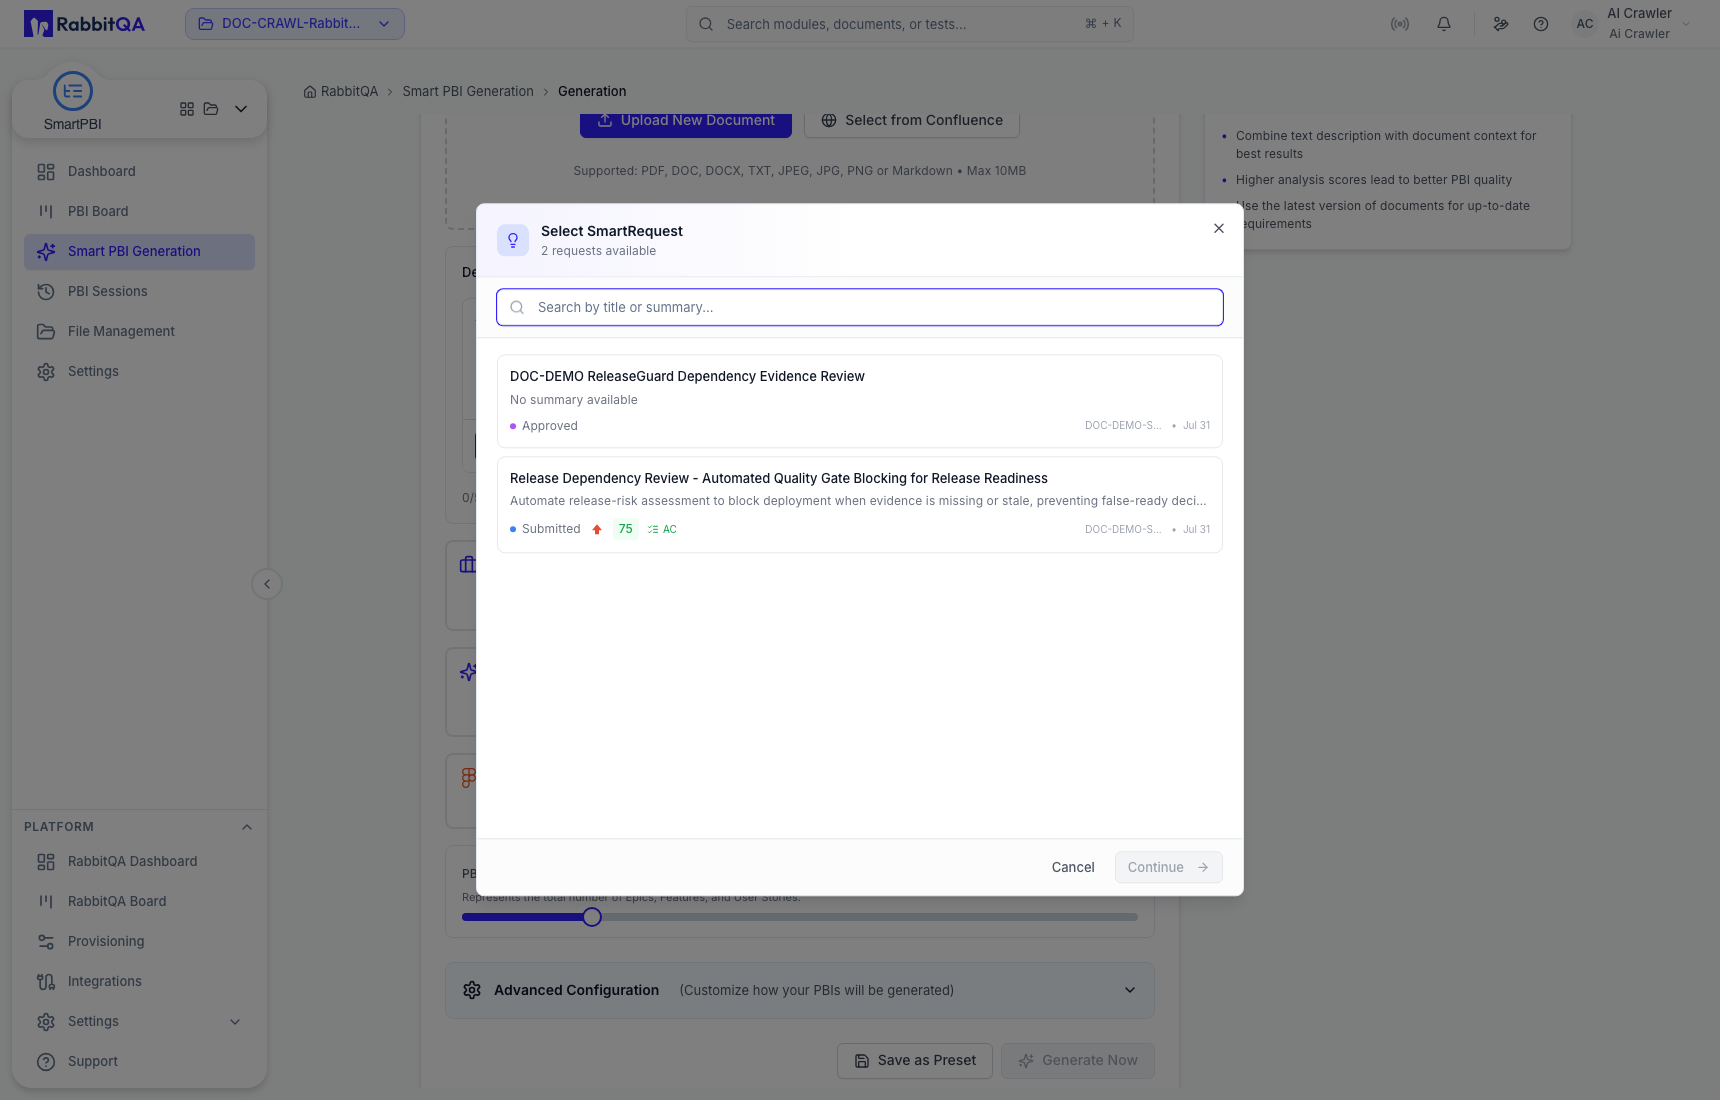
SmartRequest
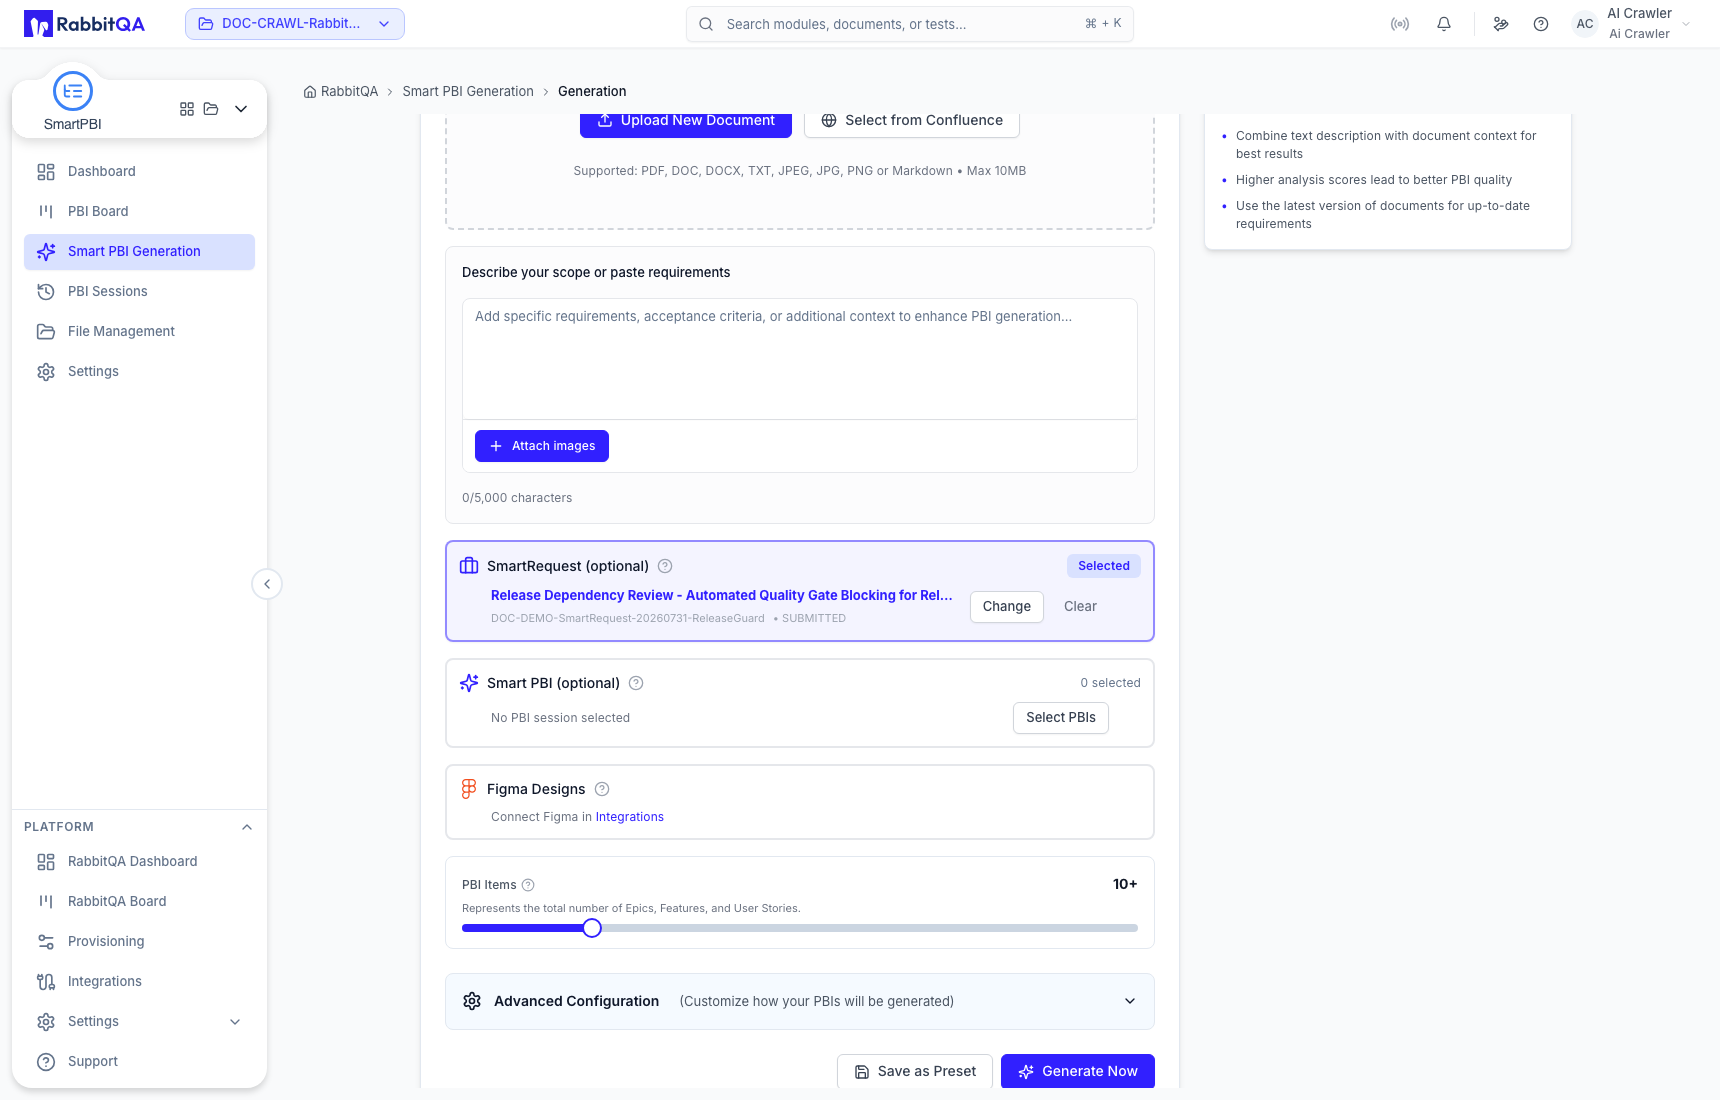
Choose Select SmartRequest, search project requests, then select the request and the data that should become generation context. Review both the request status and the chosen data groups before applying the selection.
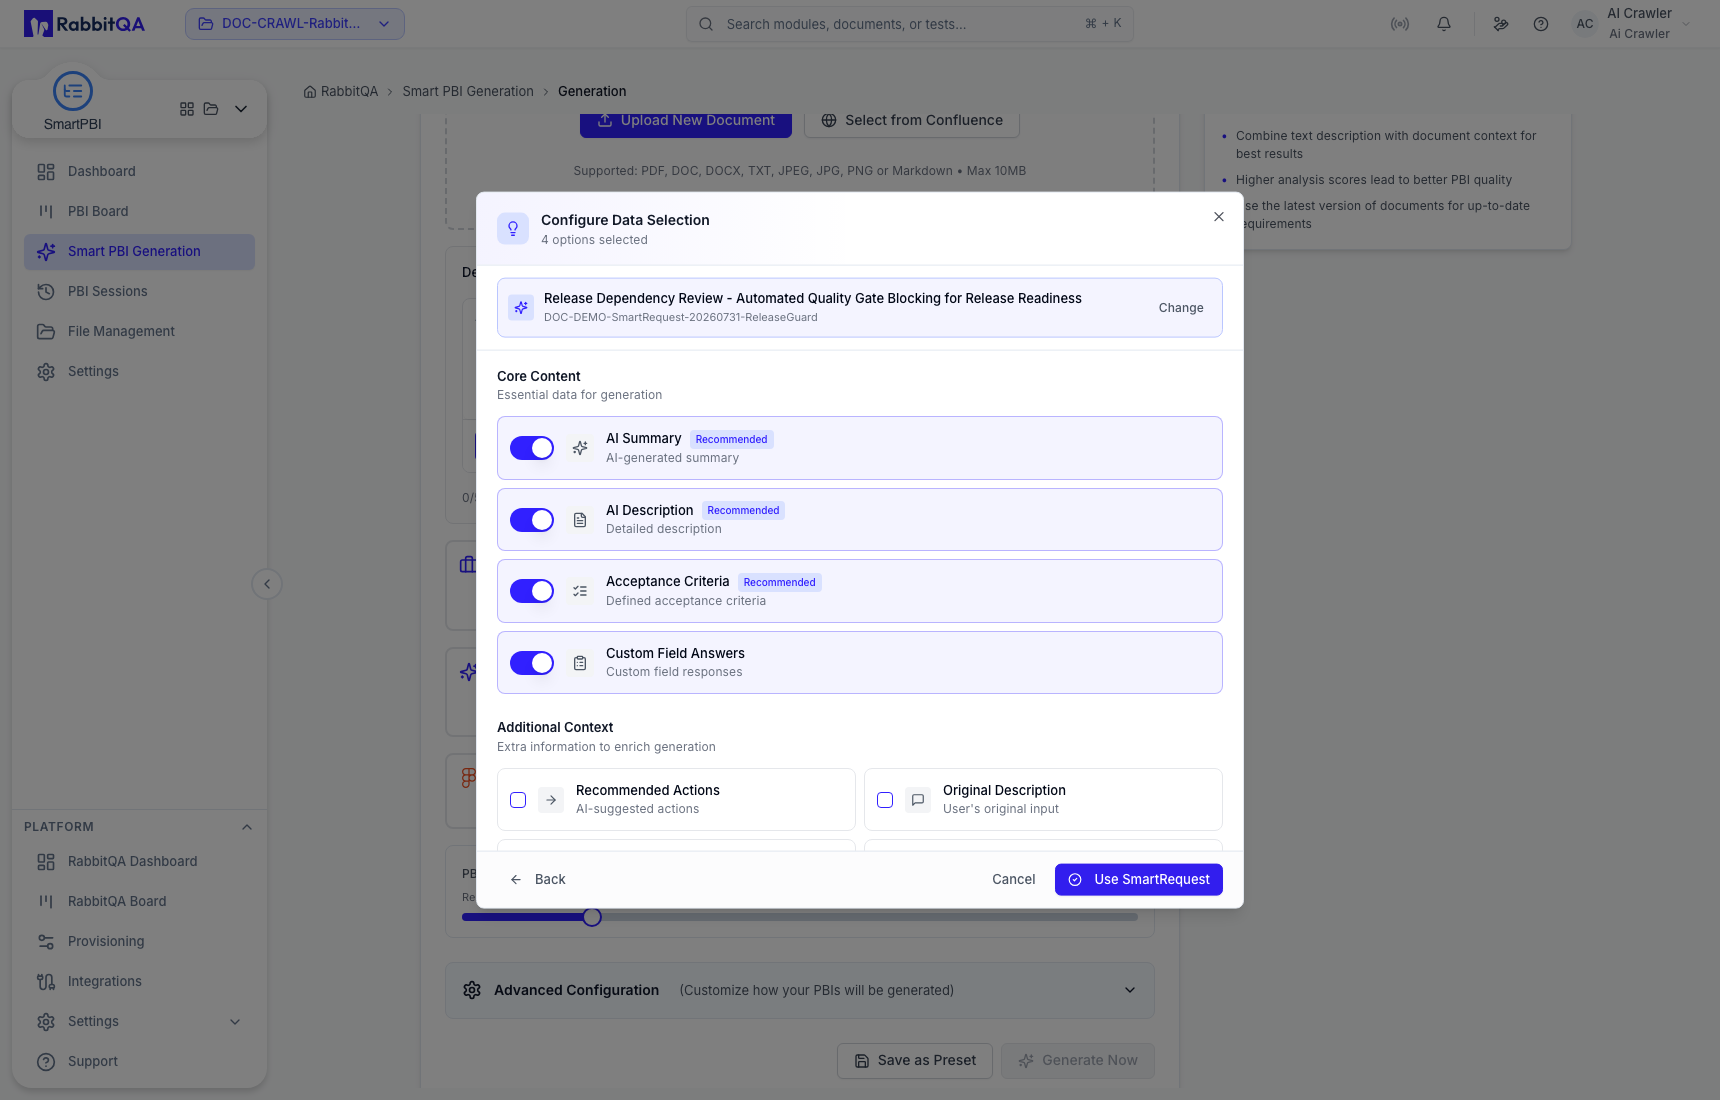
The form displays the source as Selected. Use Change to revise it or Clear to remove it. Opening Smart PBI from SmartRequest follows the same principle: verify the transferred context before generating.
Previous PBIs
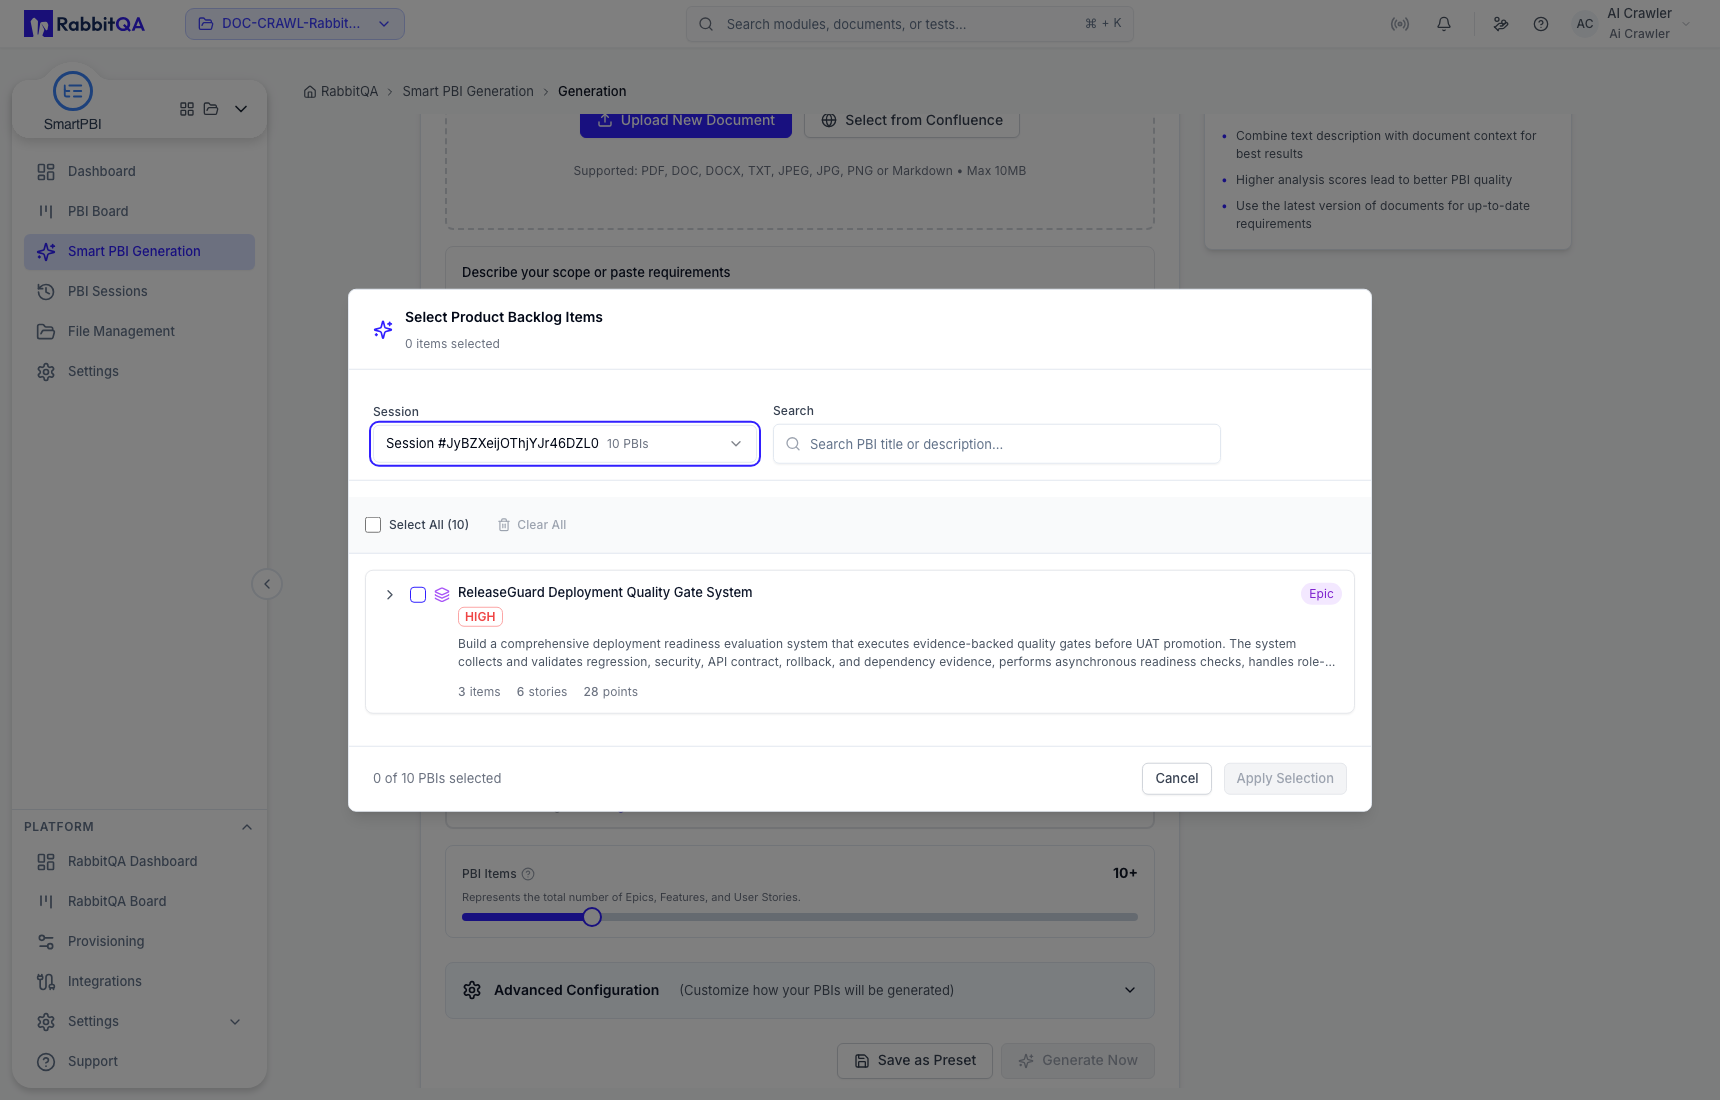
Use the optional Smart PBI source when extending or refining an existing backlog. Select a prior session, search its Epics, Features, and User Stories, and choose only the items relevant to the new scope.
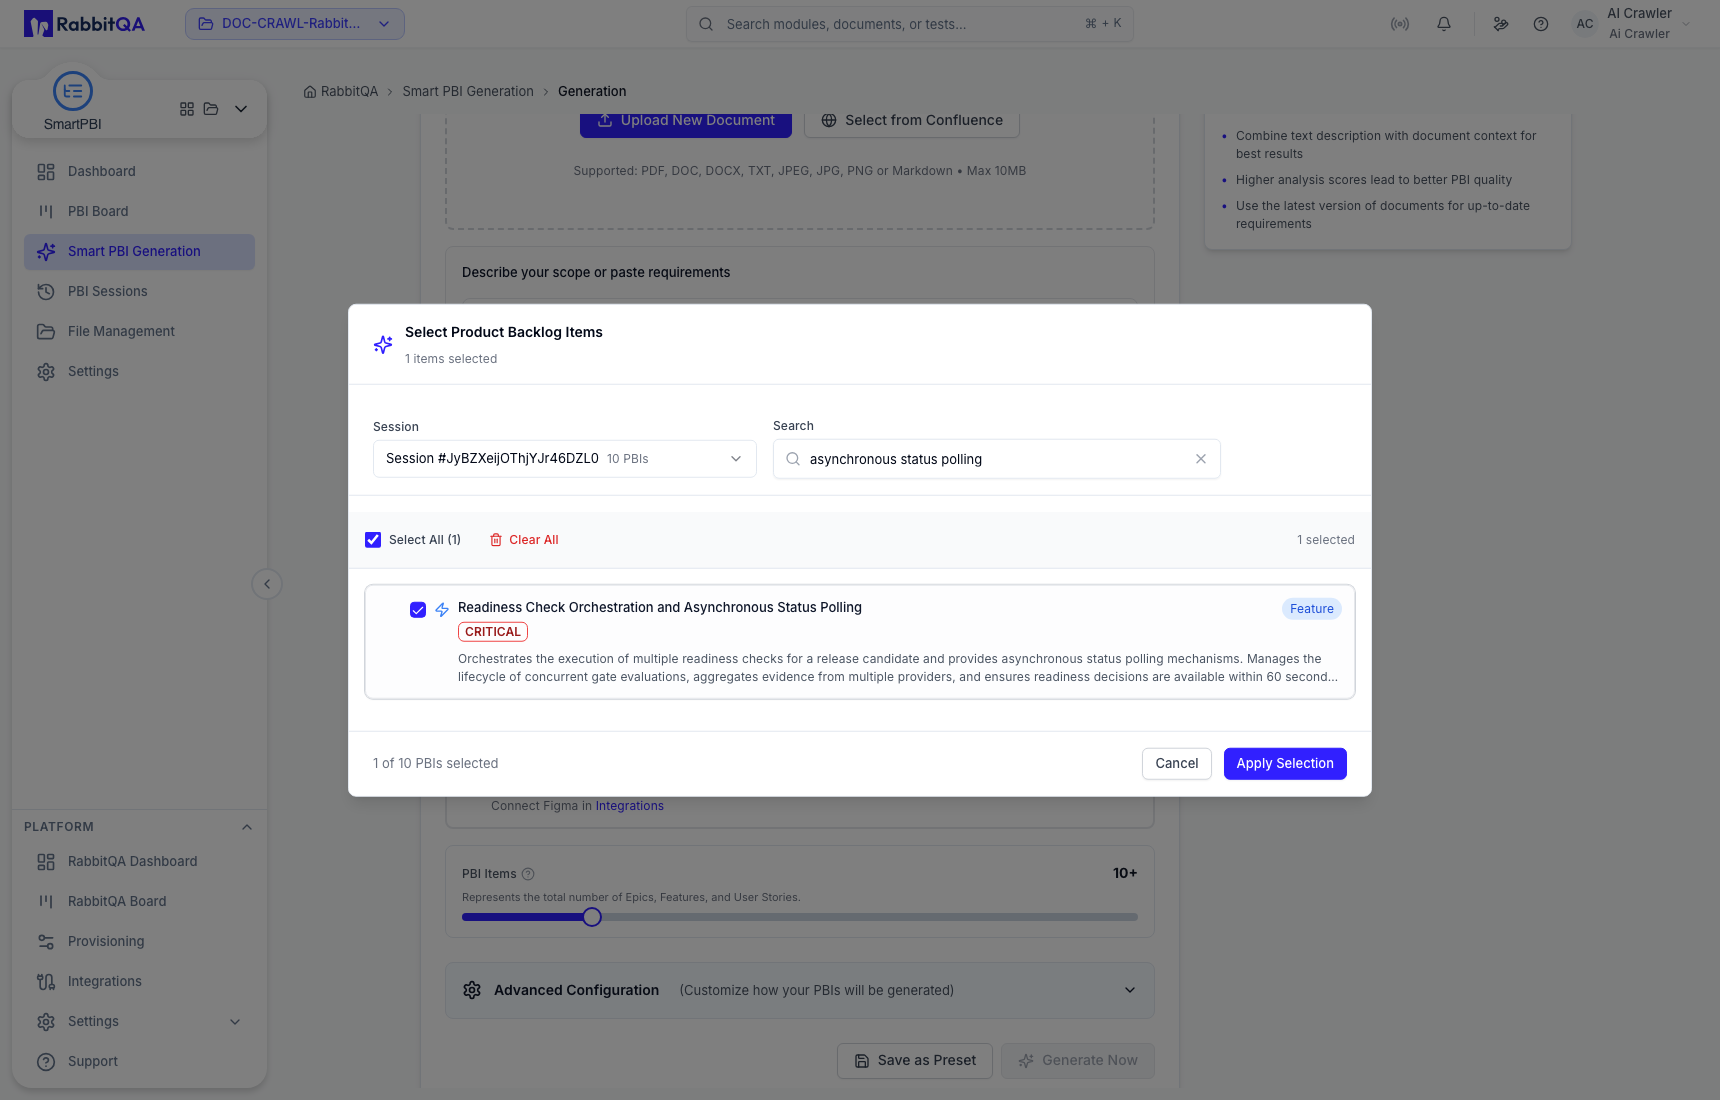
The source summary reports how many previous PBIs are selected. Clear the selection when you intend to create an independent hierarchy.
Figma
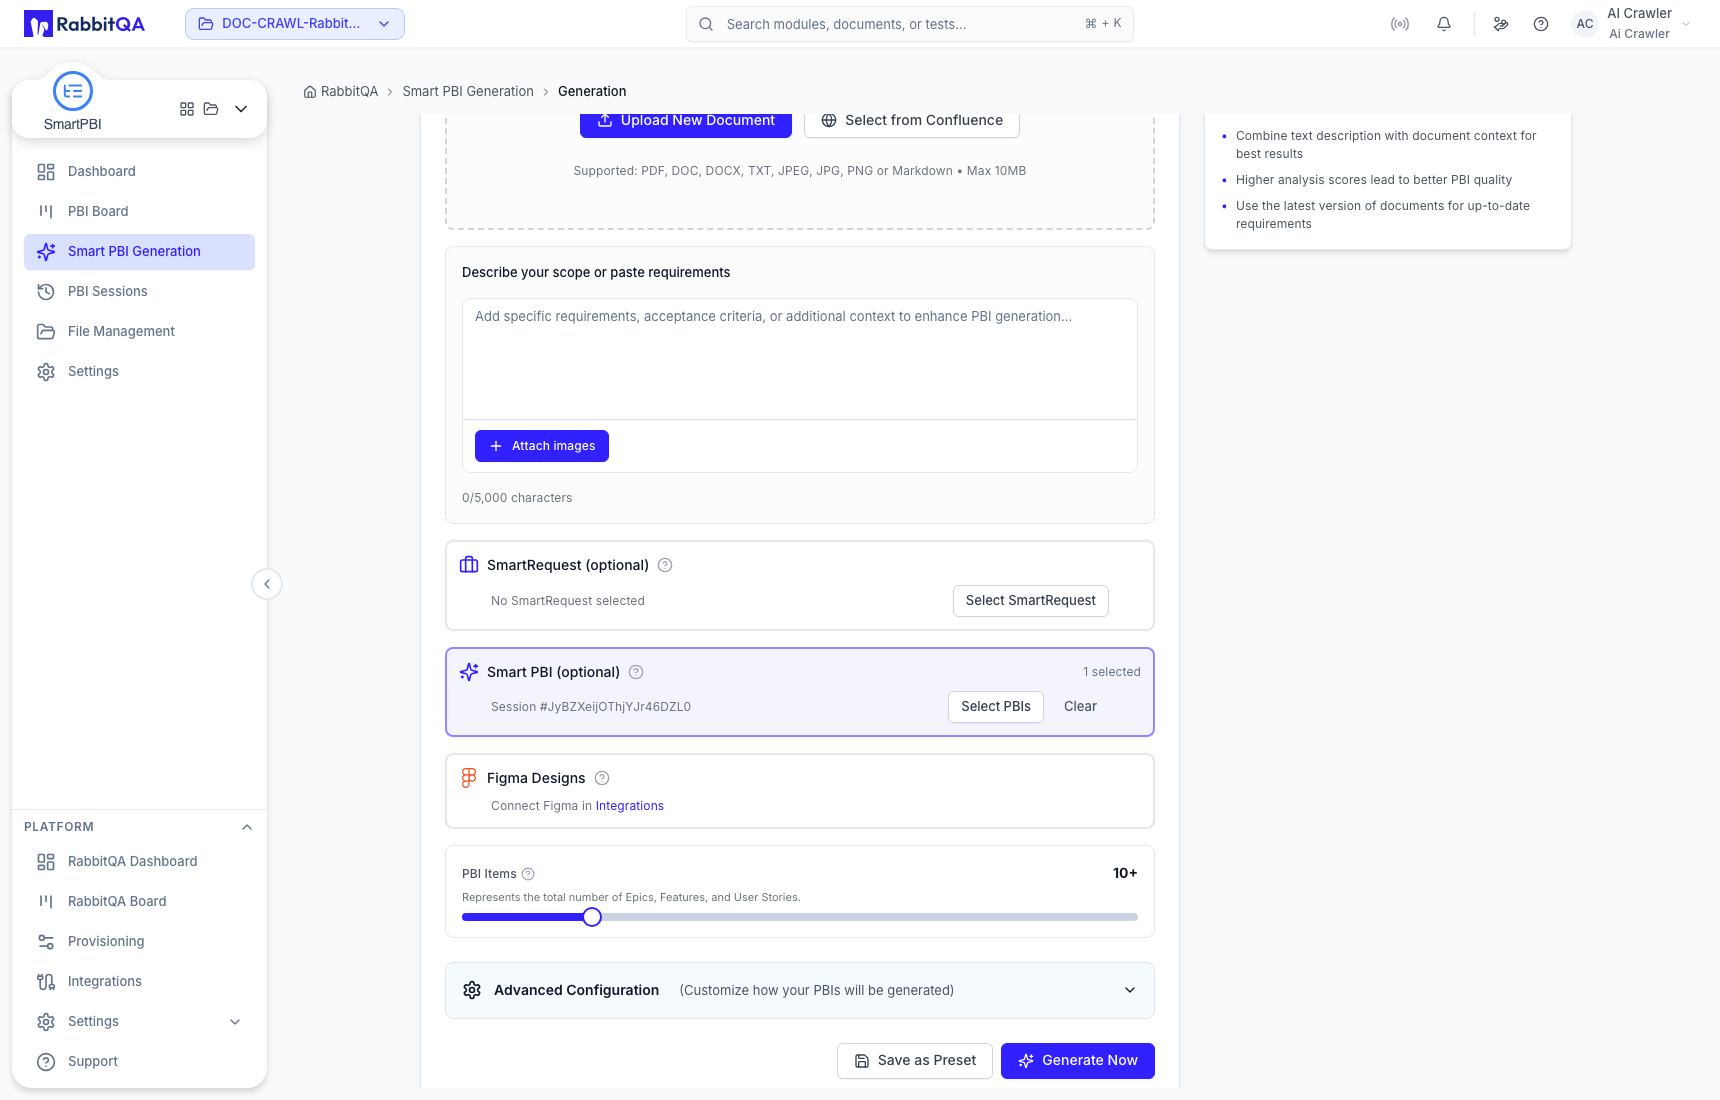
Figma Designs can contribute design context only after Figma is connected in Integrations. Treat a connection prompt as a missing prerequisite, not as a completed source selection.
2. Configure the output
Open Advanced Configuration to review the values that will be persisted with the session.
| Setting | Current behavior |
|---|---|
| AI model | Uses an available centrally managed model; model administration lives in Integrations. |
| Language | Controls the language of newly generated titles, descriptions, and criteria. |
| Quality | Choose Speed, Balanced, or Accuracy for the intended speed/detail tradeoff. |
| Platforms | Select up to three relevant targets; avoid unrelated platforms that dilute context. |
| PBI items | Sets the requested backlog size shown by the form. |
| Hierarchy | Enable Epic, Feature, User Story, and Acceptance Criteria as needed. |
Choose the full set when you need the complete Epic → Feature → User Story → Acceptance Criteria structure. A smaller combination is appropriate only when downstream users do not need the omitted levels.
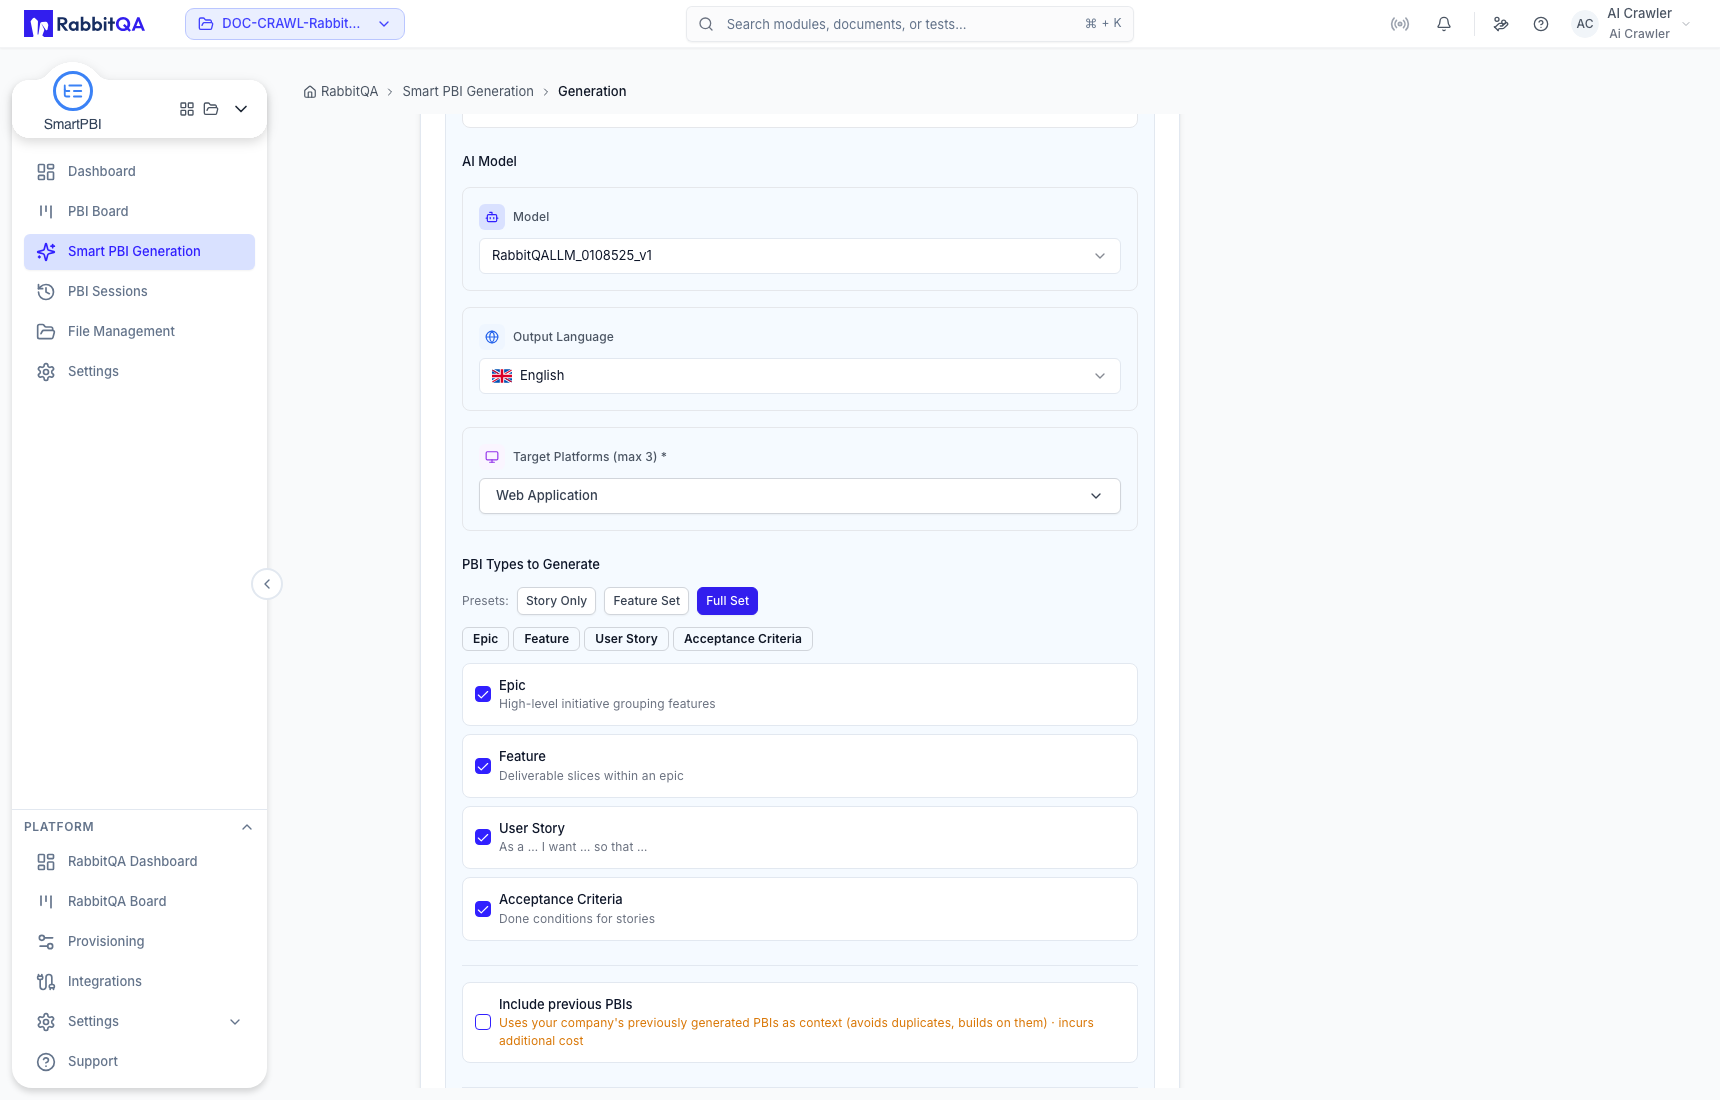
Use Save as Preset when this exact configuration should be named and reused. Presets are covered in Settings.
3. Generate and wait for completion
Select Generate Now only after reviewing source chips and configuration. Generation creates a new session; it does not overwrite a previous completed session.
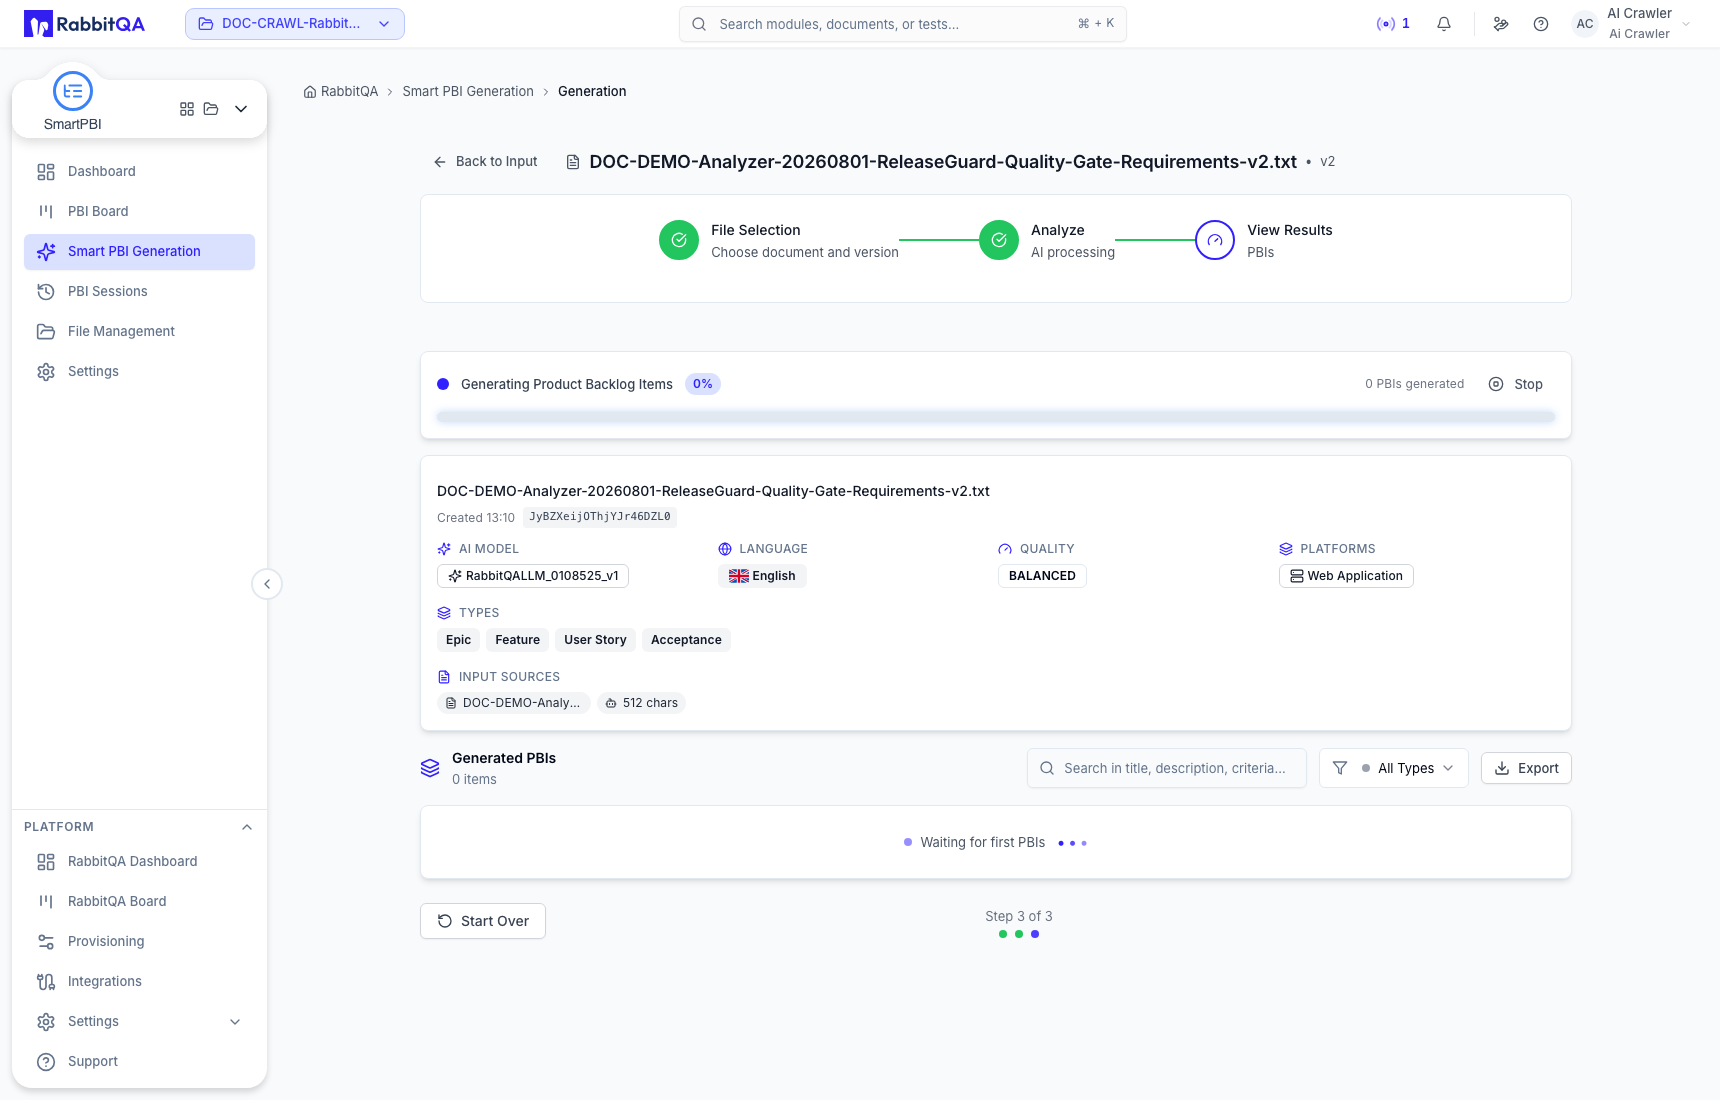
Keep the result open until the session reaches a terminal state. Do not interpret an in-progress tree or partial count as the completed backlog.
4. Review the generated hierarchy
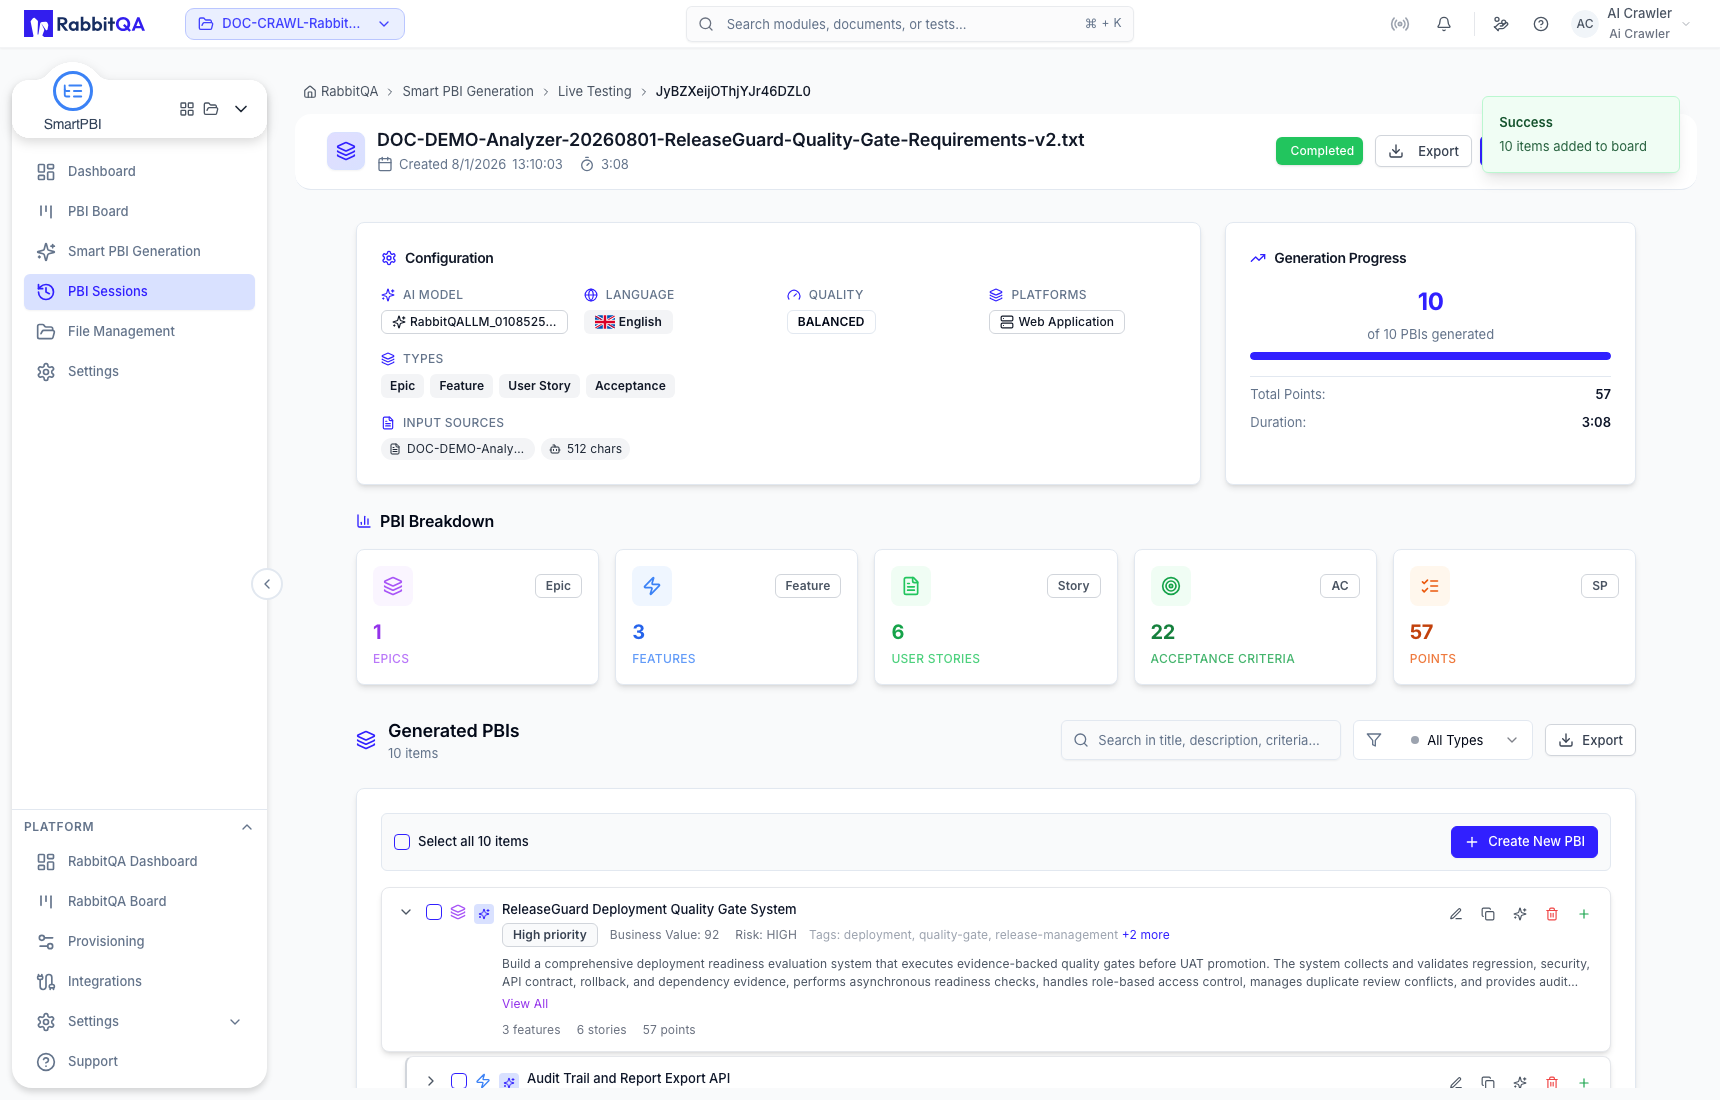
The completed view shows the source, session state, item counts, configuration, and expandable hierarchy.
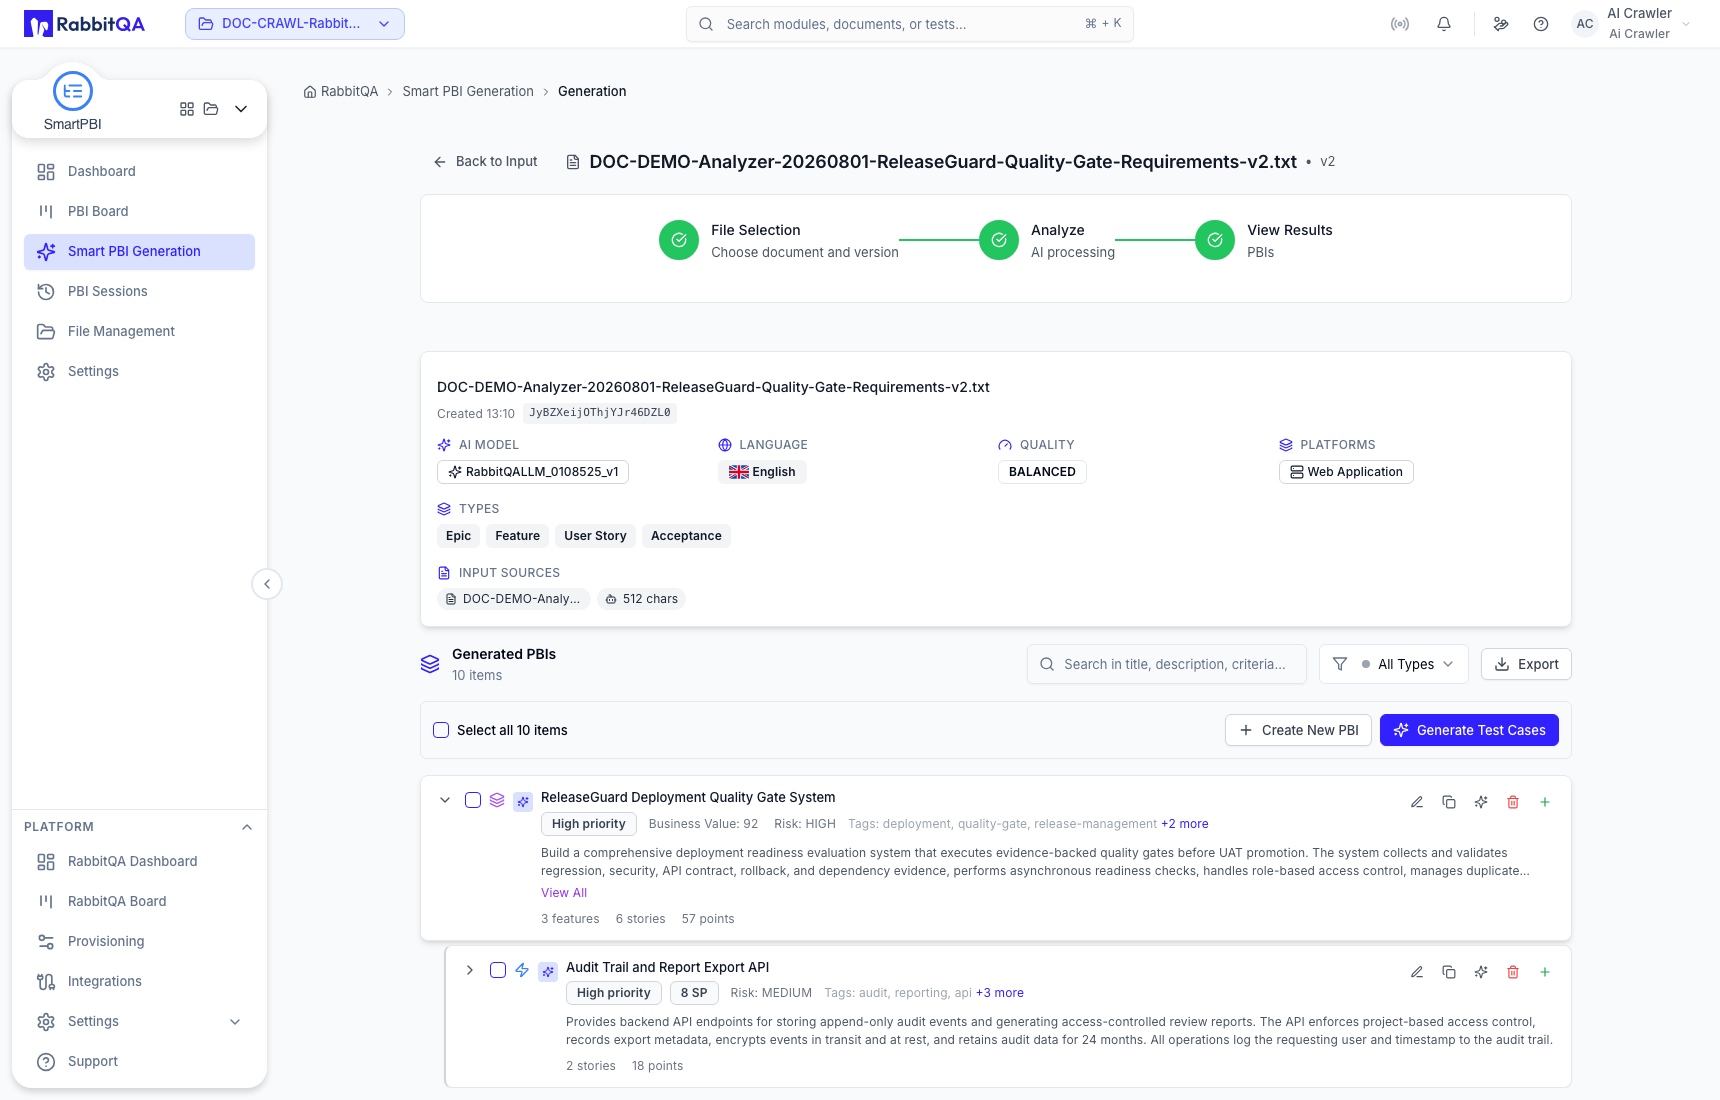
Use search and type filters to focus the review, then expand parents to verify placement and Acceptance Criteria. A filtered result does not remove hidden items from the session.
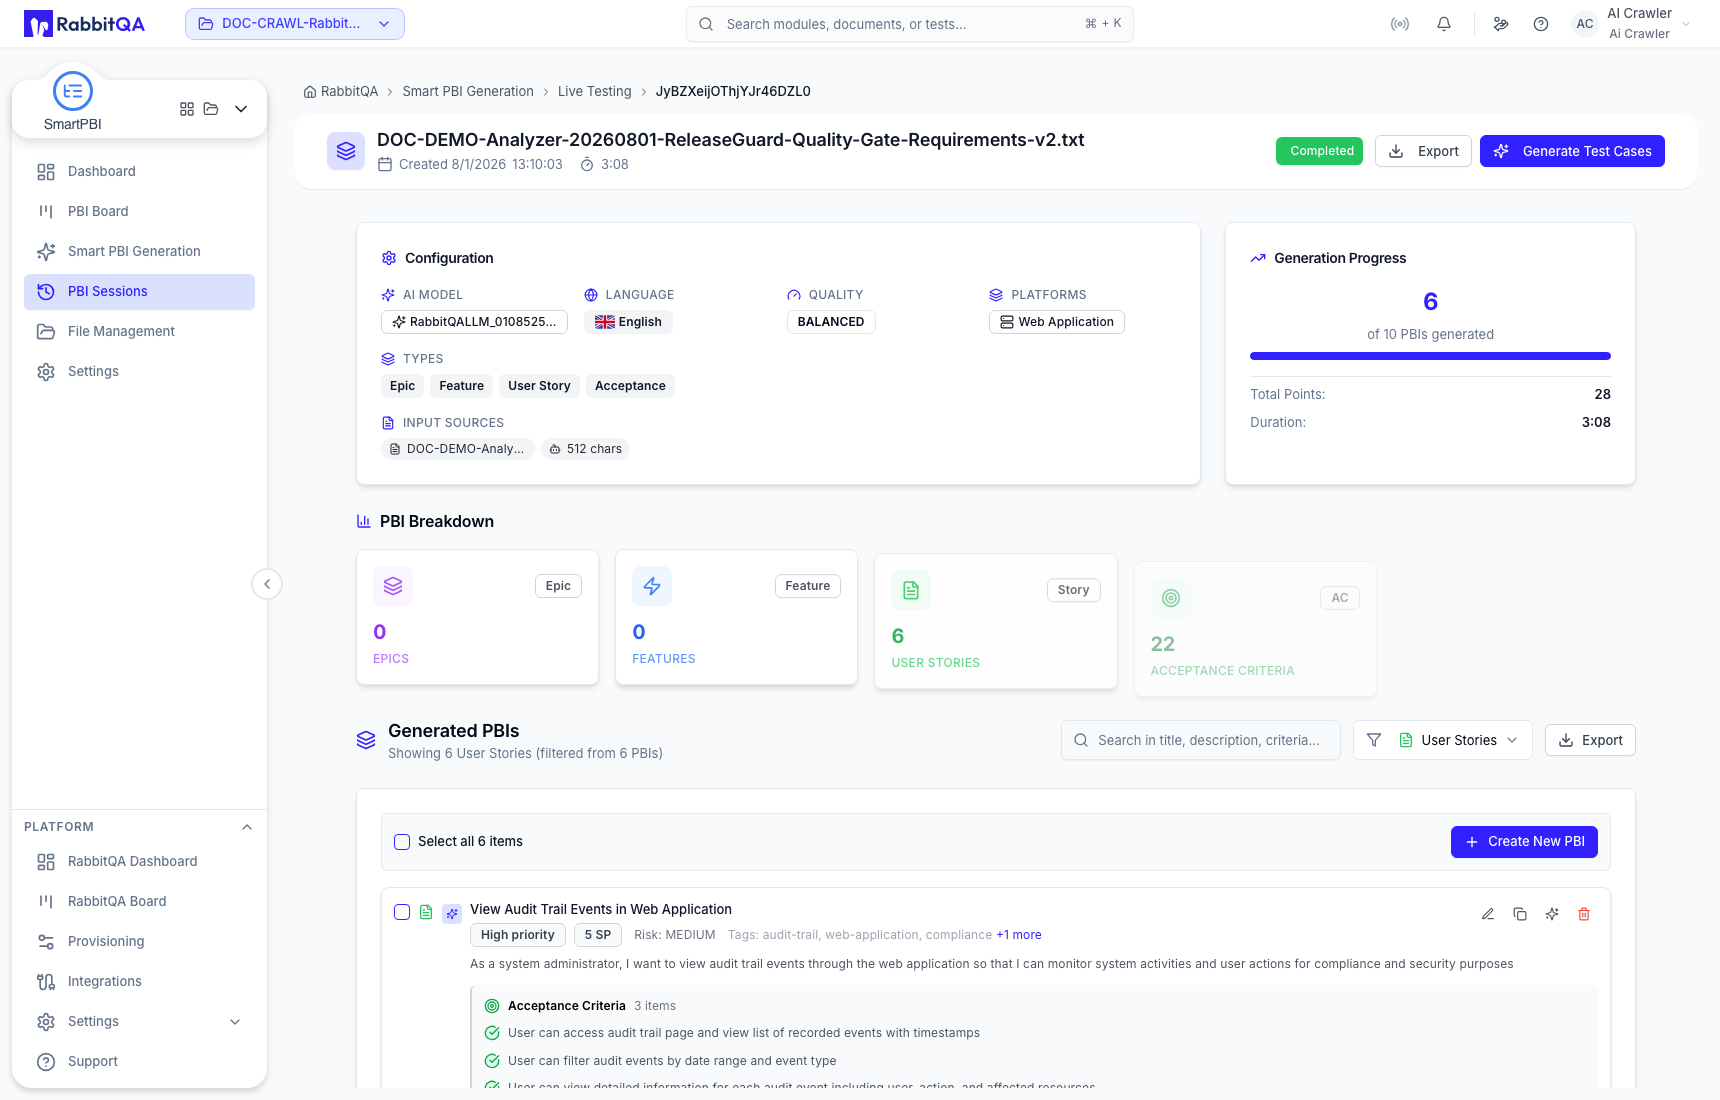
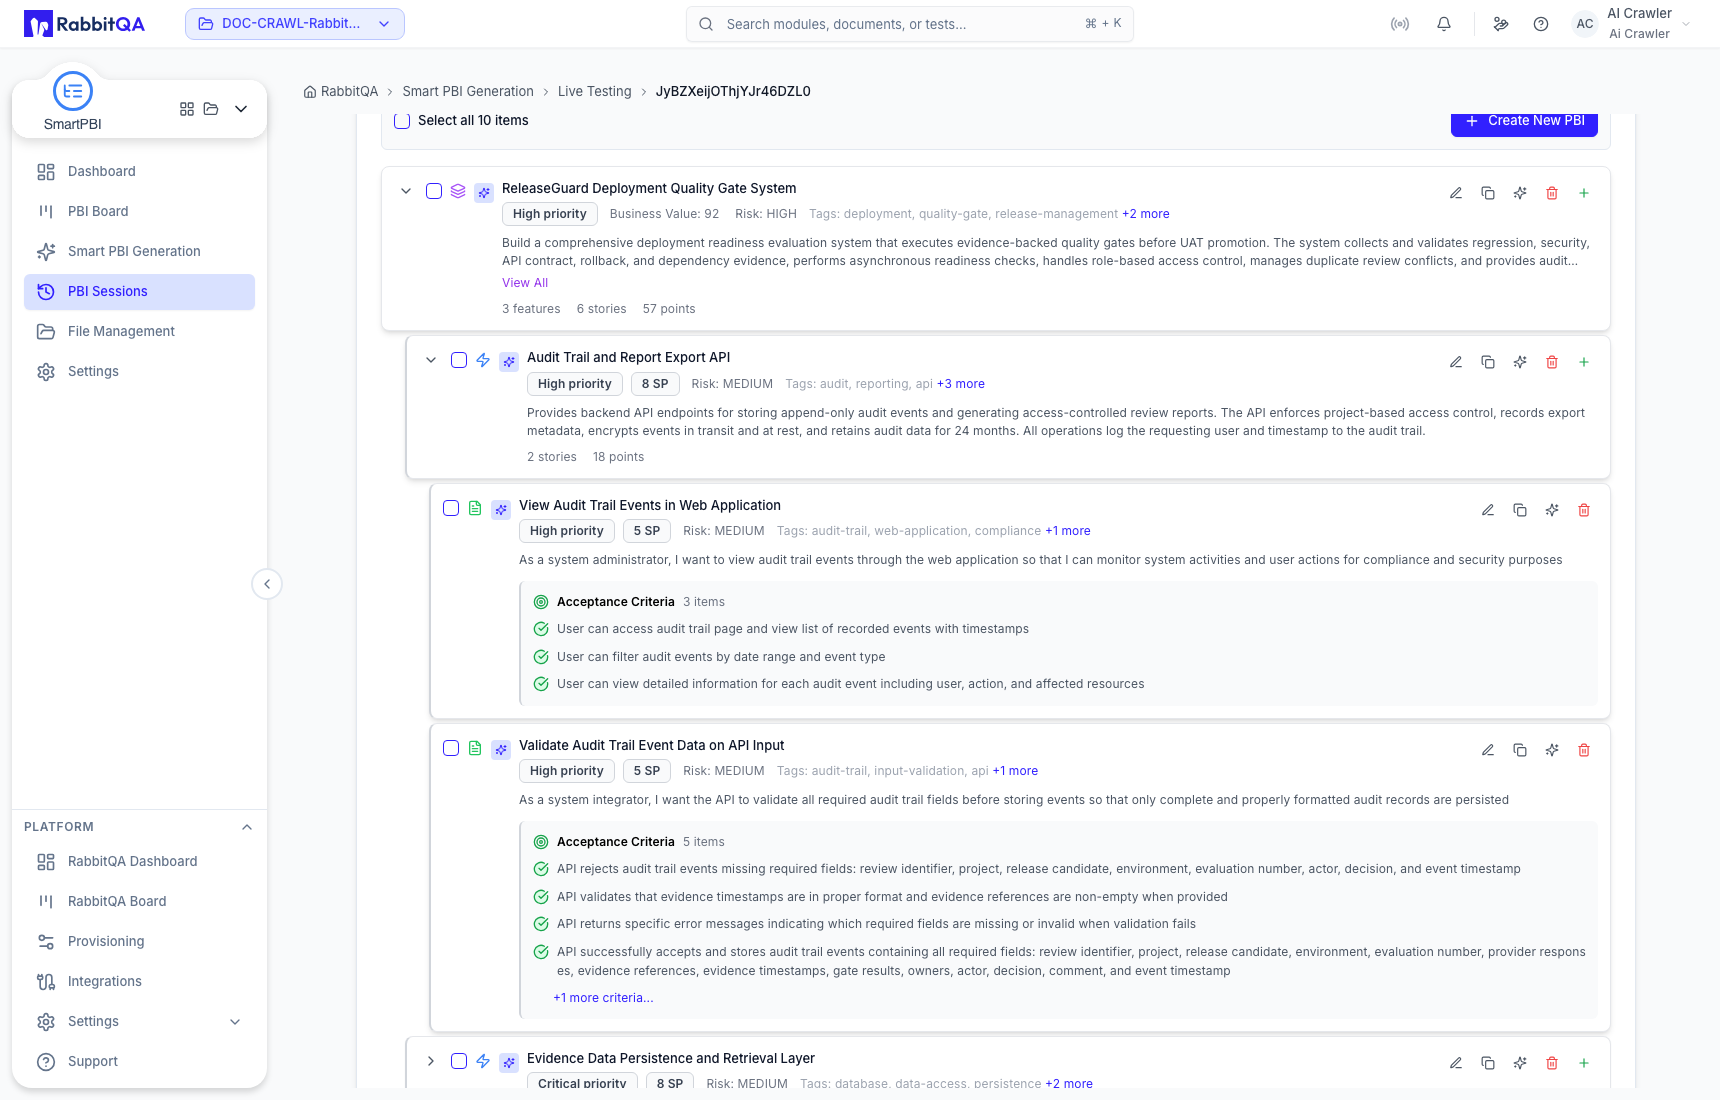
Check at least:
- every item stays within the supplied scope;
- titles and descriptions are specific enough for the intended audience;
- Features have the correct Epic and User Stories have the correct Feature;
- Acceptance Criteria are observable and testable;
- priority, risk, story points, business value, and tags are sensible;
- counts and hierarchy depth match the configured intent.
5. Edit, add, or remove an item
The edit drawer changes fields according to PBI type:
- A User Story includes title, description, story points, priority, risk, tags, and individual Acceptance Criteria.
- A Feature maintains its applicable delivery fields and child relationships.
- An Epic includes business value, priority, risk, tags, title, and description; it does not use User Story-only fields.
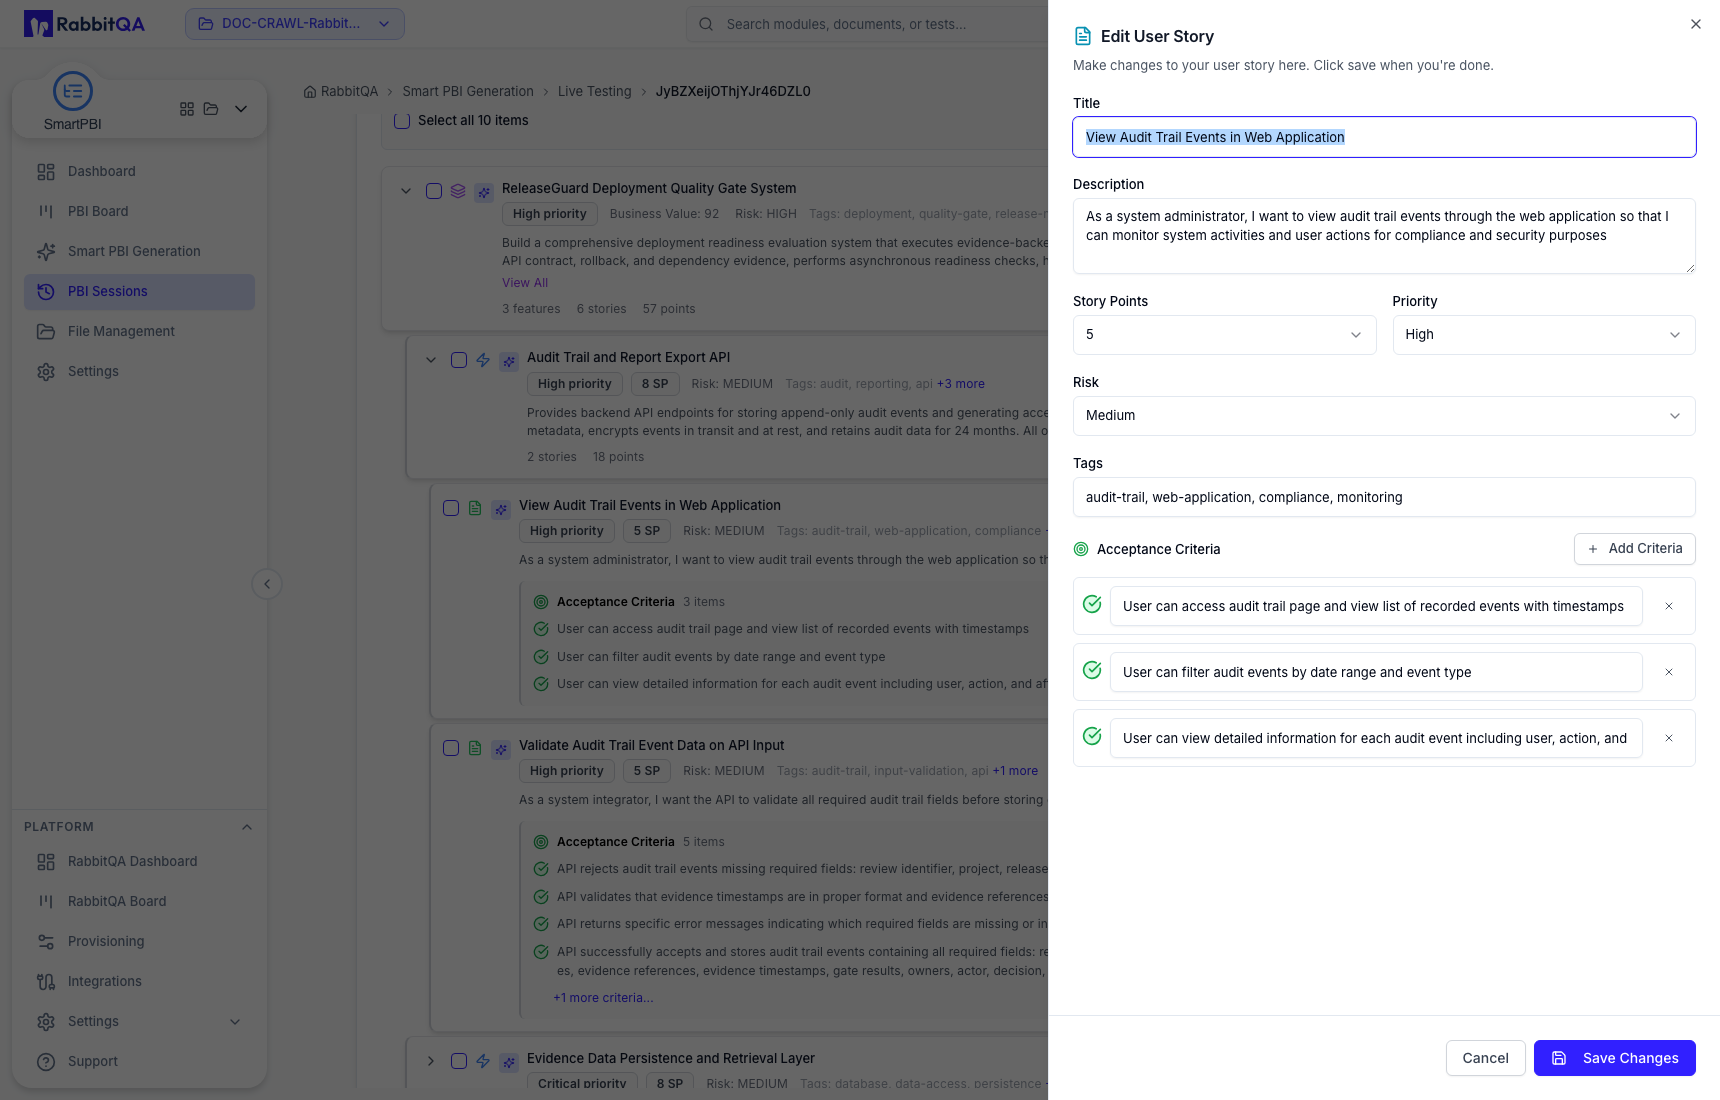
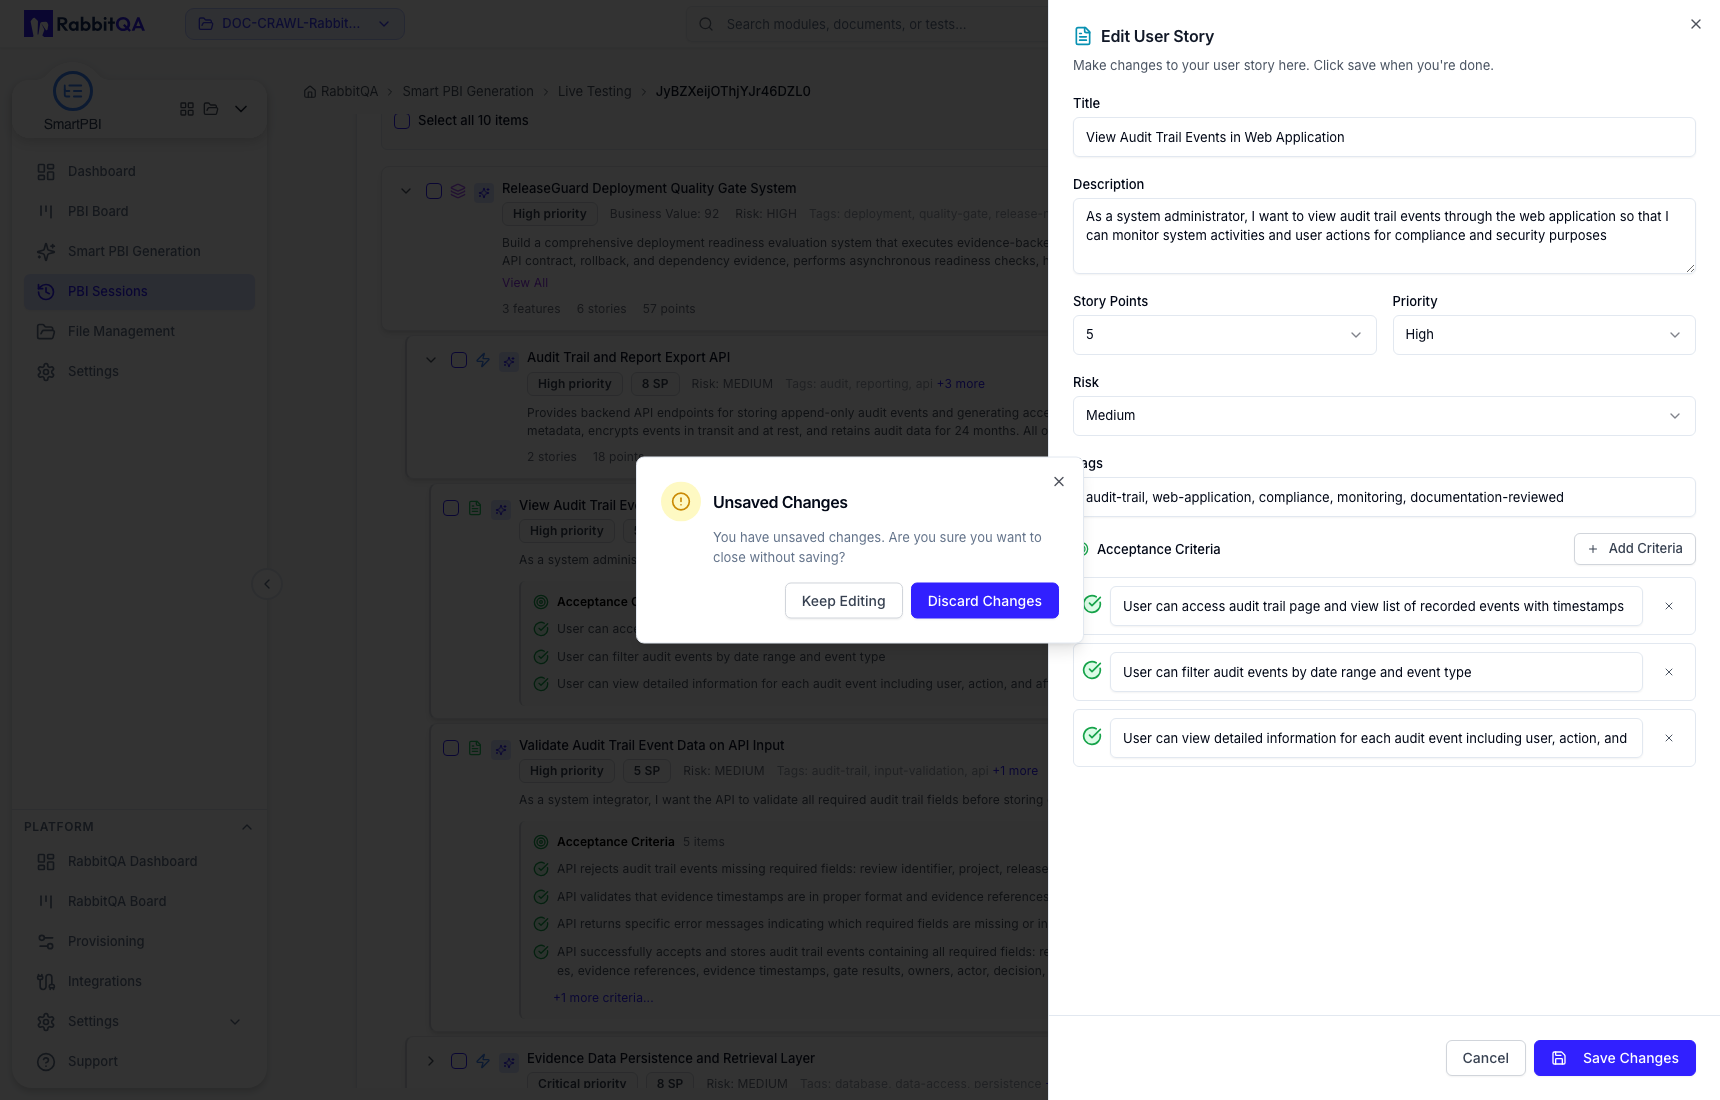
Unsaved edits trigger a confirmation when you try to close the drawer. Choose deliberately so an intended correction is not discarded.
Use a Feature's add-child action to create a User Story under that Feature. Use Create New PBI for a new top-level Epic, Feature, or User Story. Verify the selected type and parent before saving.
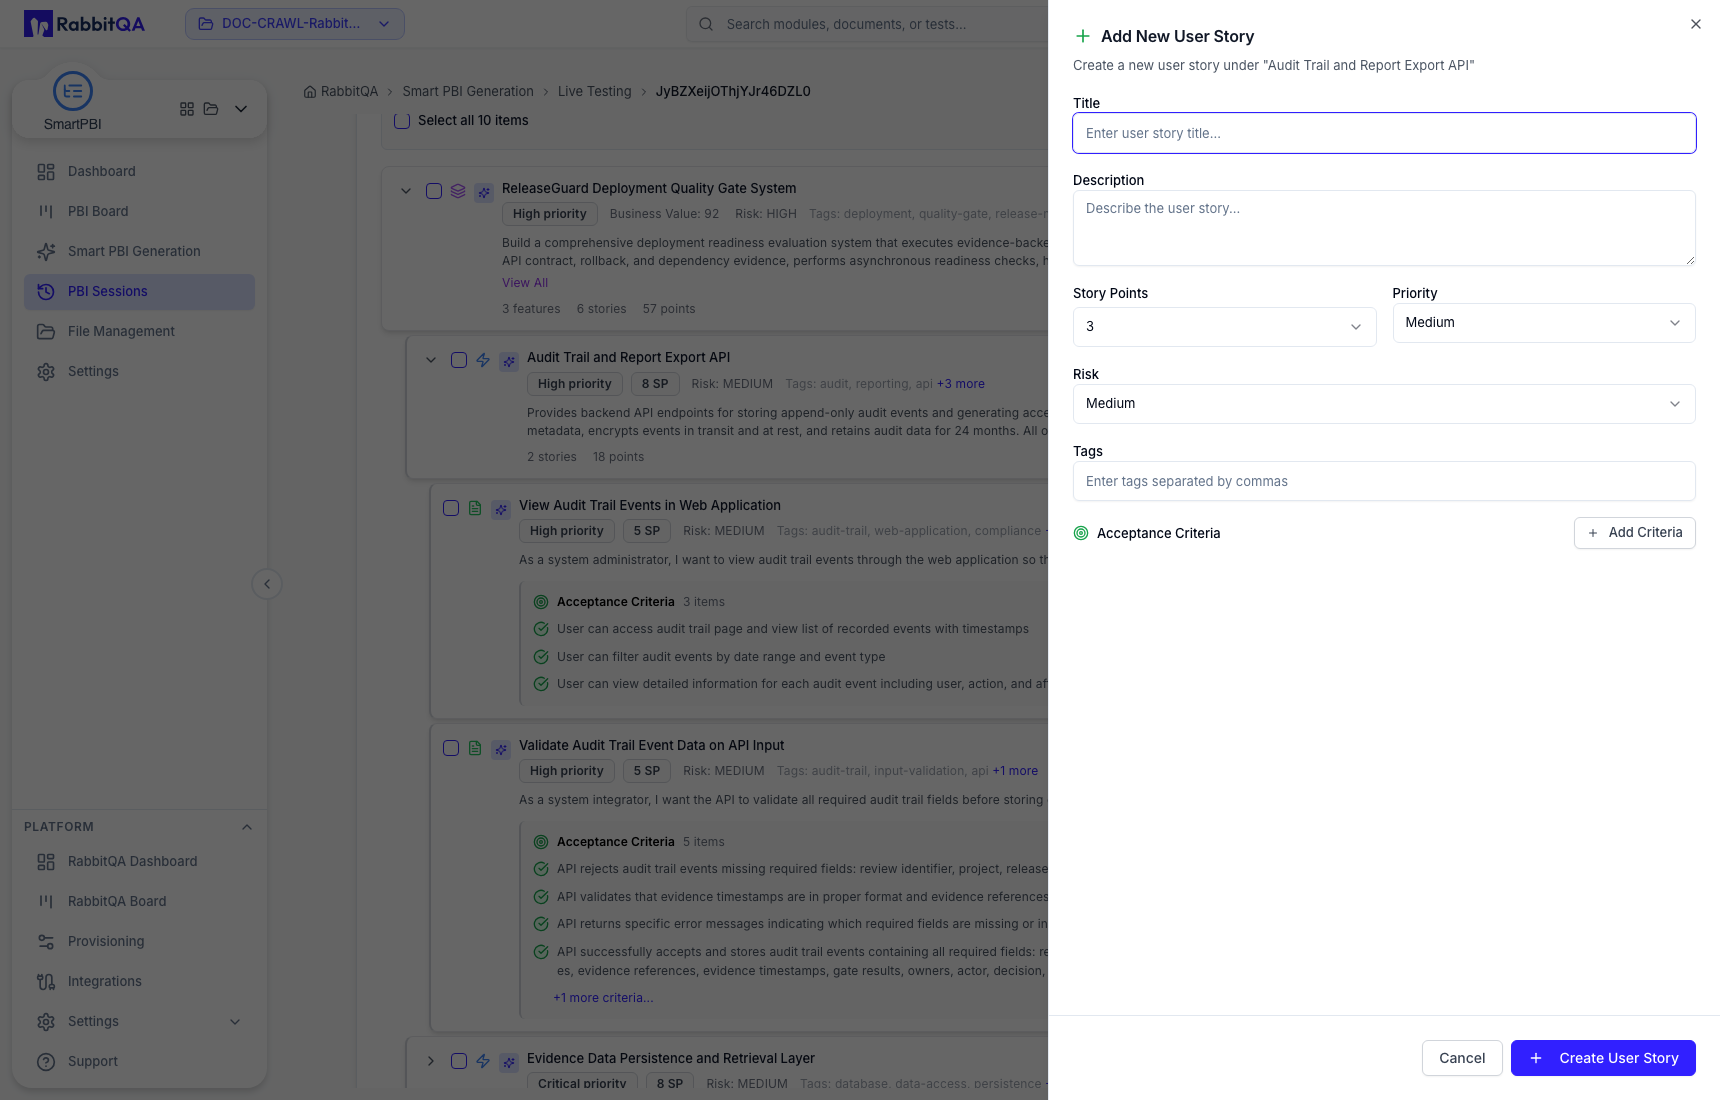
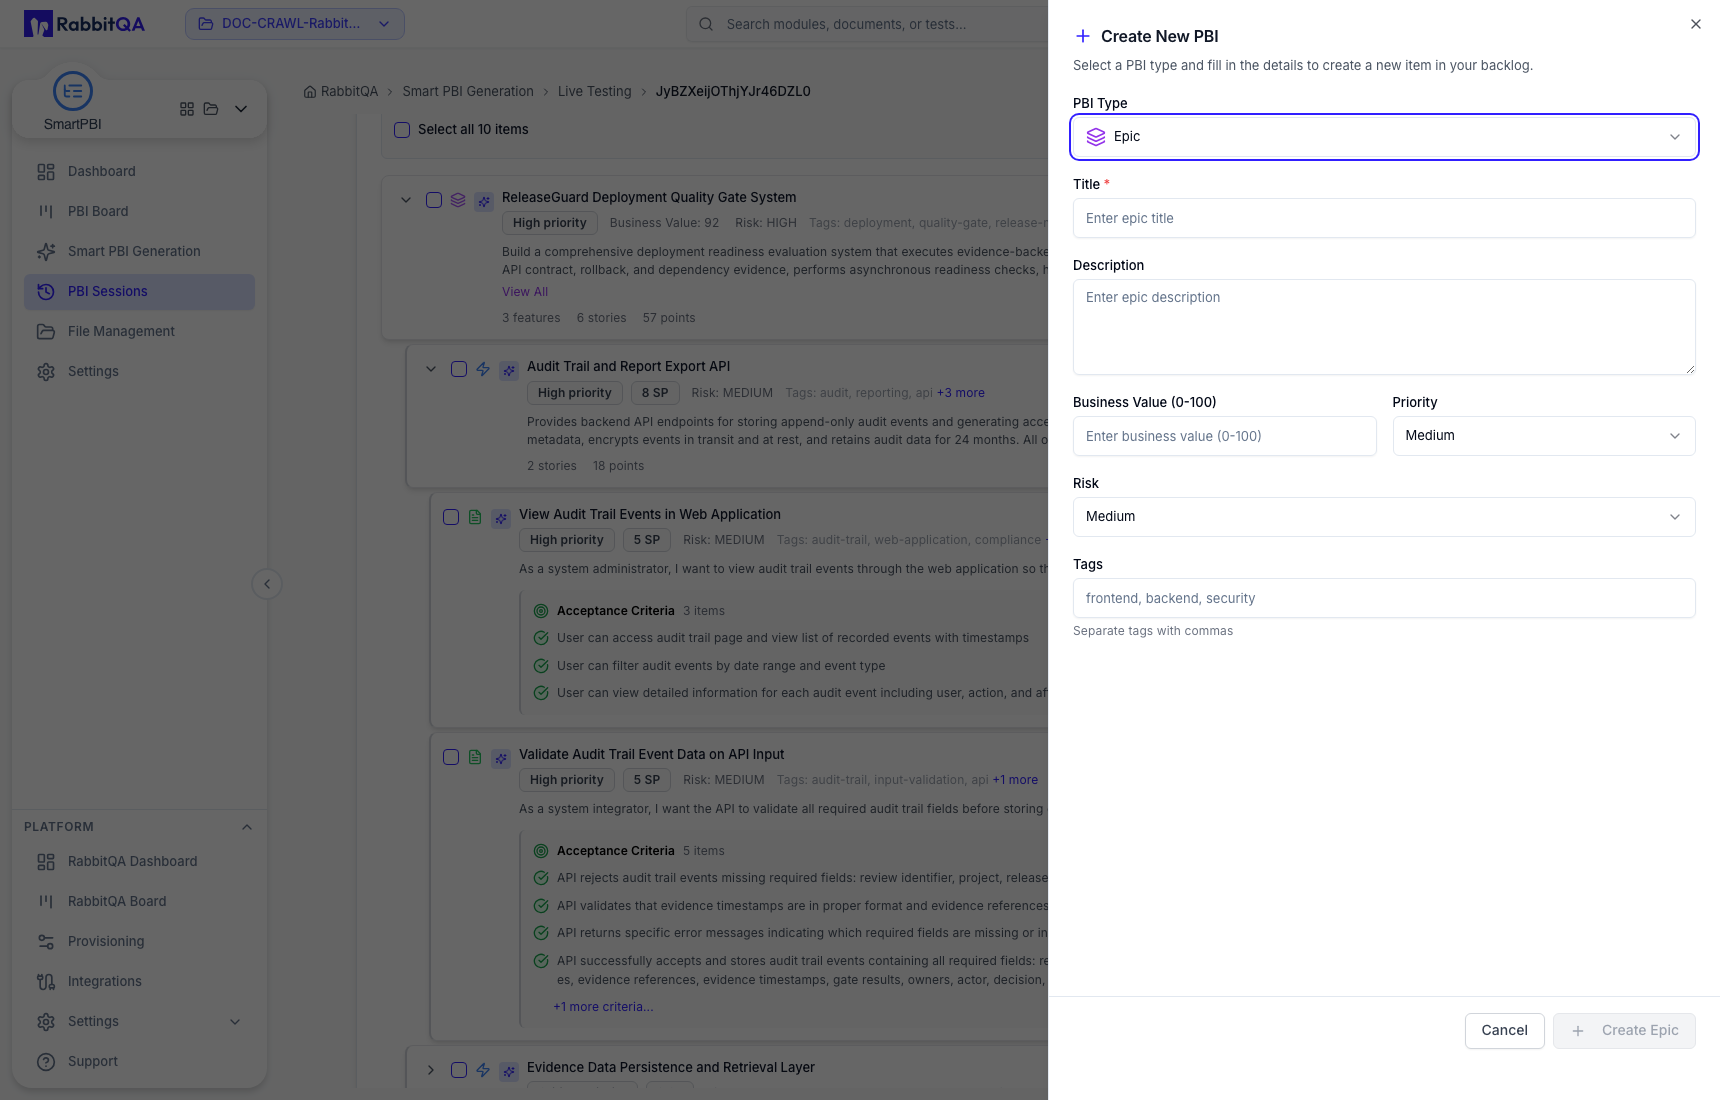
Delete is permanent for the generated item and requires confirmation. Read the item title in the dialog before proceeding.
6. Regenerate one PBI
Regeneration proposes a replacement for one selected item without regenerating unrelated PBIs.
- Open the item's Regenerate action.
- Write a specific instruction describing what must improve.
- Start regeneration and wait for the comparison to load.
- Compare the Original and Regenerated versions across title, description, estimation, delivery fields, tags, and Acceptance Criteria.
- Select the version to keep.
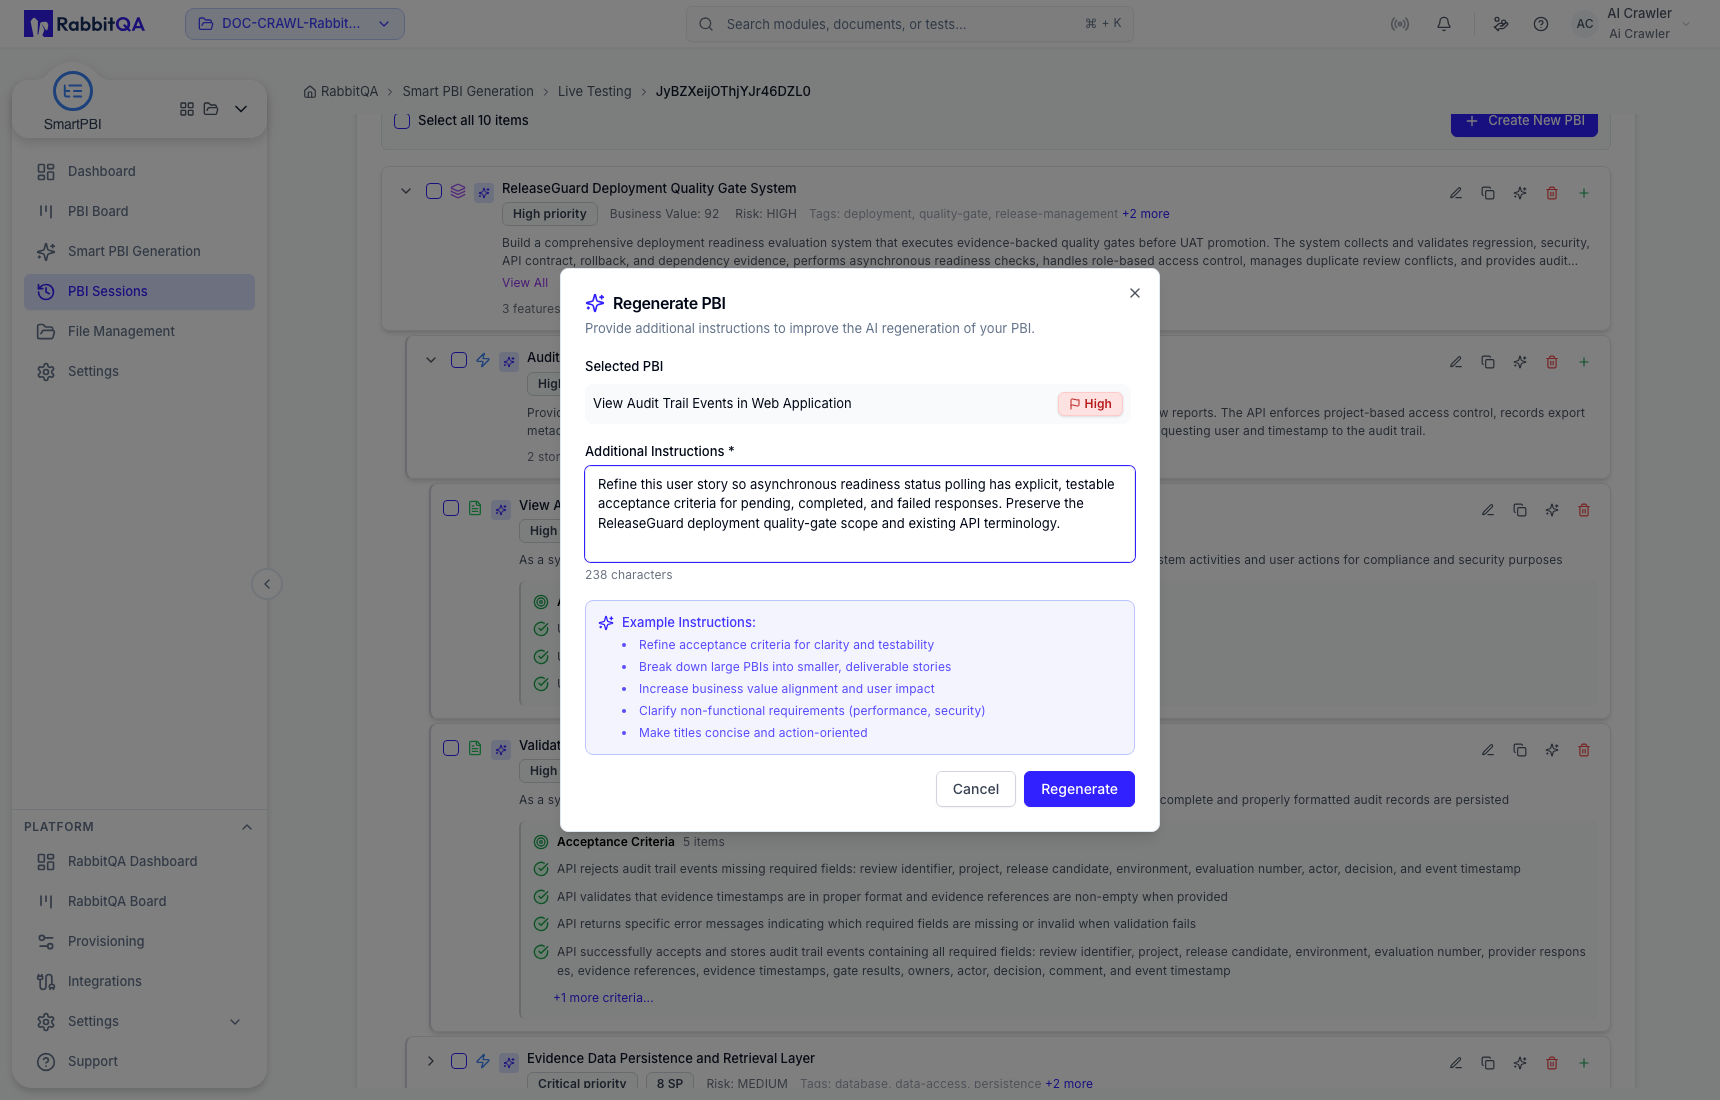
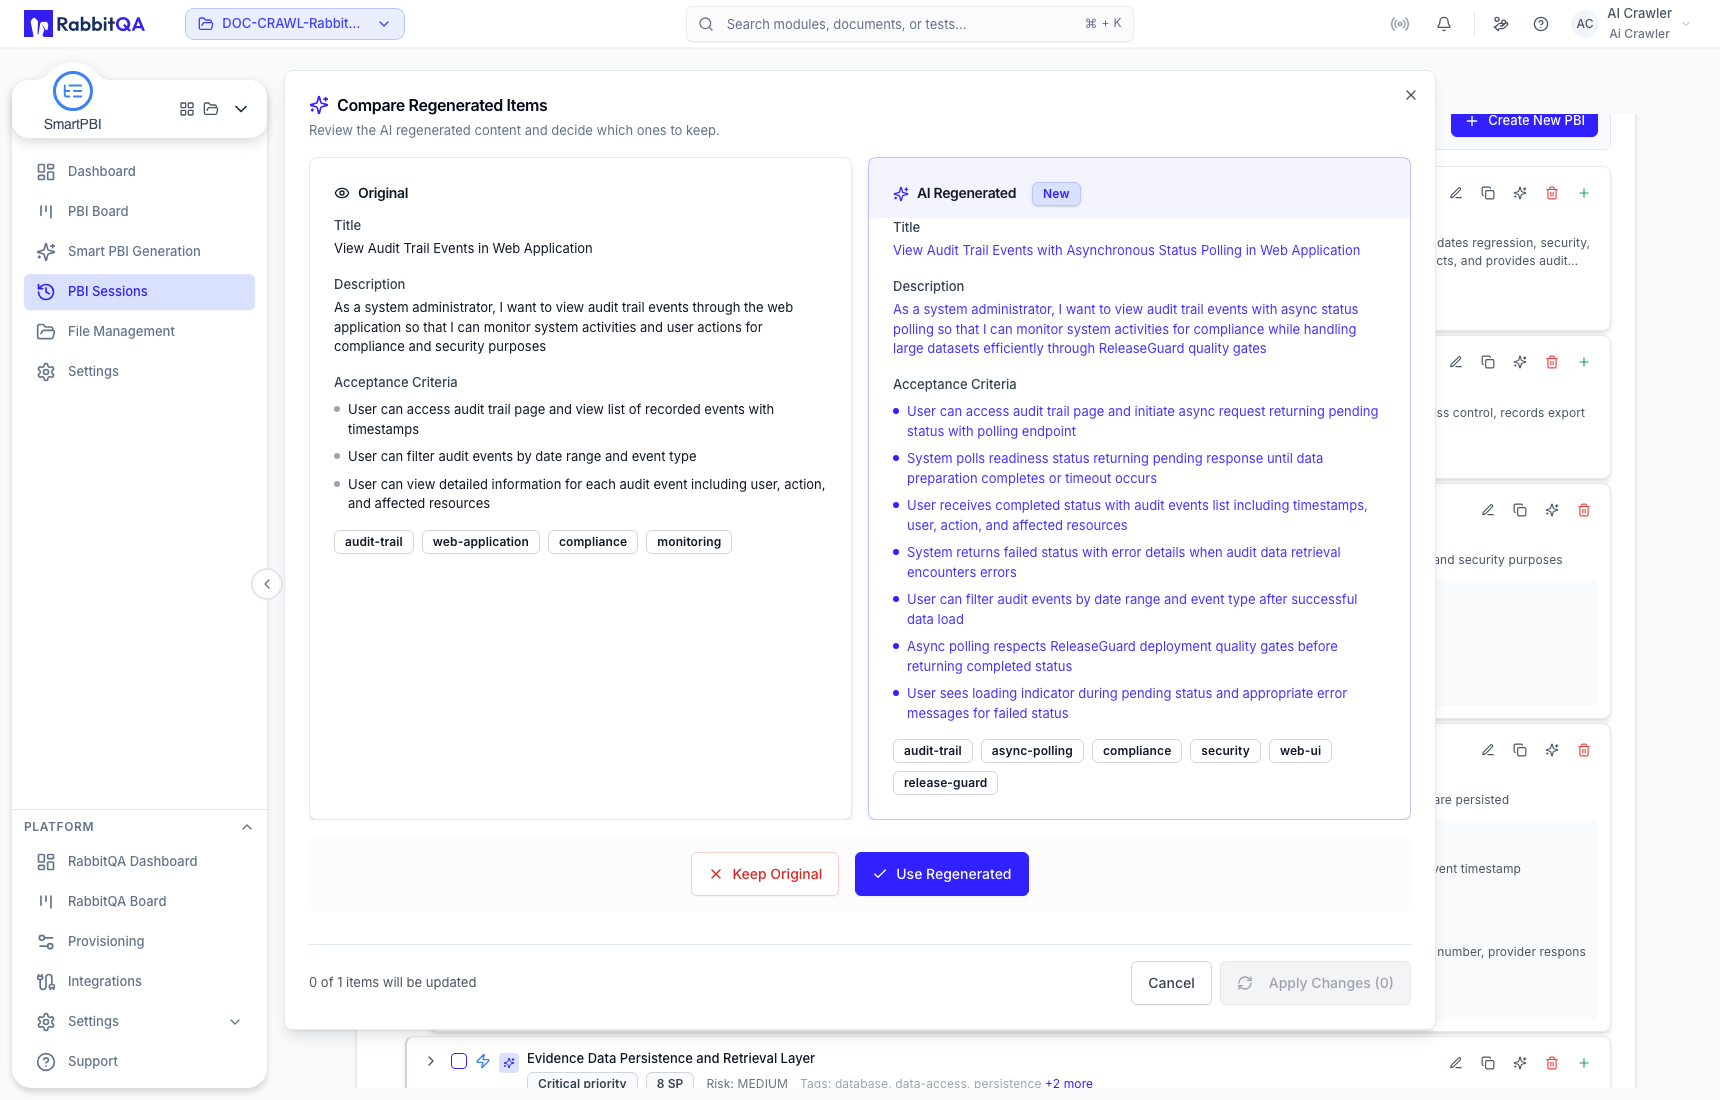
Selecting Original retains the current item. Closing the comparison without accepting the regenerated version must not be described as an update.
7. Export selected items
Open Export, choose the target, and review the item tree. Excel export lets you include the whole hierarchy or a selected subset.
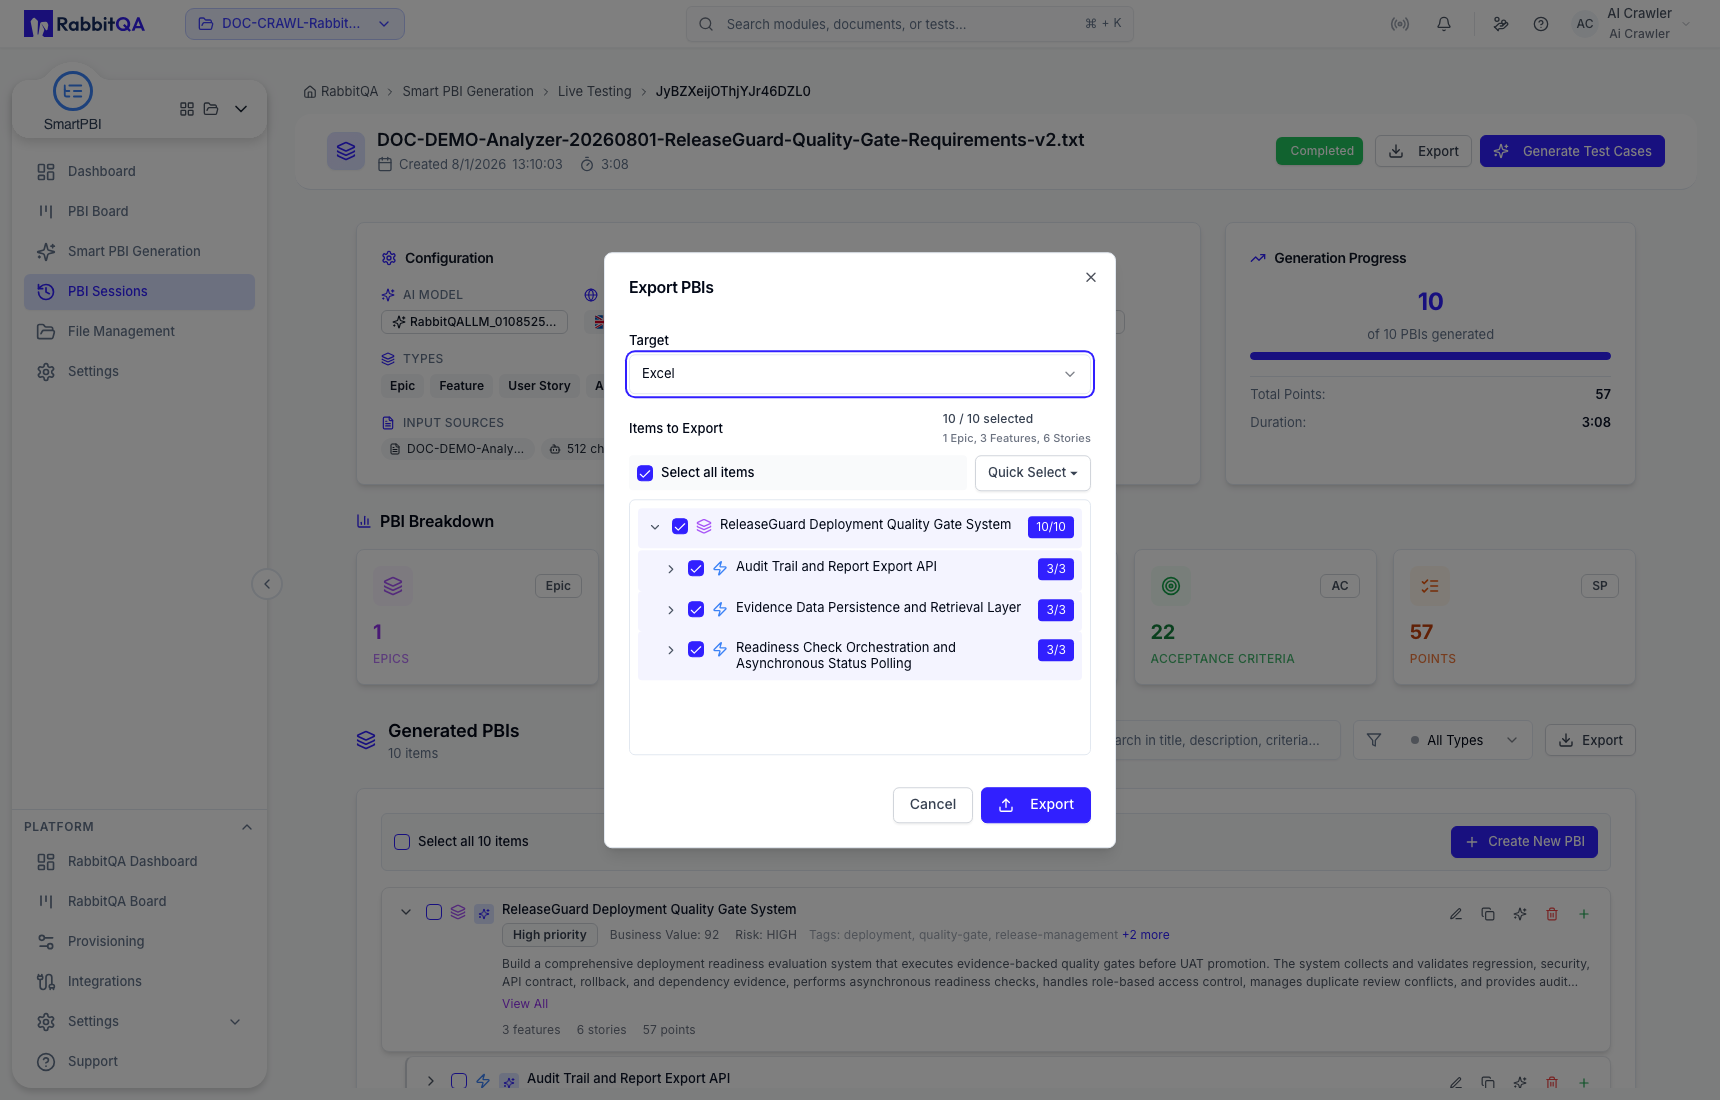
Wait for the success notification and browser download before treating the export as complete.
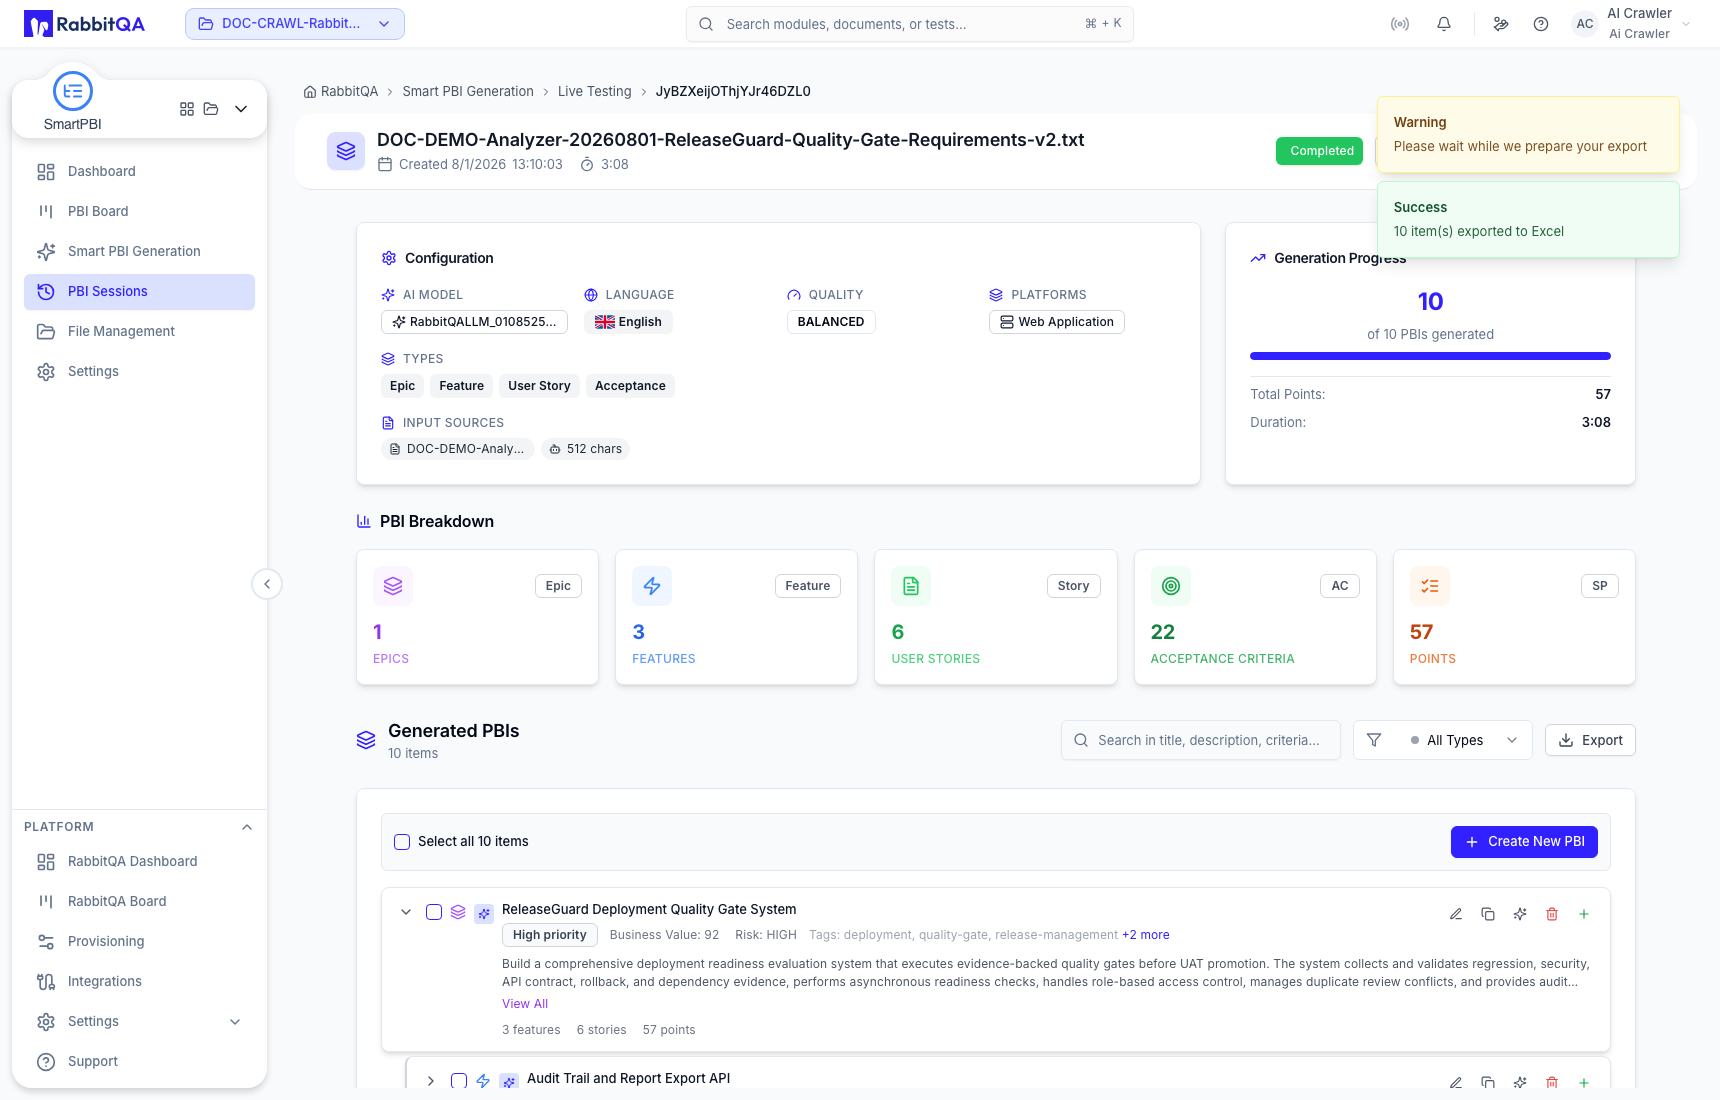
Jira and Azure DevOps may appear as targets, but they require valid project integration and mapping configuration. The verified workflow confirms Excel export; it does not confirm Jira or Azure DevOps export for an unconfigured project. PDF is not a current PBI export workflow.
8. Transfer the hierarchy to the PBI Board
Select Move to PBI Board, review the selected items and parent-child structure, and confirm the transfer. Transfer only reviewed items; board maintenance should not become the first quality gate.
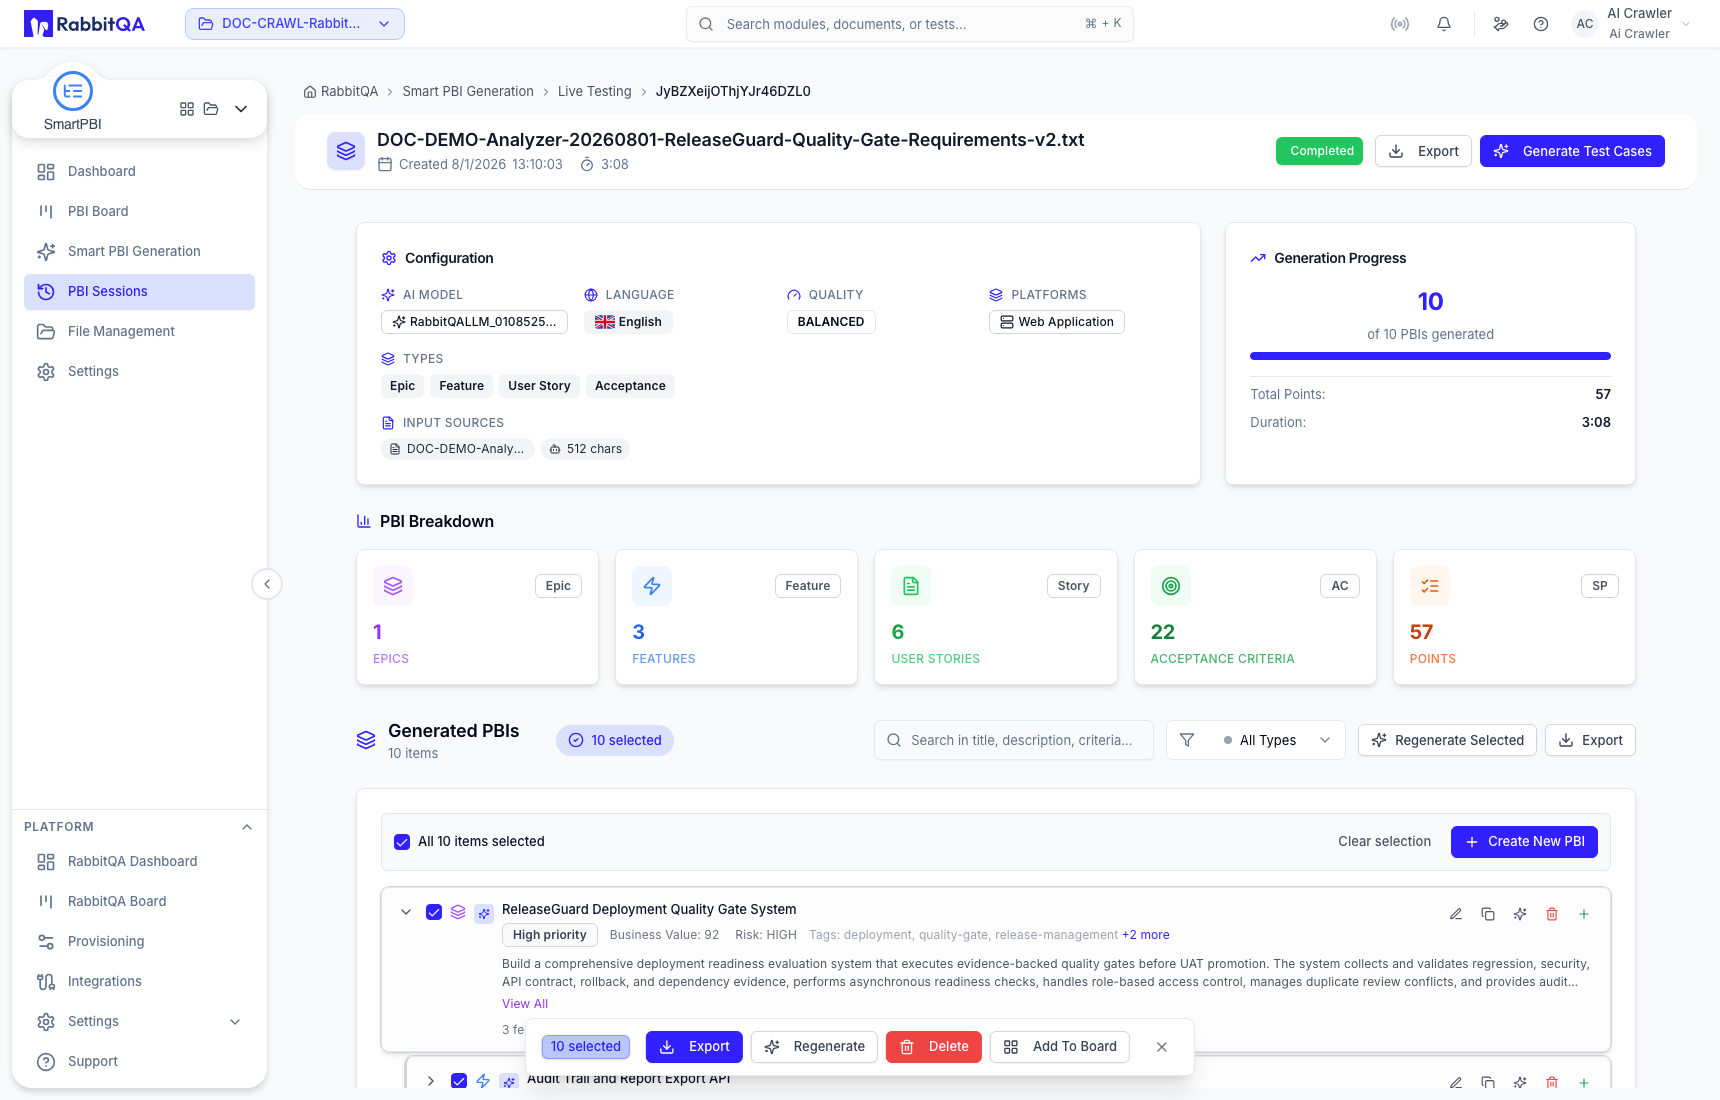
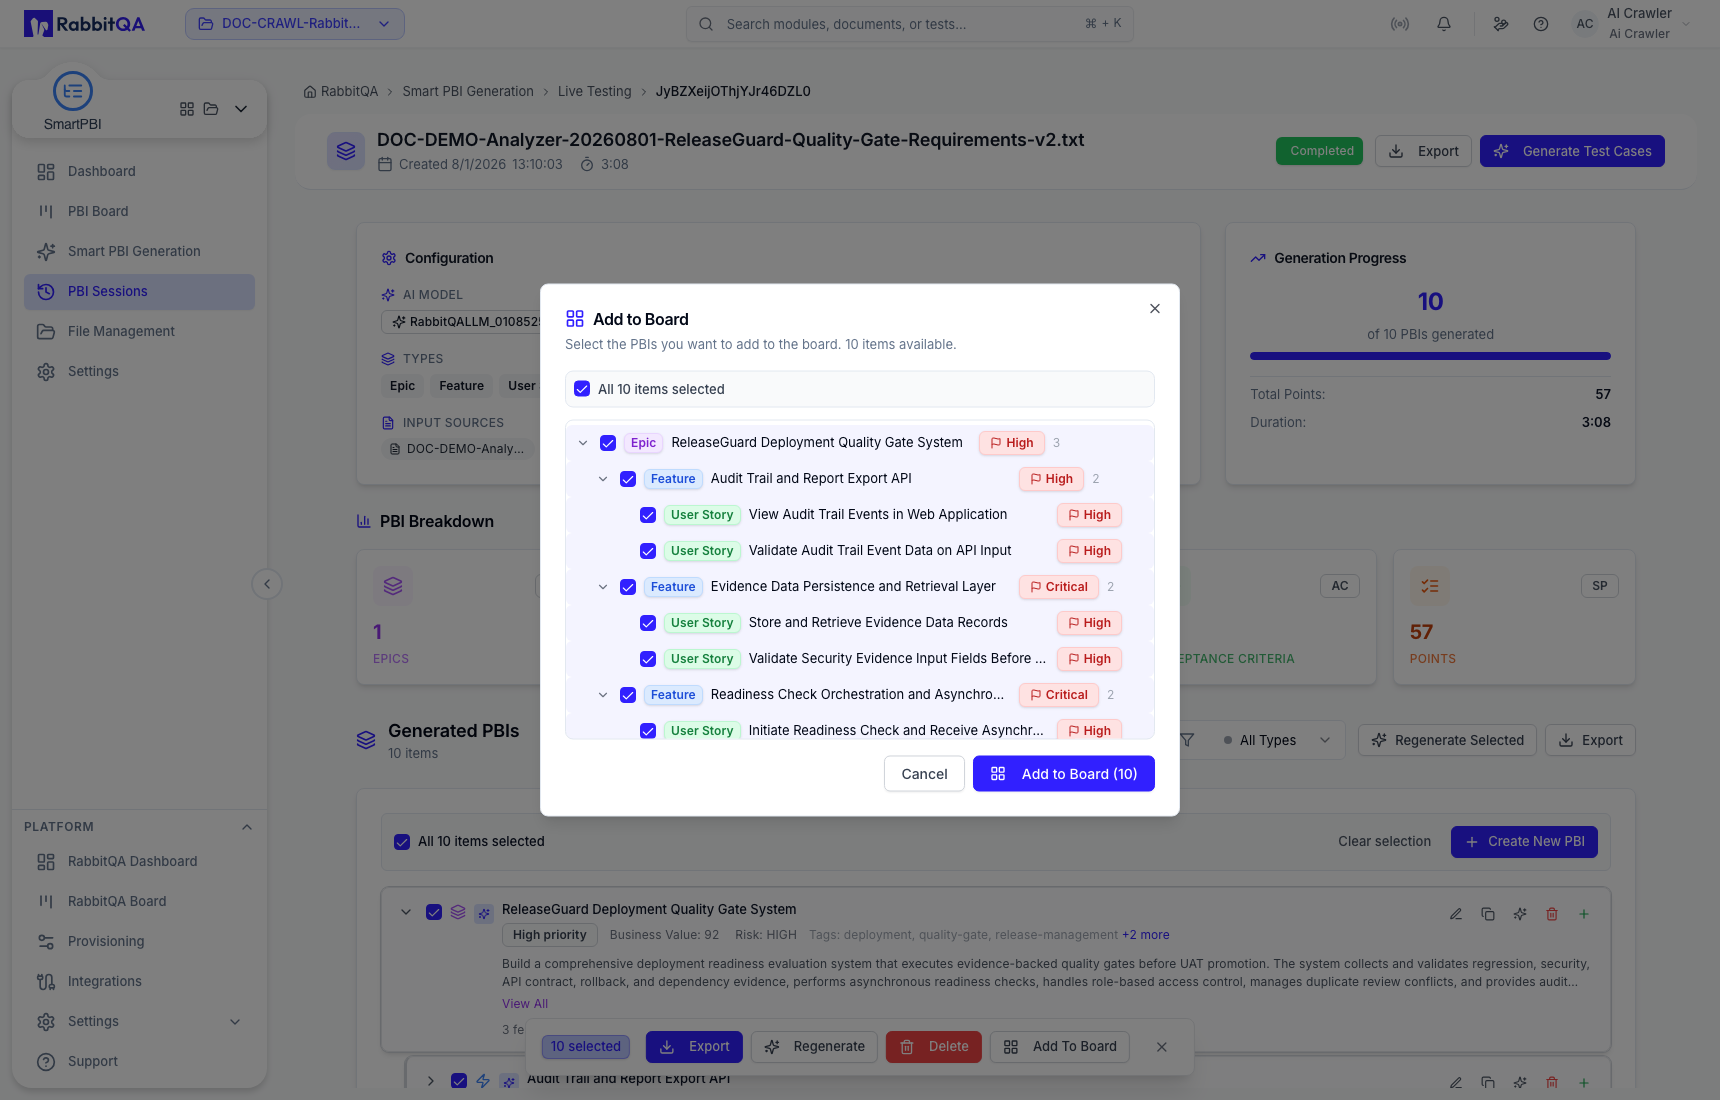
The success state means the selected hierarchy was copied to the board. Continue with PBI Board to maintain workflow and delivery fields.
Correct use
- Keep the scope focused and remove unrelated source context before generation.
- Prefer the latest appropriate analyzed version, not merely the newest filename.
- Review AI output before export, board transfer, or CaseWriter handoff.
- Use individual regeneration for a local correction; use a new session when source or configuration changes materially.
- Reuse a session configuration or preset only after checking that its model, language, platform, count, and hierarchy still fit the new work.
