Quick Start
Get started with RabbitQA Platform in minutes.
Step 1: Explore the Dashboard
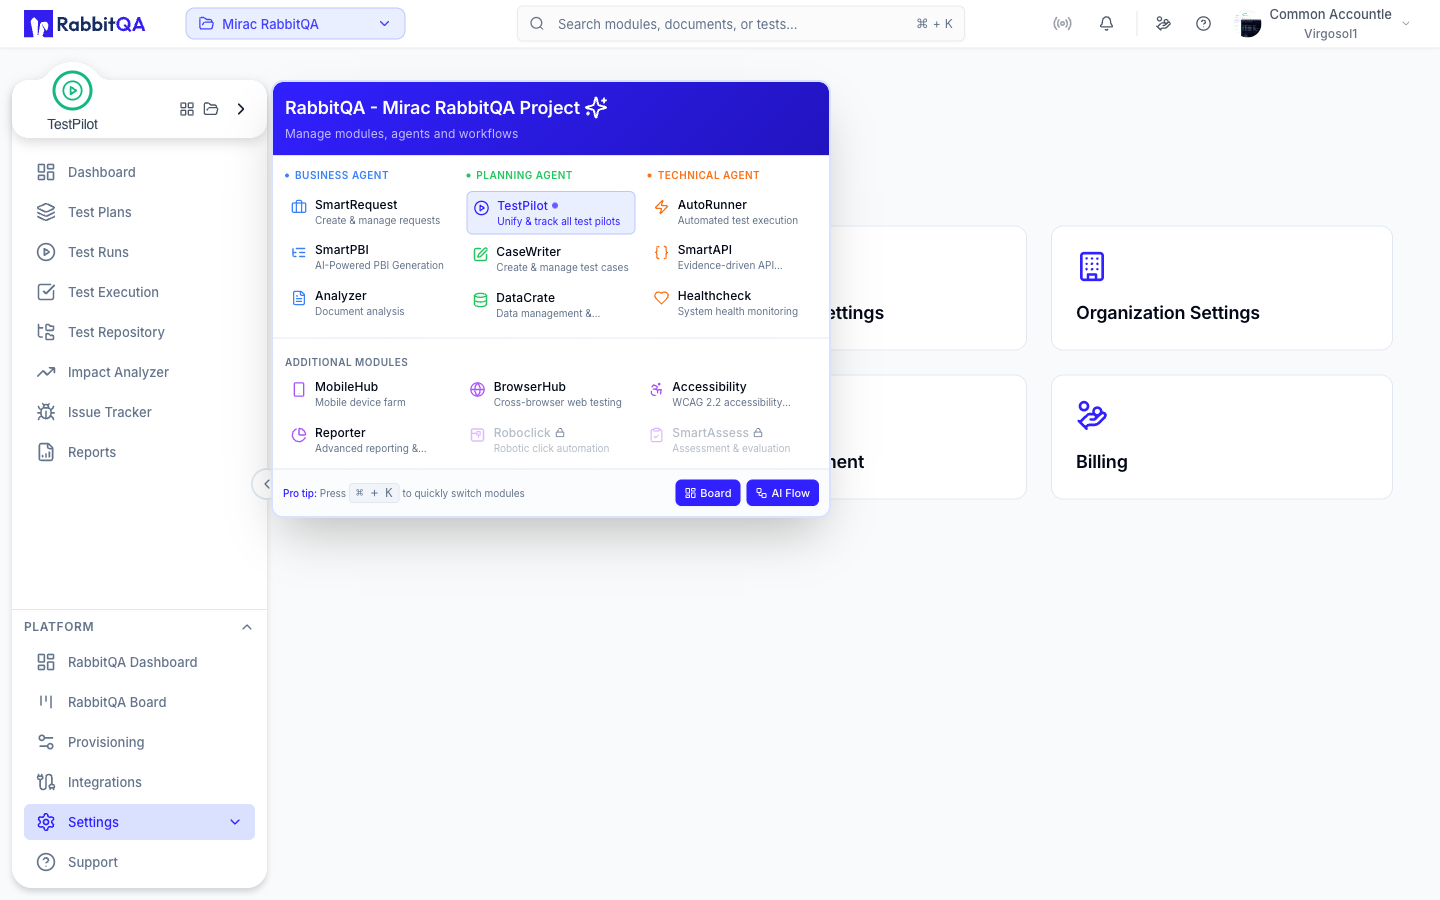
Navigate to RabbitQA Dashboard from the Platform section at the bottom of the sidebar. The summary cards report the scope of your organization: Projects (workspaces), Product Provisioning (provisioned products), Teams (active teams), and Users (company members).
Below the cards, Module Usage lists every module with its current status, so you can see at a glance which modules are active for your organization. Platform Quick Actions sits alongside it with shortcuts into the most common tasks — Quick Start, Generate Test Case, Generate PBI, and Run Test.
Step 2: Configure Integrations
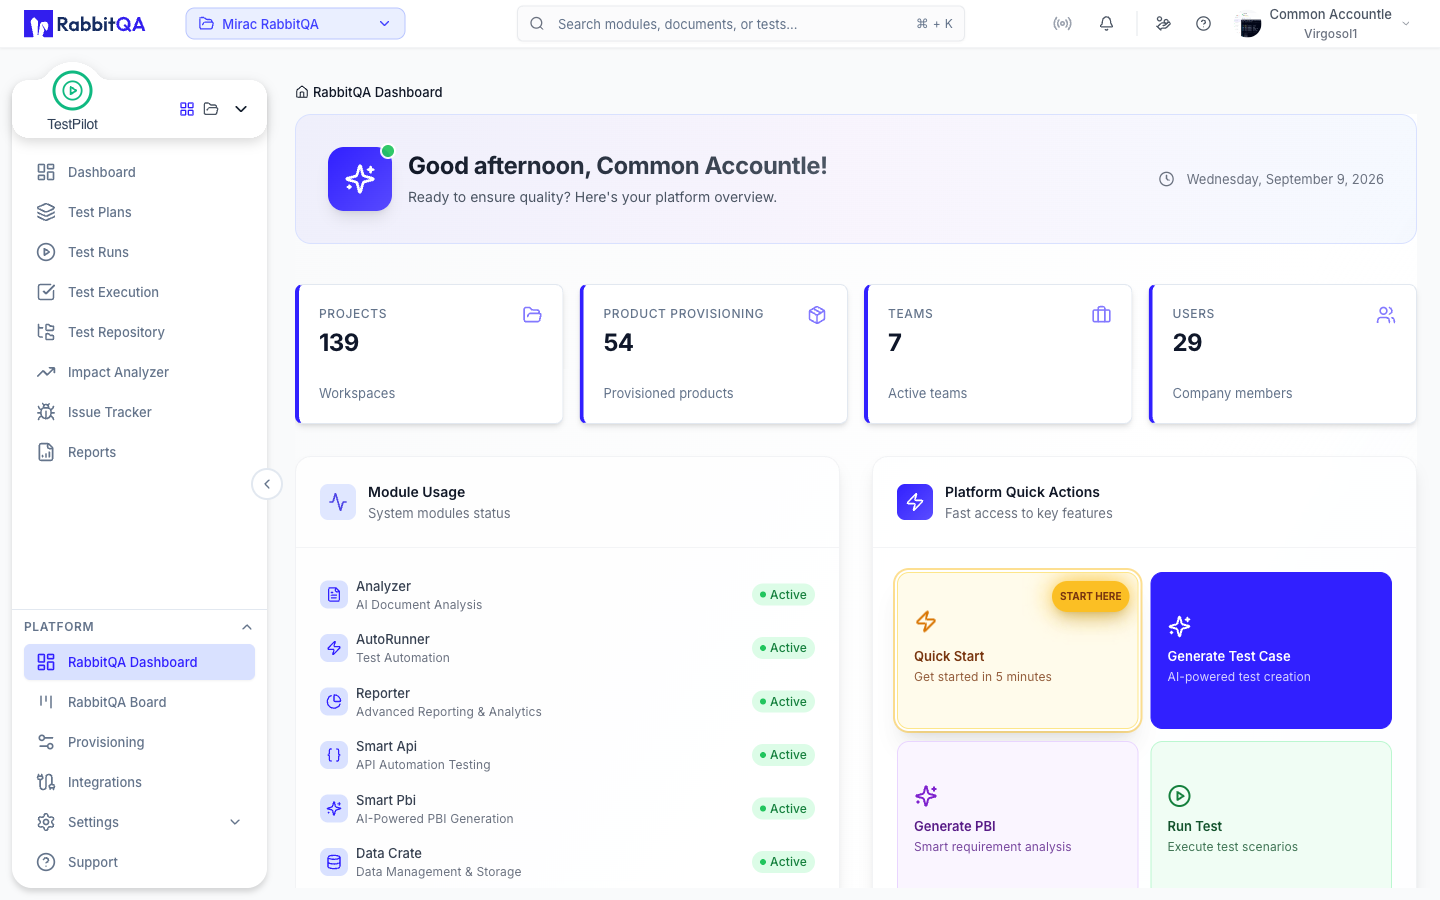
Go to the Integrations page to connect RabbitQA to the tools your team already uses. Integrations are presented as a catalogue of cards; use the search box, the All Categories filter, and the All Status filter to find a connector, and the list/grid toggle to change how the catalogue is laid out.
Each card shows its current state. A connector marked Available offers a Connect button that walks you through its credentials; one already marked Connected offers Manage instead, so you can review or revise the connection. Jira, Azure DevOps, Confluence, ClickUp, Linear, TestRail, Figma, and source control providers are all configured from this page.
Step 3: Configure Platform Settings
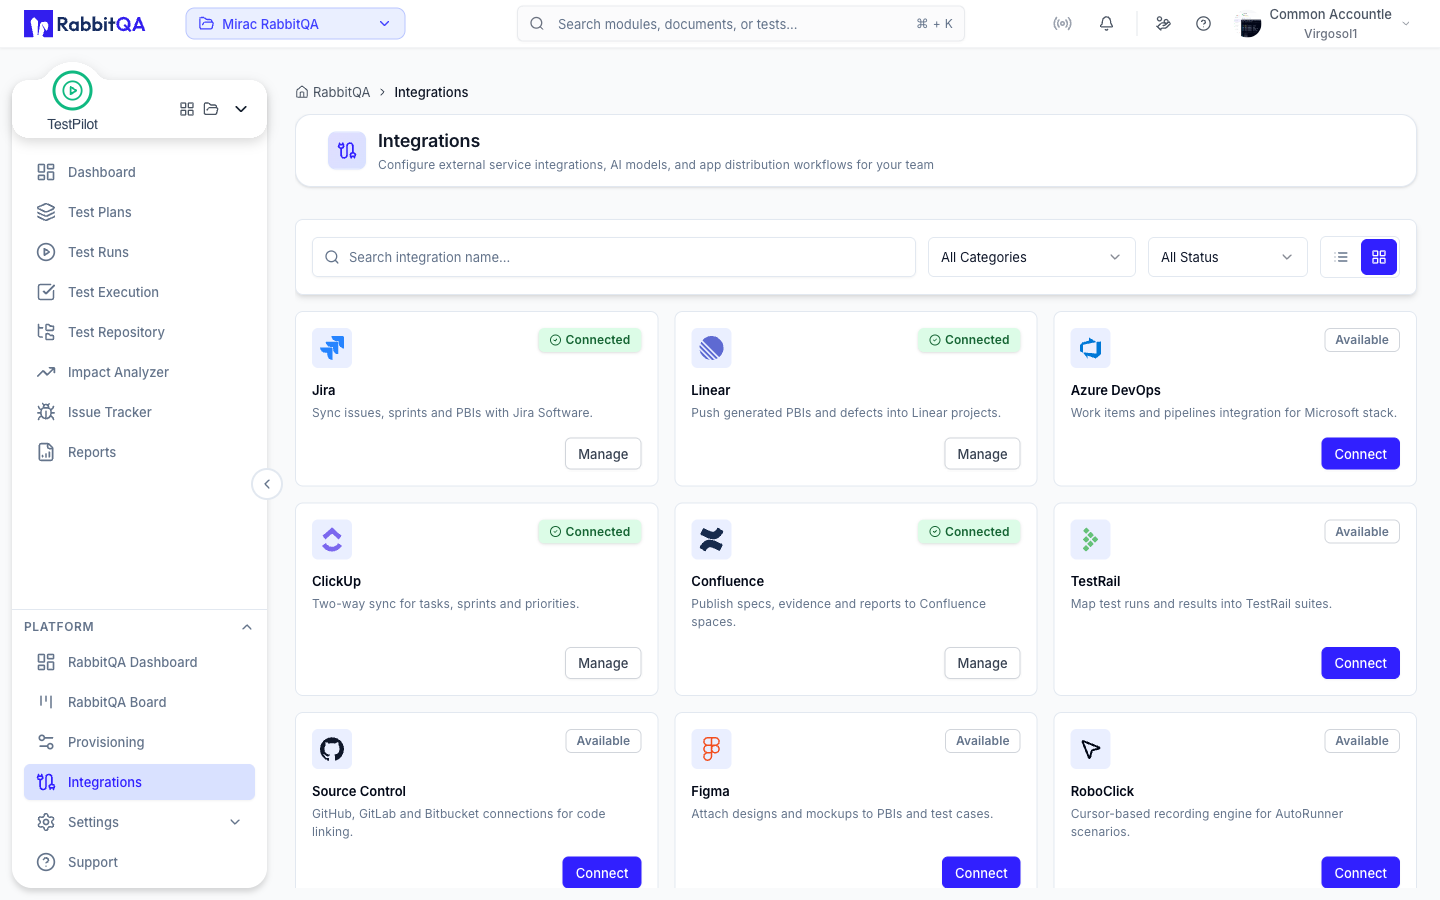
Visit the Settings page. Settings is a hub of six areas, each opening from its own card:
- Profile Settings — your own account details
- Notification Settings — how and when RabbitQA notifies you
- Organization Settings — organization-wide preferences
- Team Management — add team members and manage their membership
- Role Management — define roles and the permissions attached to them
- Billing — subscription and usage
Work through Organization, Team Management, and Role Management first; those three determine what the rest of your team can see and do.
Step 4: Access Modules
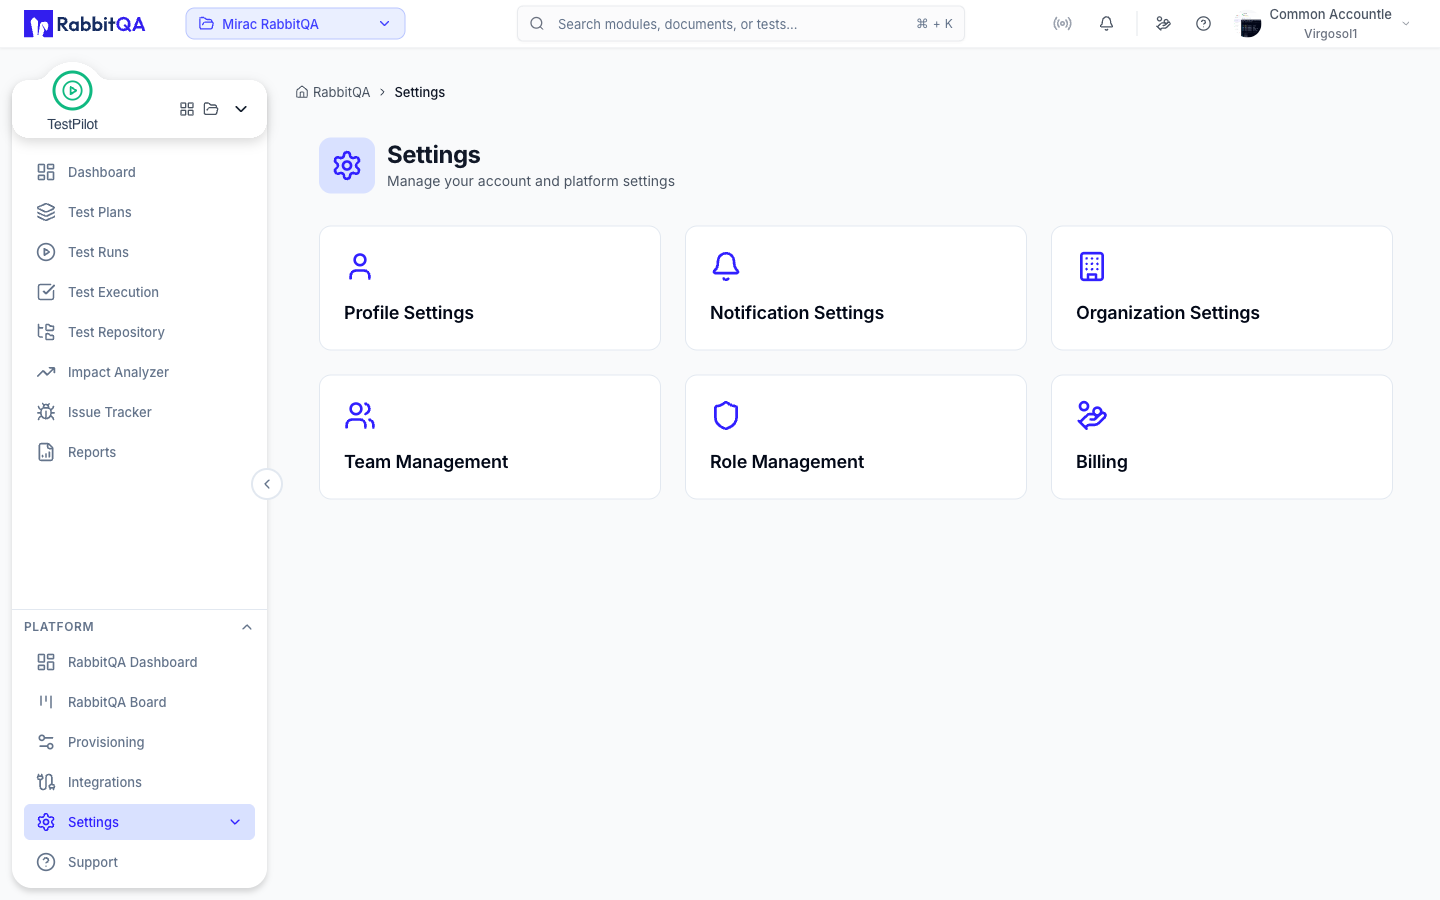
Open the module switcher at the top of the left sidebar to move between modules. The panel groups them by the kind of work they do:
- Business Agent — SmartRequest, SmartPBI, and Analyzer
- Planning Agent — TestPilot, CaseWriter, and DataCrate
- Technical Agent — AutoRunner, SmartAPI, and Healthcheck
- Additional Modules — MobileHub, BrowserHub, Accessibility, Reporter, and others
Modules your organization has not licensed appear dimmed with a padlock. Selecting a module swaps the upper half of the sidebar for that module's own navigation, while the Platform section stays pinned below it.
Press ⌘ + K (Ctrl + K on Windows and Linux) to switch modules without opening the panel.
A typical first pass runs Analyzer to upload and analyze documents, then CaseWriter to create test cases, and finally TestPilot to execute them.