BDD Scenarios
Author behavior-driven test scenarios using Gherkin syntax, organize them in a hierarchical folder structure, and manage execution across your automation projects.
What are BDD Scenarios?
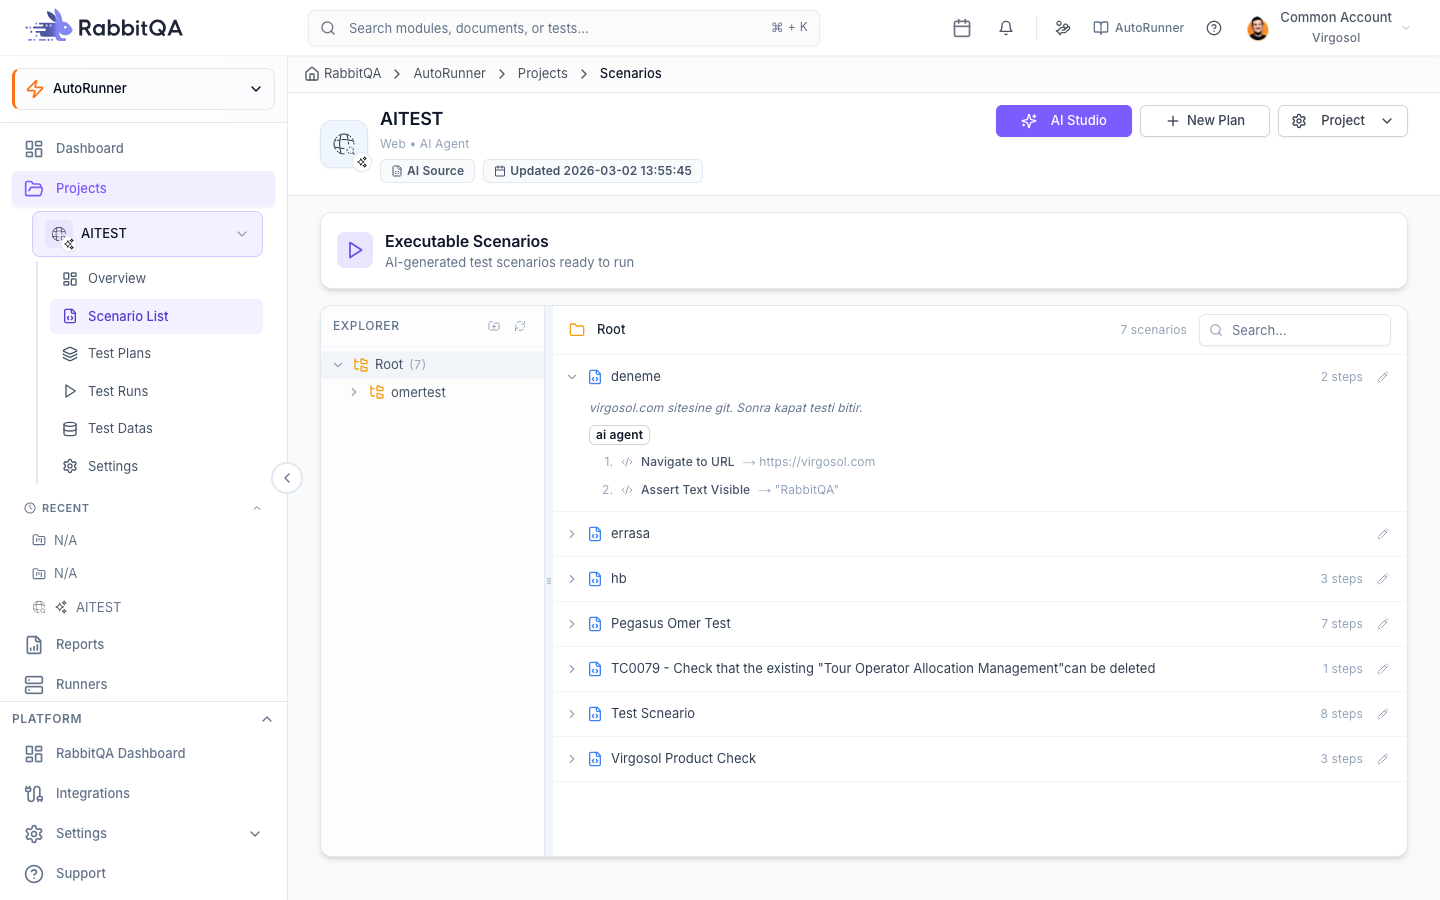
BDD (Behavior-Driven Development) scenarios describe application behavior in plain language using the Gherkin syntax. Each scenario defines a set of preconditions, actions, and expected outcomes that AutoRunner translates into executable test steps. Scenarios live inside test suites and are organized in a tree structure of folders and files.
Gherkin Syntax
AutoRunner uses standard Gherkin syntax for scenario authoring. Every scenario belongs to a Feature and follows the Given/When/Then pattern:
Feature: Shopping Cart Checkout

  Scenario: Apply a valid discount code
    Given the cart contains 3 items totaling $150.00
    When I enter the discount code "SAVE20"
    And I click the Apply button
    Then the total should be $120.00
    And a success message should appear
| Keyword | Purpose |
|---|---|
| Feature | Groups related scenarios under a single capability |
| Scenario | Defines one discrete test case |
| Given | Establishes the initial state or preconditions |
| When | Describes the action or event under test |
| Then | States the expected outcome |
| And / But | Chains additional conditions within a step block |
| Scenario Outline | Parameterized scenario with an Examples table |
| Background | Shared preconditions executed before every scenario in a feature |
Use Scenario Outline with an Examples table to run the same scenario with multiple data sets without duplicating steps.
Monaco Editor
AutoRunner provides a built-in Monaco editor for writing and editing Gherkin feature files. The editor includes:
- Syntax highlighting — Gherkin keywords (Feature, Scenario, Given, When, Then, And, But) are color-coded for readability.
- Auto-complete — Start typing a Gherkin keyword and the editor suggests completions, reducing typos and speeding up authoring.
- Line numbers and minimap — Navigate large feature files quickly.
- Error indicators — Malformed syntax is underlined with inline diagnostics.
- Dark mode support — The editor respects the application theme setting.
Scenario Tree
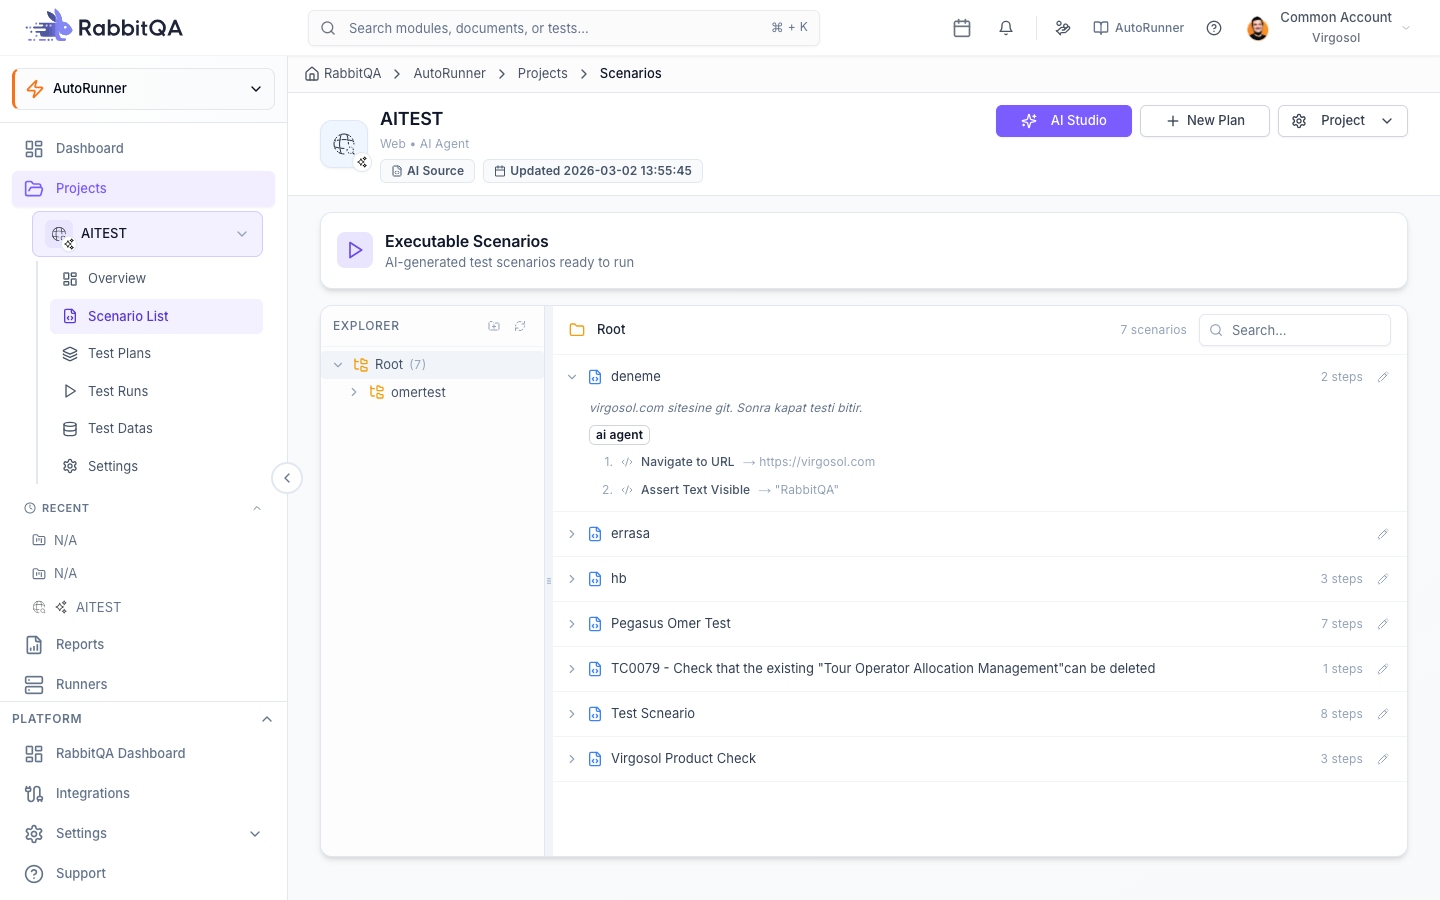
Scenarios are organized in a hierarchical tree structure of folders and feature files, displayed in the left sidebar.
Folder Organization
Use the FolderTreeSelector to create a multi-level folder hierarchy that mirrors your application structure:
- Right-click the tree to create folders or create feature files.
- Drag and drop folders and files to reorganize the tree. The order persists across sessions.
- Rename or delete folders from the context menu.
- Expand and collapse folders to focus on the area you are working on.
Structure your tree by application area (e.g., Authentication, Checkout, Admin) or by test type (e.g., Smoke, Regression, E2E) depending on your team's workflow.
Search and Filtering
Use the search bar above the scenario tree to locate scenarios quickly:
- Text search — Filter scenarios by name or step content.
- Tag filter — Narrow results to scenarios with specific tags.
- Status filter — Show only scenarios in a particular execution state.
Step Management
Each scenario is composed of individual steps. AutoRunner provides dedicated components for managing steps within a scenario.
Adding Steps
Open a scenario and use the StepForm to add new steps:
- Select the step keyword (Given, When, Then, And, But) from the dropdown.
- Enter the step text describing the action or assertion.
- Optionally attach a data table or doc string to the step.
- Click Add Step to append it to the scenario.
Editing and Reordering
Each step is rendered as a StepItem that supports inline editing:
- Click the step text to edit it in place.
- Drag the handle on the left to reorder steps within the scenario.
- Click the delete icon to remove a step.
- Steps are automatically numbered to reflect execution order.
Scenario Statuses
Every scenario tracks an execution status that updates in real time during test runs:
| Status | Description |
|---|---|
| PASSED | All steps completed successfully |
| FAILED | One or more steps did not meet the expected outcome |
| SKIPPED | The scenario was excluded from the run (by tag filter or dependency) |
| PENDING | The scenario is queued and awaiting execution |
| RUNNING | The scenario is currently being executed |
Status badges appear next to each scenario in the tree, giving you an at-a-glance view of the latest results.
Tag Management
Tags allow you to categorize, filter, and selectively run scenarios. Add tags at the Feature or Scenario level using the @ prefix:
@smoke @authentication
Feature: User Login

  @critical
  Scenario: Login with valid credentials
    Given I am on the login page
    ...
- Manage tags from the Tags panel in the scenario editor.
- Filter the scenario tree by one or more tags to focus on a subset.
- Use tags to define run profiles — for example, run only
@smokescenarios in CI/CD pipelines.
Flaky Test Detection
AutoRunner automatically detects flaky tests — scenarios that alternate between PASSED and FAILED across recent runs without code changes. Flaky scenarios are marked with a Flaky badge in the scenario tree and in run reports.
Flaky tests erode confidence in your test suite. Investigate and stabilize any scenario flagged as flaky before it masks real regressions.
Import from Repository
The Import feature lets you pull existing Gherkin feature files from a connected Git repository into your project.
- Click the Import button in the scenario tree toolbar.
- In the ImportModal, select the repository branch and target directory.
- Browse the repository file tree and select the feature files to import.
- Click Import Selected to add them to your scenario tree.
Imported scenarios retain their original folder structure. You can reorganize them after import using drag and drop.
Postman Collection Integration
For projects with the Service project type, AutoRunner supports importing Postman collections as test scenarios. Each request in the collection is converted into a scenario with pre-configured steps for the HTTP method, URL, headers, and assertions.
- Open a Service-type project.
- Click Import and select Postman Collection.
- Upload the
.jsoncollection file or paste the collection URL. - Review the generated scenarios and confirm the import.
Mass Operations
Select multiple scenarios to perform bulk actions:
- Bulk Select — Use the checkboxes in the scenario tree to select multiple items, or use Select All within a folder.
- Bulk Run — Execute all selected scenarios in a single test run.
- Bulk Delete — Remove multiple scenarios at once (with a confirmation prompt).
- Bulk Tag — Apply or remove tags across selected scenarios.
Next Steps
- Test Runner — Execute scenarios and monitor run progress
- Scheduling — Set up recurring runs for your test suites
- Reports — Analyze scenario results and failure trends
- CI/CD Integration — Trigger scenario runs from your pipeline
