Quick Start Guide
This guide takes you from an empty workspace to a completed run.
Before You Start
- A RabbitQA account with AutoRunner access.
- A workspace selected in the RabbitQA shell. Everything in AutoRunner is scoped to it.
- Either a Git repository with existing tests, a Postman collection, or nothing at all — AI Studio can generate scenarios from scratch.
Step 1: Connect a Source
A source is where scenarios come from.
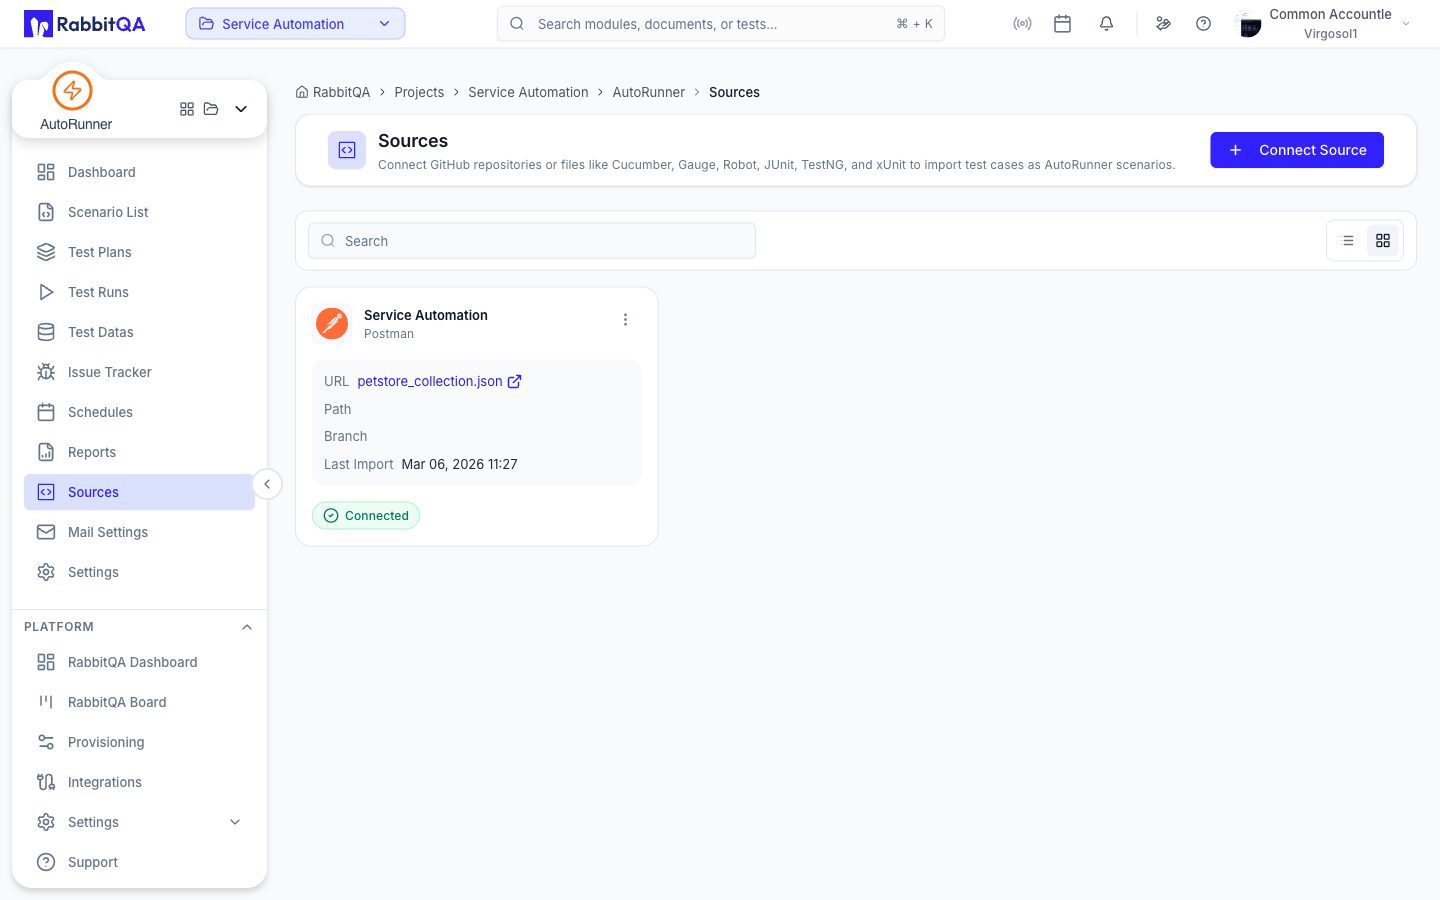
- Open Sources in the AutoRunner sidebar.
- Select Connect Source.
- Enter a Source Name, pick a Project Type, and pick a Test Framework.
- For a repository, choose Use Template to have RabbitQA create a starter repository, or My Repository to connect your own. For a Postman source, upload the collection.
- Select Create Source.
Project type and framework cannot be changed later.
If you want AI-generated scenarios instead, skip this step. Selecting AI Studio provisions the workspace's AI source for you.
See Sources.
Step 2: Create a Run Profile
A run profile says how tests execute. A plan needs one.
- Open Settings > Run Profiles.
- Select New Profile.
- Give it a Name and add at least one Execution Target — Desktop Browser, Mobile Browser, Native Mobile, API Only, or POS Device.
- Optionally pick an Environment, and set parallelism, timeouts, retries, and screenshot behavior under Advanced Settings.
- Save, then set it as the workspace default.
See Settings.
Step 3: Get Some Scenarios
From a Connected Source
Open Scenario List. The explorer shows every scenario the workspace has, grouped by source. Search by name or filter by platform to find what you need.
From AI Studio
- Select AI Studio from the Scenario List header.
- Select New Scenario, then New Scenario again to write one from scratch.
- Name it, add any Pre-Conditions, and describe the test on the AI Prompt tab — for example, "Log in with the test account, add the first product to the cart, and check out."
- Select Create & Generate.
- Choose Web, Android, or iOS, then the target URL or device.
- Watch the agent work on the Live tab. Answer any question it asks you.
When generation finishes, the Script tab holds the executable steps.
See AI Studio.
Step 4: Build a Test Plan
A plan is what you actually run.
- Open Test Plans and select New Plan.
- Enter a Plan Name.
- Under Select Scenarios, pick the scenarios to include. You can take them from more than one source.
- Choose the Default Run Profile you created in Step 2.
- Select create.
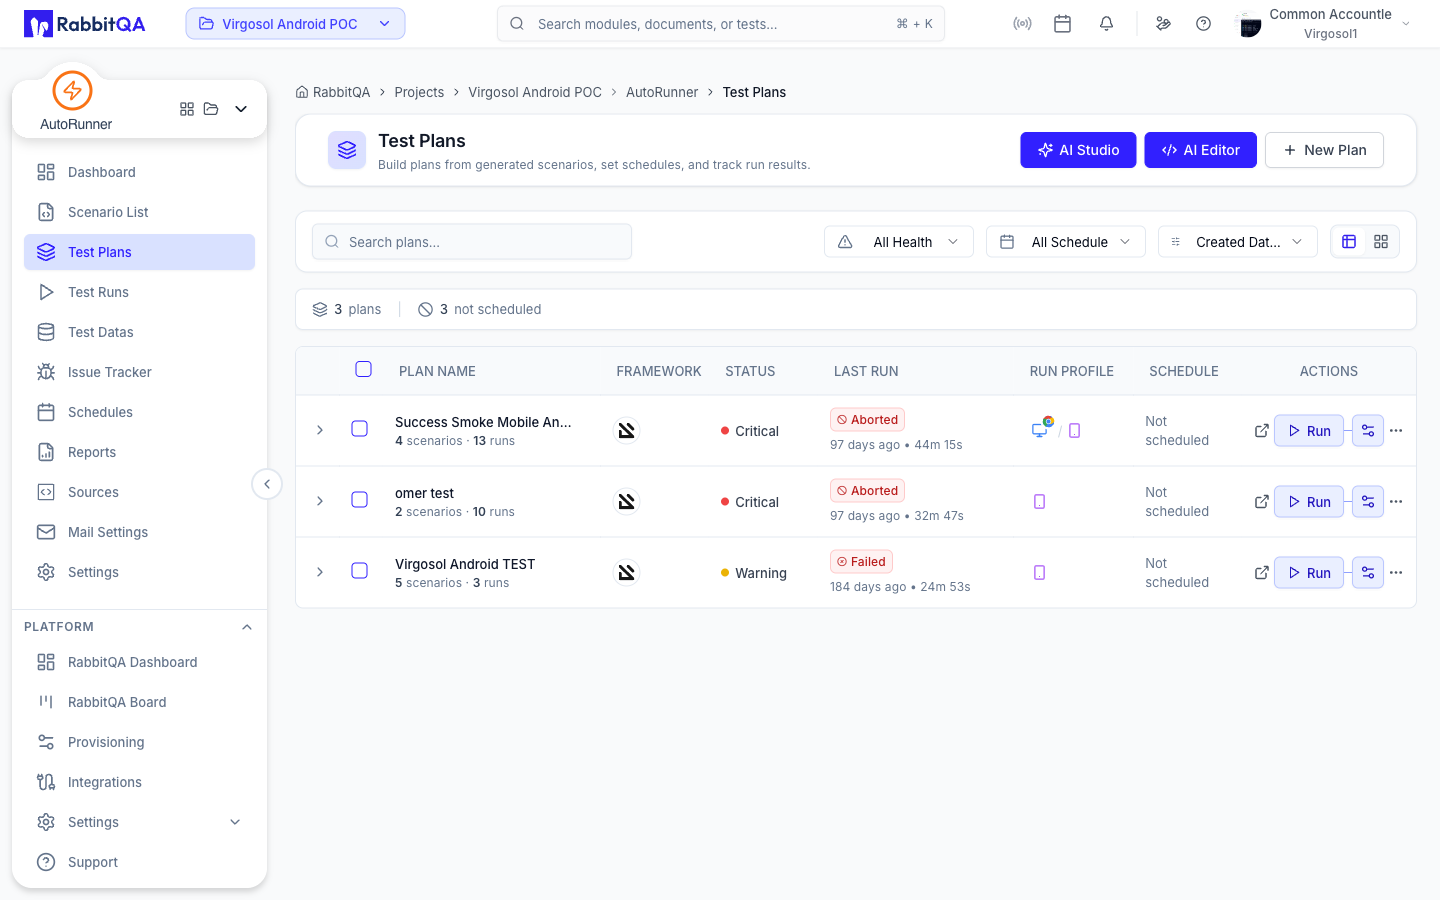
See Test Plans.
Step 5: Run It
From the plan row, select the run button. Use the Run Profiles dropdown beside it to run against a different profile.
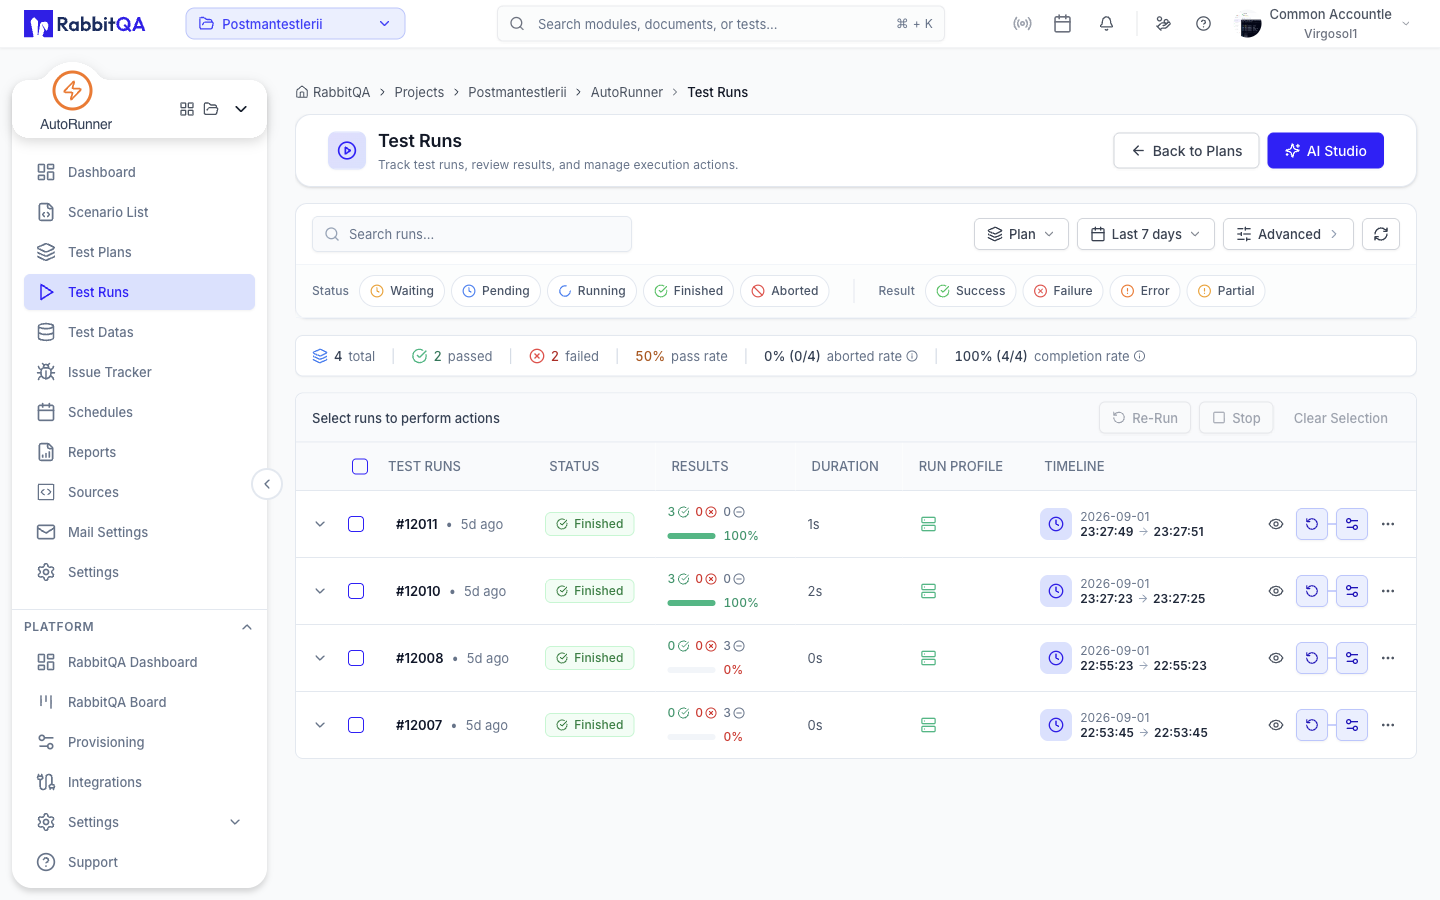
The run moves through these statuses:
WAITING → PENDING → RUNNING → FINISHED
                            → ABORTED
A finished run also carries a result: SUCCESS, FAILURE, ERROR, or PARTIAL.
Step 6: Read the Result
- Open Test Runs and select your run.
- The Scenarios tab lists every scenario with its outcome. Filter to Failed to go straight to problems.
- Select a scenario to open its drawer.
- On the Steps tab, the failing step shows its error and any screenshot captured at that moment.
- Use Logs for the execution output, Network for HTTP traffic, and Watch Video for the recording.
See Run Detail.
Troubleshooting
The run stays in WAITING
No runner has picked it up yet. Check the Runner Status KPI on the Dashboard for online runners and utilization.
Creating a plan is rejected
The plan needs a run profile. Create one in Settings > Run Profiles and set it as the workspace default, then try again.
A scenario fails on an element that moved
Check the Self-Healing strip on the run. If the agent found a working locator, it raises a proposal you can accept so future runs use it. See Element Registry.
A masked variable comes through empty
Revealing masked values needs the autorunner:testdata:reveal permission.
Without it the value is withheld by the server, not just hidden in the browser.
See Test Datas.
Next Steps
- Schedules — Run the plan automatically
- CI/CD Integration — Run it from a pipeline
- Reports — Track results over time
- Element Registry — The knowledge that keeps AI scenarios working
